
Speed up your content with our next-generation CDN, Edge Storage and Optimization Services. BunnyCDN makes lightning fast performance at any scale easier than ever before.

How to Activate Bunny CDN for your App
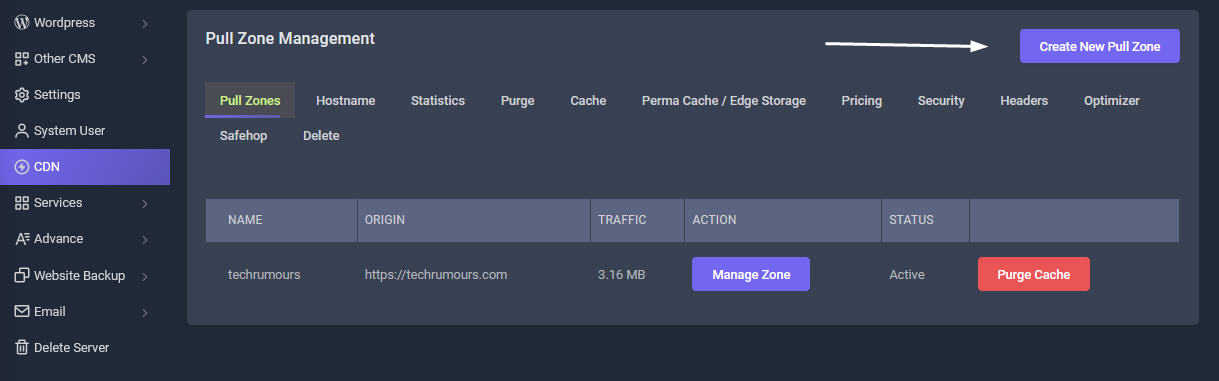
Create New Pull Zone
Log in your Sellcloud panel, enter your CDN tab management page. Click on Create New Pull Zone button
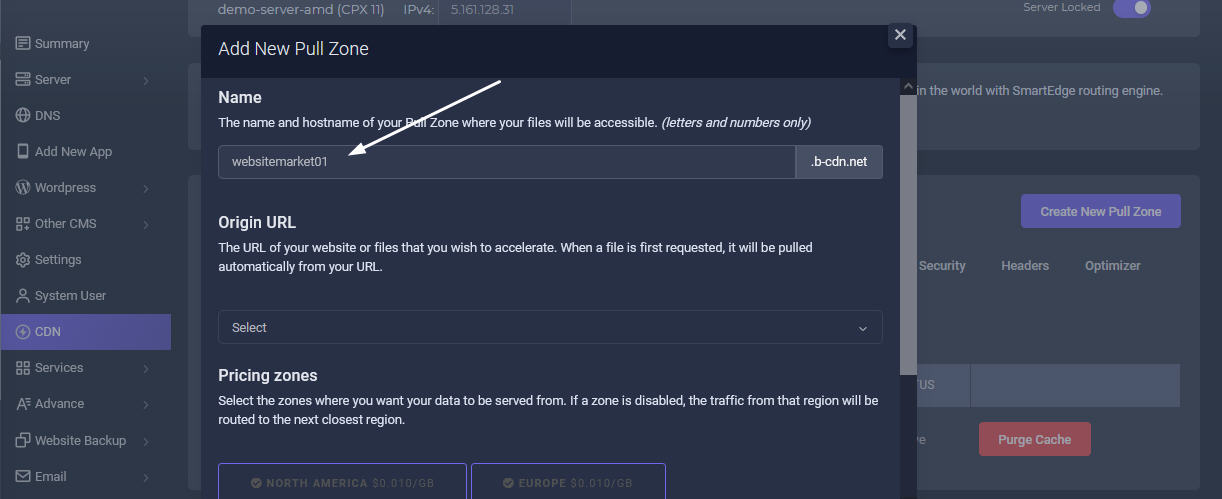
Add your zone name
Add the name of your Pull Zone where your files will be accessible. Example: mysitename01(letters and numbers only). Sometimes the name may not be accepted if someone else used it. So you can change or add some numbers to differentiate it.
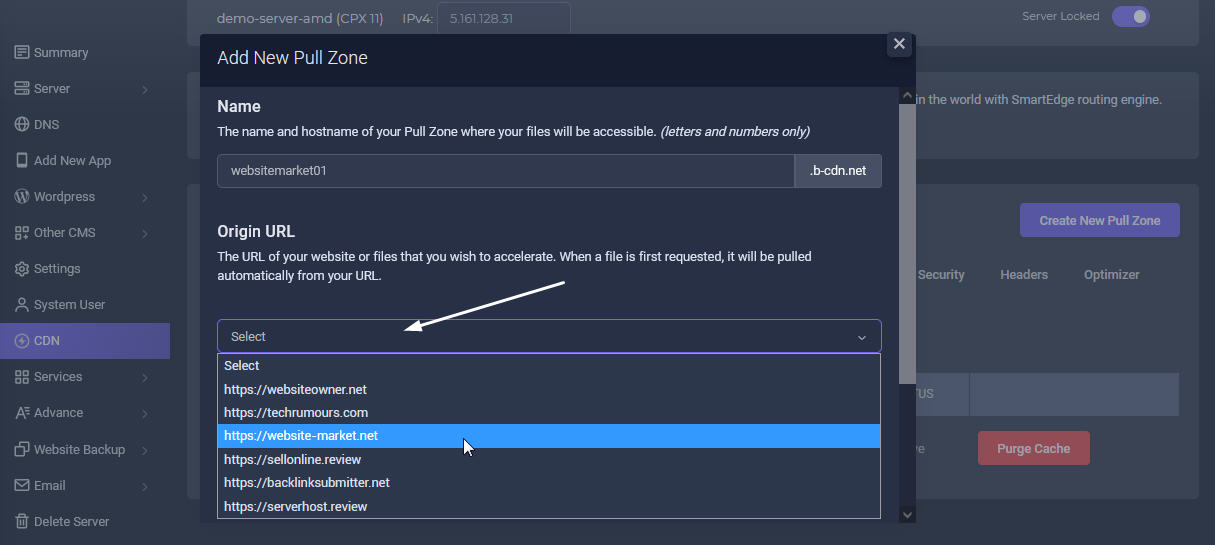
CDN Url
Then add your app domain url name from the pull-down menu. Select your domain url which require CDN if you have many apps listed.

CDN Pricing
Then scroll down in the pop-up form. You will notice the cdn usage pricing for each zone. You can click it to disable any zones you do not need for CDN. Recommended all zones. Then click Add Pull Zone
.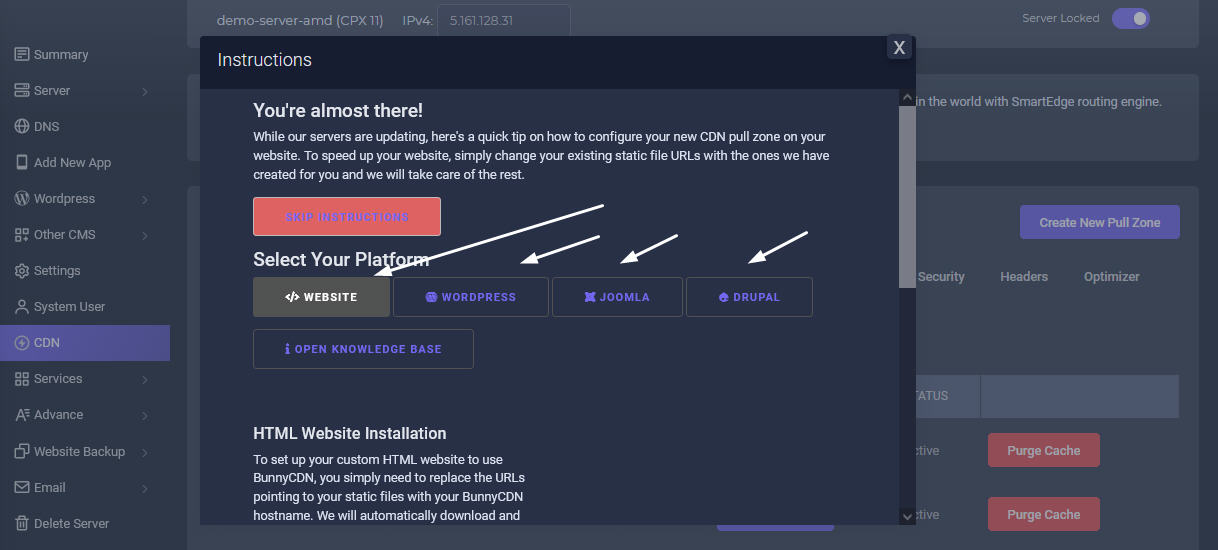
PullZone Activated
Your pull zone is activated. You will notice a pop-up form showing instructions for intergration with Html, Wordpress, Joomla and other CMS apps. You can click those buttons to view the help tutorials for Wordpress. Now close the pop-up window.
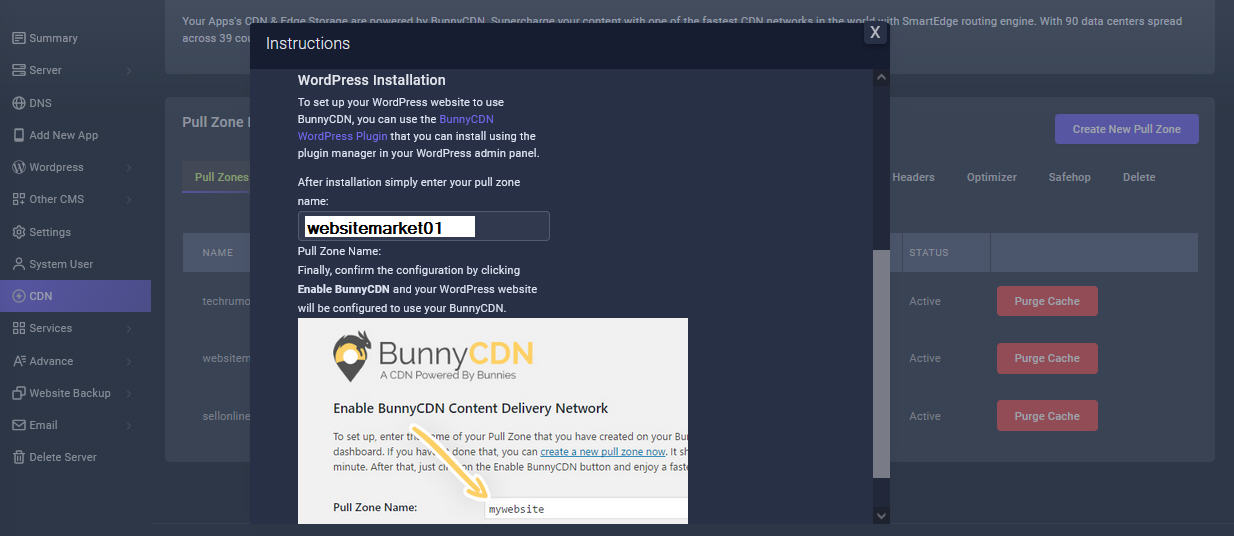
BunnyCDN WordPress Installation
This is the instruction for intergration with your Wordpress app. In the next step, you need to set up your WordPress website to use BunnyCDN, you can use the BunnyCDN WordPress Plugin that has been already installed on your Wordpress Admin panel when you first created a new app. Close the pop-up instruction page.
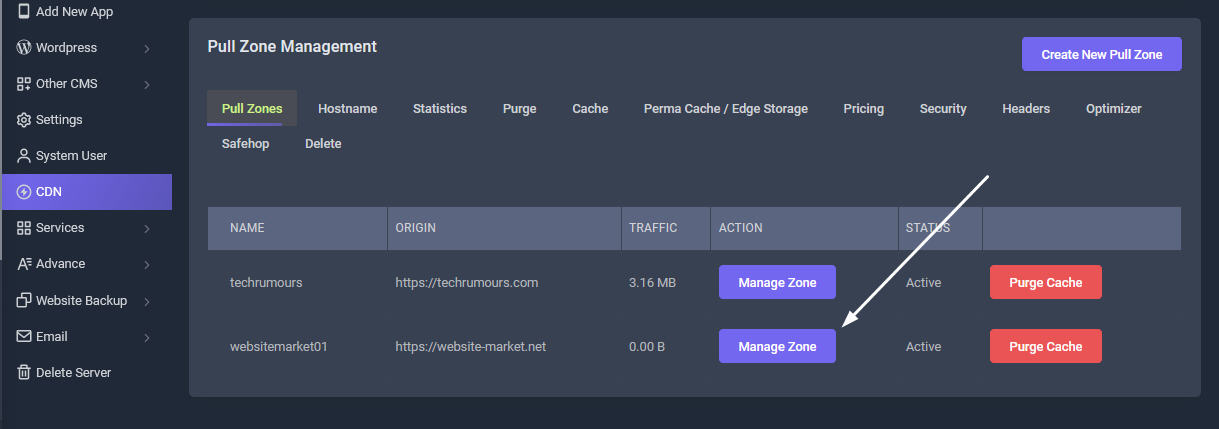
New Zone Added
Your new zone is shown in the main CDN tab page. Now you can click the Manage Zone button and you will be brought to all the settings tab for the cdn zone. You can edit the settings accordingly.
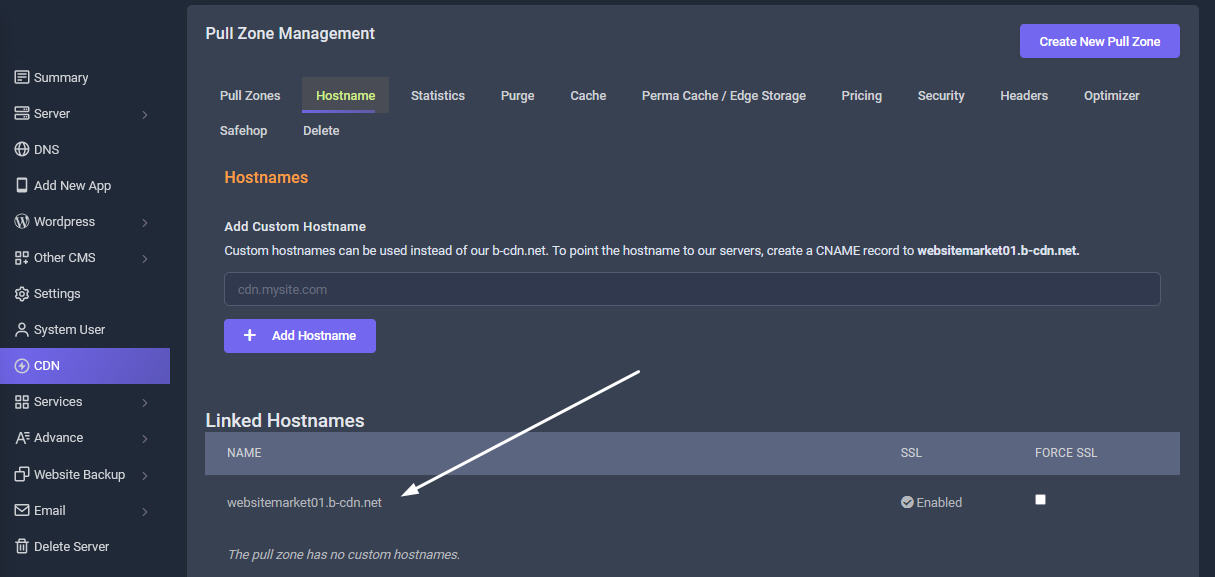
CDN Hostname
In the Hostname tab, on the bottom is shown your new cdn hostname for your wordpress app domain. Example: websitemarket01.b-cdn.net This is your CDN url that must be intergrated with your website url.

Activate BunnyCDN WordPress Plugin
Now login to your Wordpress Admin panel and scroll down on the left tab and click Bunny.net tab. In this page, add your pull zone name. Example: websitemarket01 (The name of the pull zone that you have created for this site. Do not include the .b-cdn.net.) Finally, confirm the configuration by clicking Update CDN Settings button. BunnyCDN and your WordPress website will be configured to use CDN.
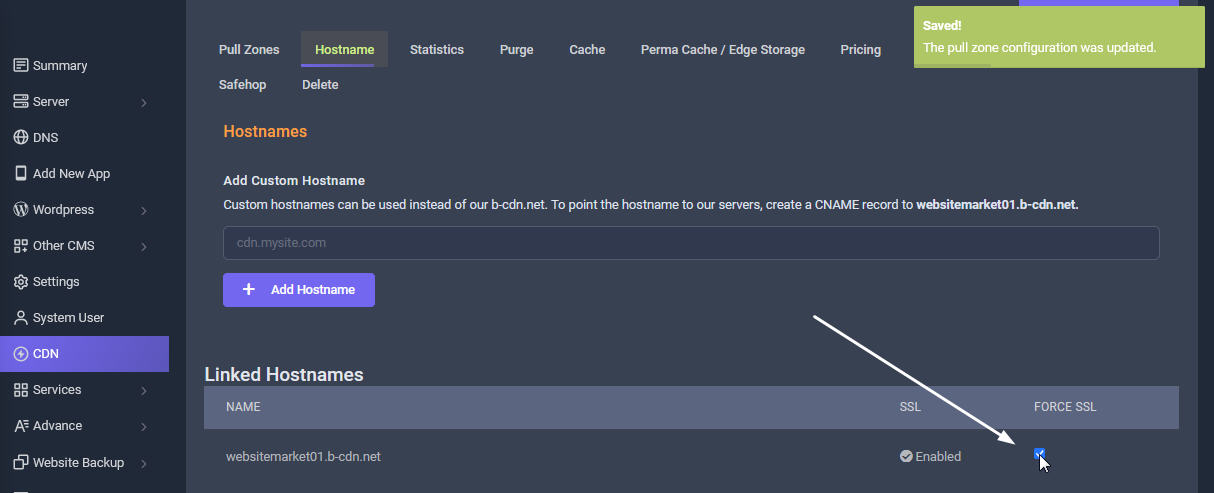
CDN Hostname Tab
Now return back to your Sellcloud panel. In the CDN Hostname tab, click the empty field on the bottom to Enable Force SSL. This will force all CDN pages to use HTTPS.
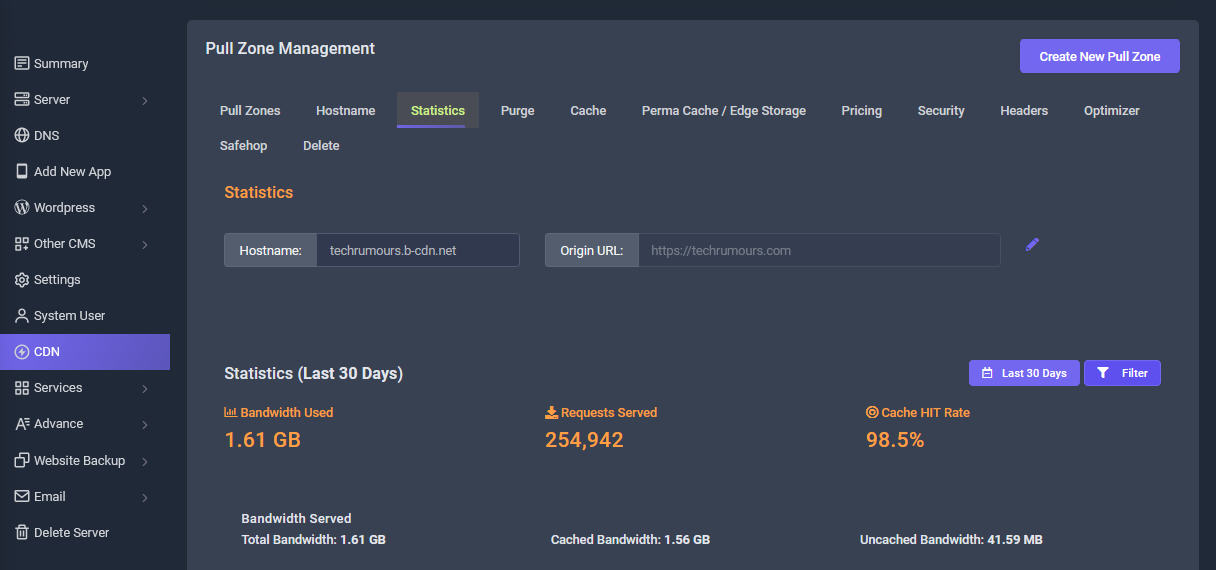
CDN Statistics Tab
Next click Statistics tab. Here you can view the Bandwidth Used, Requests Served, Cache HIT Rate stats for that particular app.
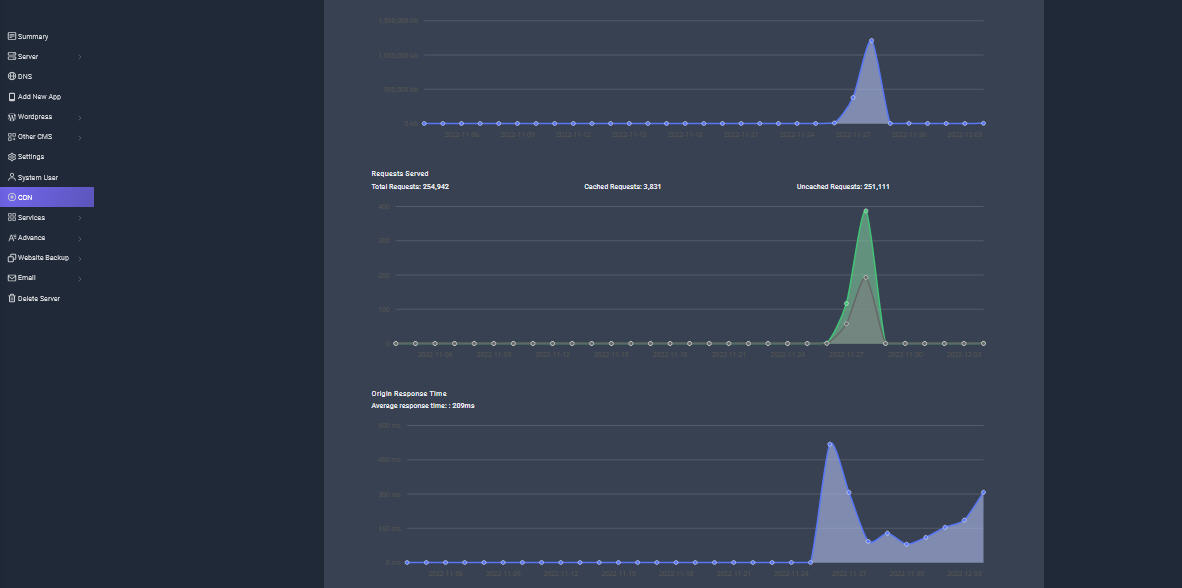
CDN Graphs
You can also view the graphs showing Origin Response Time, Requests Served etc...
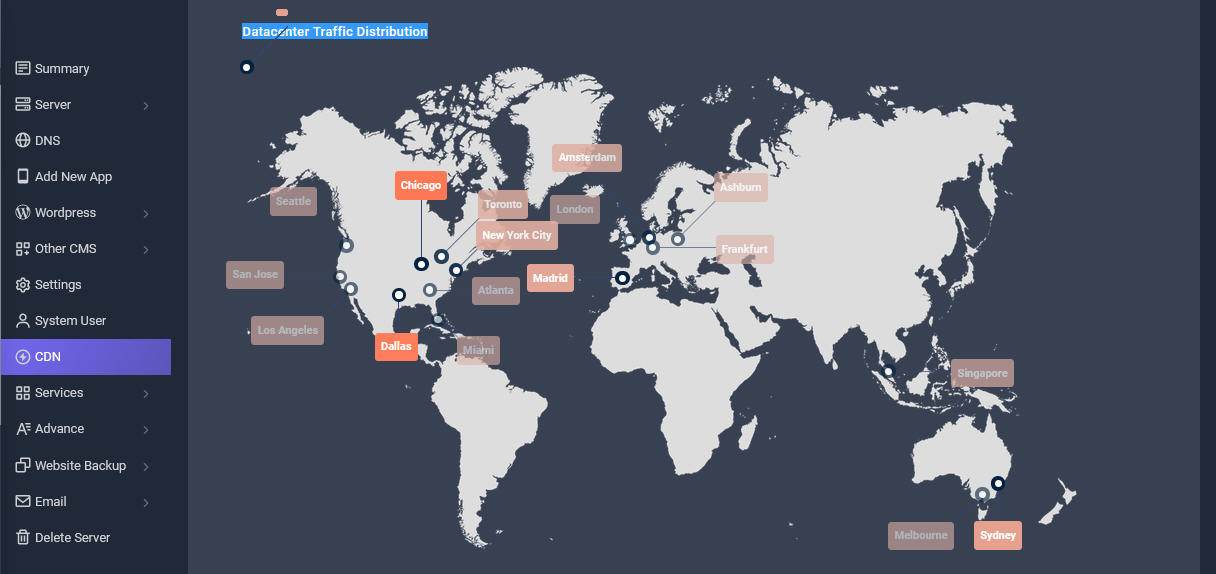
Datacenter Traffic Distribution
You can also view the map showing the countries where most cdn traffic has been used.
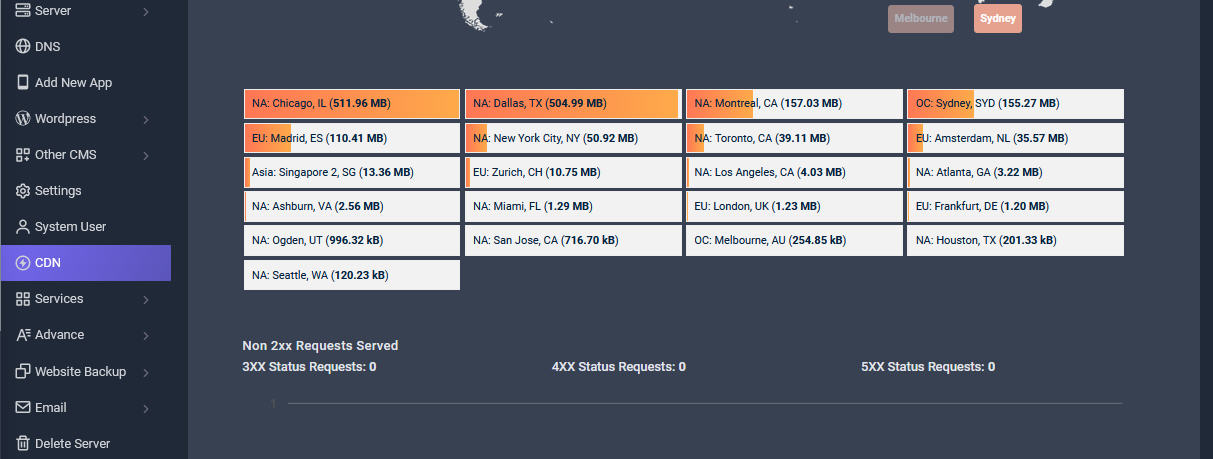
CDN Traffic Served
You can also view the amount of traffic served by the cdn from BunnyCDN data centers worldwide
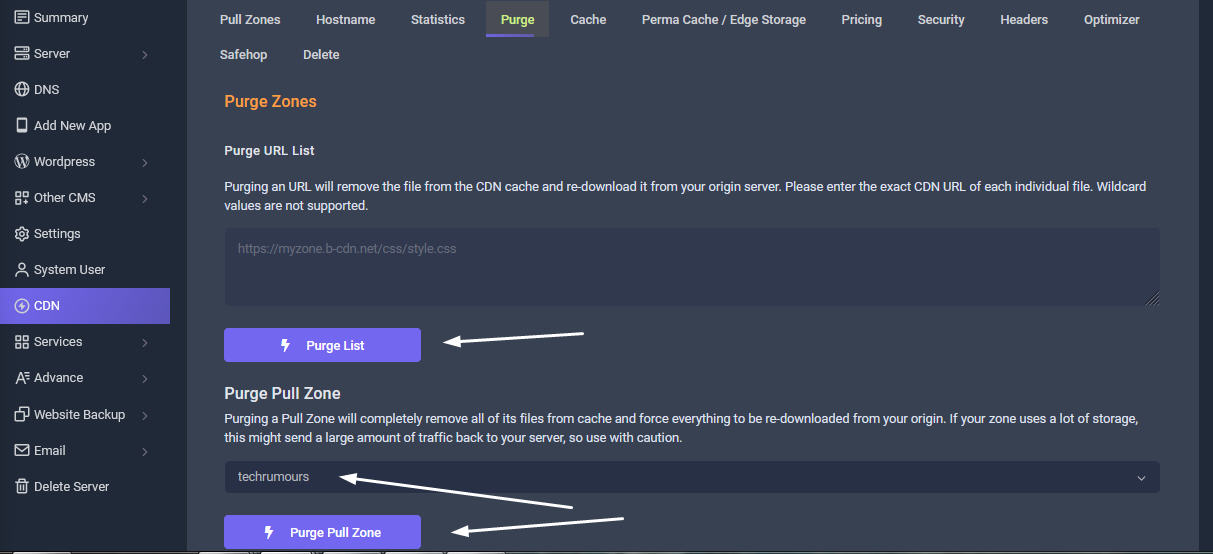
Purge Zone Tab
Next, in the Purge tab, you can purge the CDN cache either by selecting individual file or the whole site files.
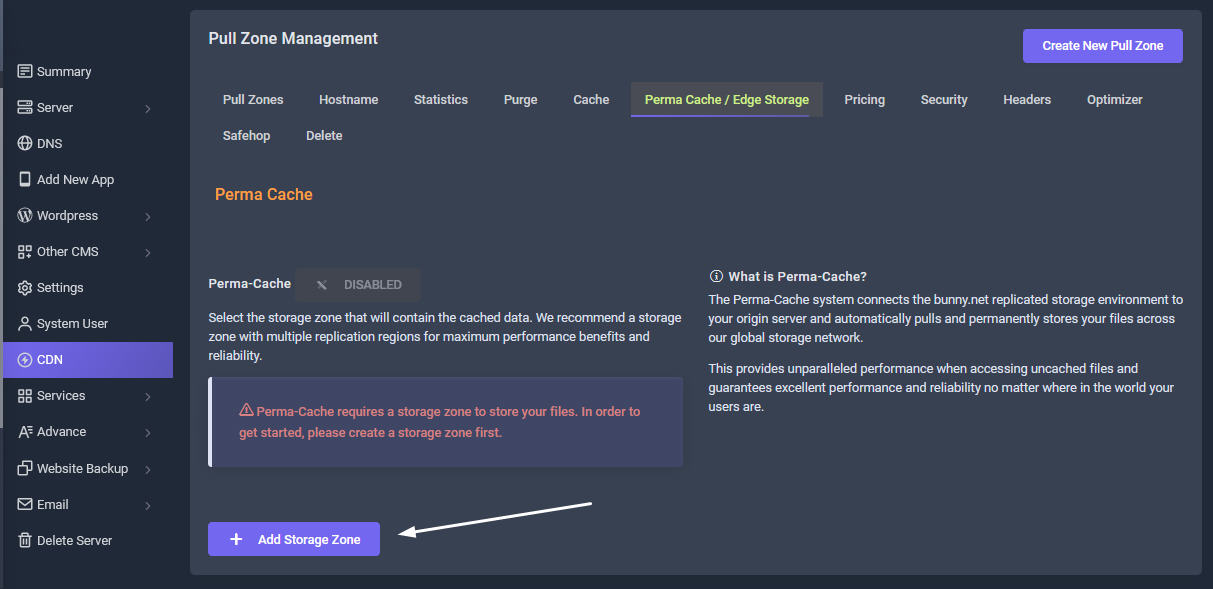
Edge Storage
Perma-Cache requires a storage zone to store your files. In order to get started, please create a storage zone first. The Perma-Cache system connects the bunny.net replicated storage environment to your origin server and automatically pulls and permanently stores your files across our global storage network. This provides unparalleled performance when accessing uncached files and guarantees excellent performance and reliability no matter where in the world your users are. Click Add Storage button.
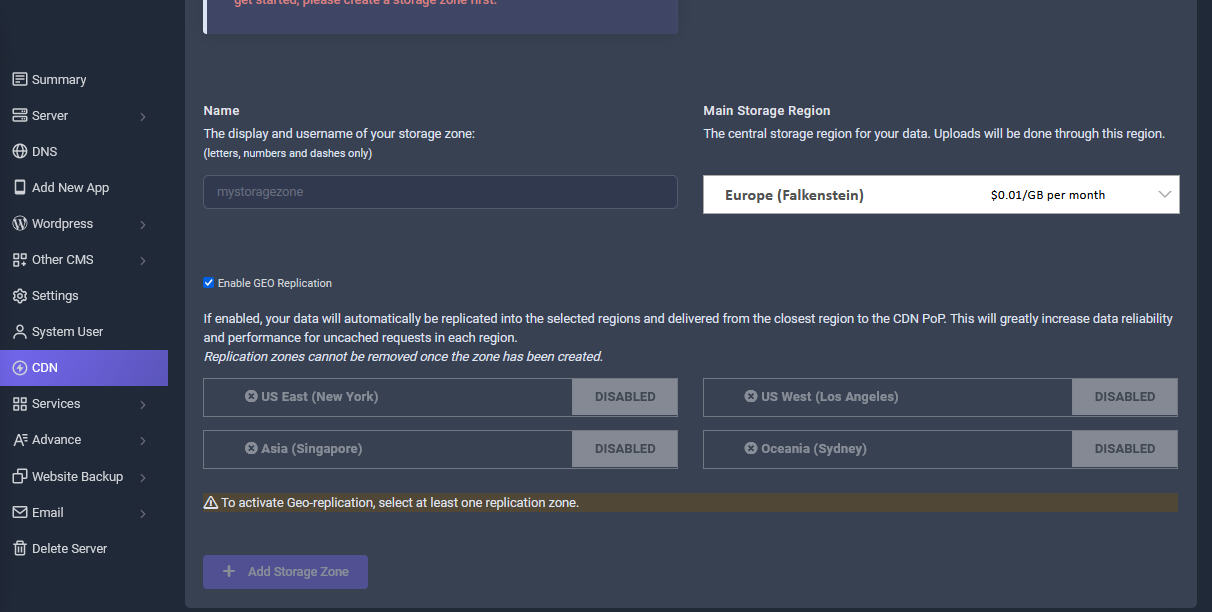
Edge Zone form
The form will show this fields to add.
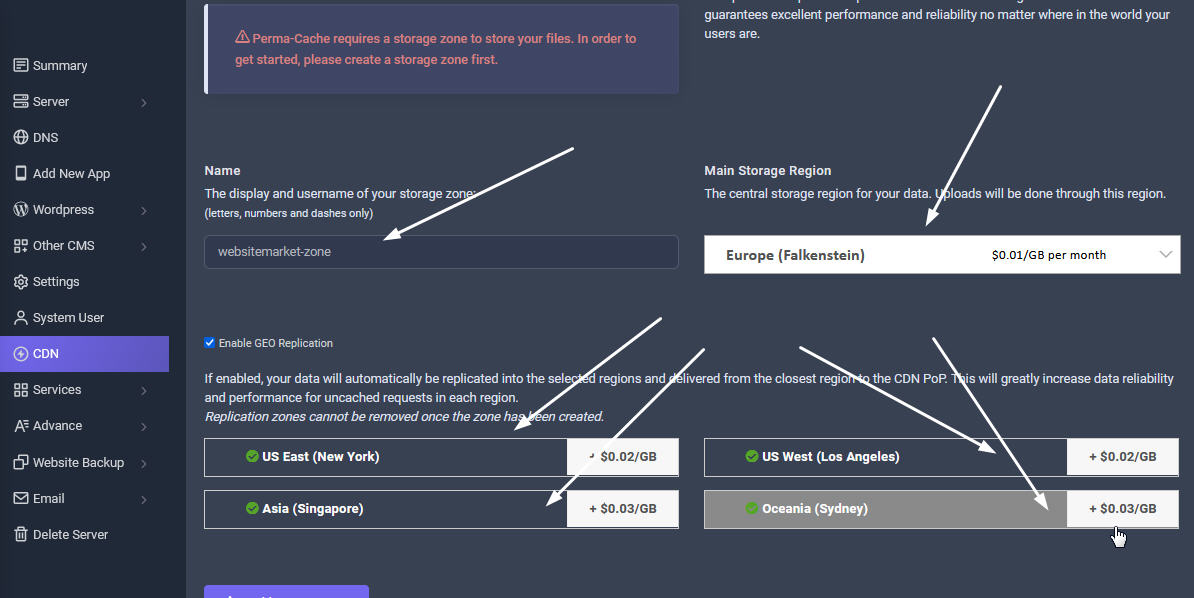
Fill in the fields
Fill in the fields as shown in the image. Select the storage zones that will contain the cached data. We recommend a storage zone with multiple replication regions for maximum performance benefits and reliability.
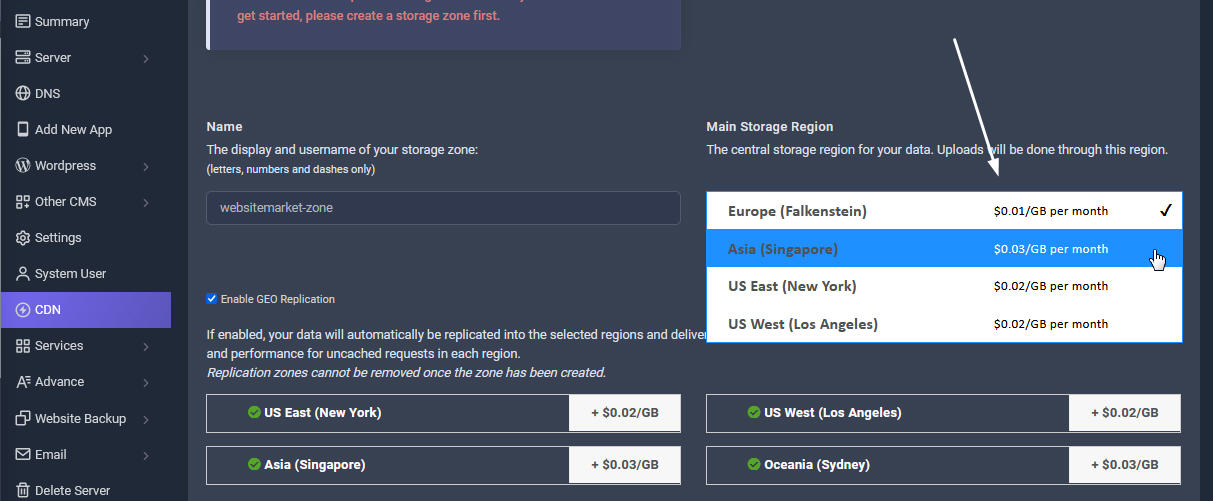
Main Storage Region
Select the main storage zone.

Click Add Storage Zone
Click Add Storage Zone button to activate the Edge Storage
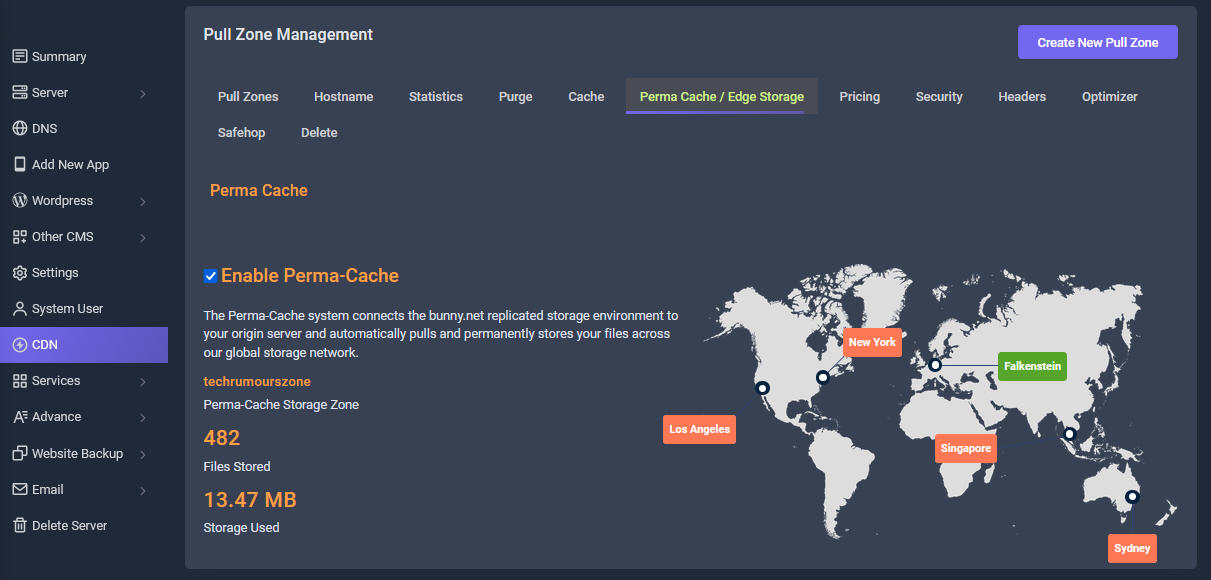
CDN Perma Cache Zone Stats
Once your Edge Storage is activated, BunnyCdn will pull from your server and store your website files and images on the 5 Edge Storage zones worldwide. It will send the files nearest to your customer country from the nearest Edge zone.

That's it
Once you follow the above steps, your CDN will function without issues. You do not need to edit any other tabs or settings. Leave the Advance tabs setting alone unless you need to edit the settings.