
A staging site allows you to experiment with your site's design and features without affecting the main site's performance. It works by creating a copy of your website, including its pages, databases, media, and posts in a subdirectory of the current live site. You can then freely modify its contents - useful if you're planning to redesign pages or the entire site. It also makes it easy to push the changes you made on the staging site to your live website.
This plugin comes in very handy especially in cases where you need to create a testing environment to test plugins, themes or WordPress updates. With it, you can create a staging site in a subdirectory of the current live site in just few clicks, and make the staging sites live after your finish the work.

First, log in to your SellCloud admin panel and go to your app's Plugins tab in SellCloud Dashboard > Products/Services > Your Server > Wordpress > Web Application > Your App > Plugins
Find the SellCloud Staging Plugin and tick it and then scroll down and add your app's system user password and click the Install Plugin button. It will install and activate the Staging plugin on your Wordpress Admin Panel. Then login to your Wordpress Admin Panel. Since it's installed, you can access the plugin from your left admin menu > SellCloud Staging. SellCloud Staging Pro has 3 tab pages: Staging Sites, Create A Staging Site, Create A Fresh WP Install
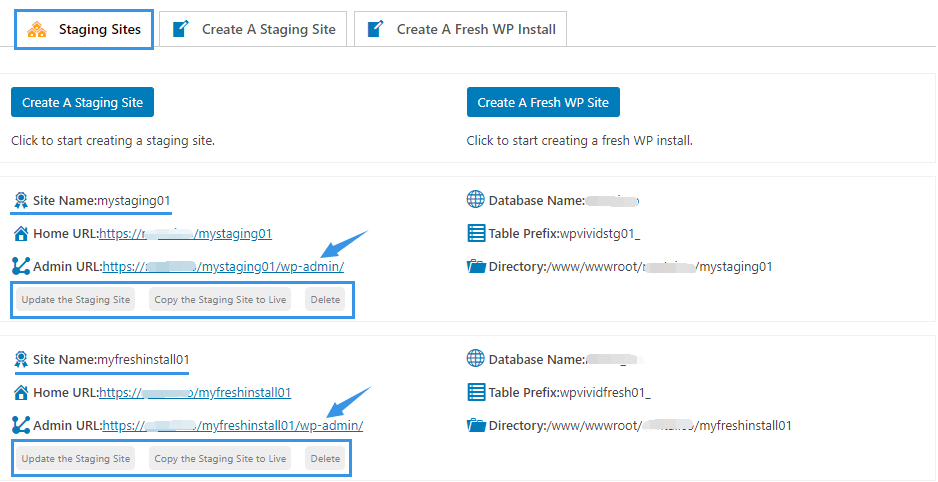
Staging Sites
The Staging Sites page serves as a managing dashboard for all your staging sites. From the page, you can copy a staging site to live, update a staging site and delete a staging site. It also gives you quick access to the creating page of the staging site and fresh WP install.

Create A Staging Site
From the page, you can create a staging site in a subdirectory of the current site in few steps:
- Choose a database to install the staging site: to the same database as your live site, or a separate database.
- Choose directory to install the staging site: the root directory or the wp-content directory.
- Choose what to copy to the staging site: Select files and database tables you want to copy from live site to the staging site
Once you're done with the settings, click "Create Now" to start creating the staging site.
Once the staging site is created, you can access the staging site from the sub-directory you chose.
Next How-to: Publish A Staging Site to Live
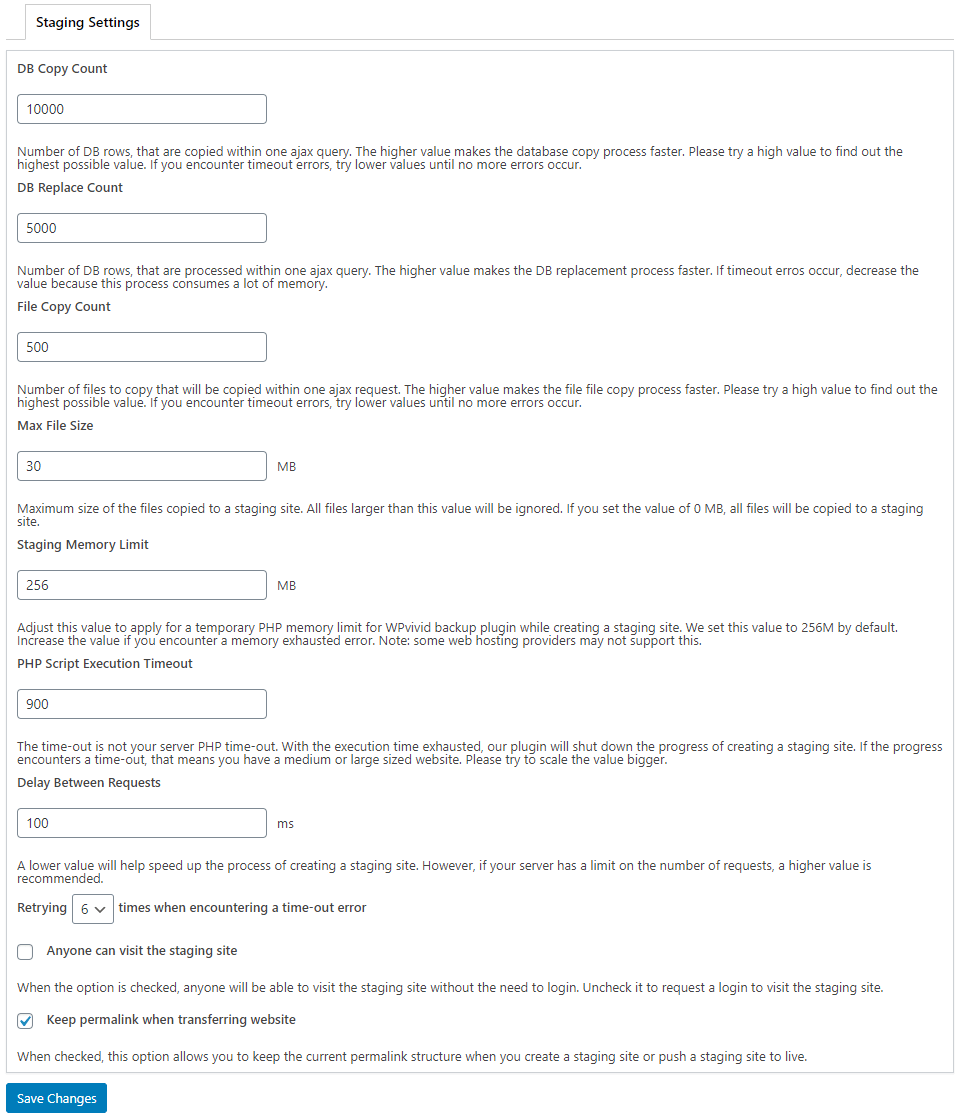
Settings page for Staging plugin
The settings page of the WPvivid Staging Pro plugin. You can try to configure the settings when encountering problems when creating a staging site:
- DB Copy Count: Number of DB rows copied within one ajax query. If you encounter timeout errors, try lower values until no more errors occur.
- DB Replace Count: Number of DB rows processed within one ajax query. If timeout erros occur, decrease the value.
- File Copy Count: Number of files copied within one ajax request. If you encounter timeout errors, try lower values until no more errors occur.
- Max File Size: Maximum size of the files copied to a staging site. If you set the value of 0 MB, all files will be copied to a staging site.
- Staging Memory Limit: A temporary PHP memory limit for the plugin to create a staging site. Increase the value if you encounter a memory error.
- PHP Script Execution Timeout: The time-out is not your server PHP time-out. Try to scale the value bigger in a timeout situation.
- Delay Between Requests: If your server has a limit on the number of requests, a higher value is recommended.
- Retrying times when encountering a time-out error: Task retry times in a timeout situation.
- Anyone can visit the staging site: When the option is checked, anyone will be able to visit the staging site without the need to login. Uncheck it to request a login to visit the staging site.
- Keep permalink when transferring website: When checked, this option allows you to keep the current permalink structure when you create a staging site or push a staging site to live.