Sellcloud installs and configures Postfix so your scripts can send email from your server. However, Sellcloud does not manage mail servers for hosting your domain's email.
Running an email server can be a very time-consuming task, from removing IPs from blocked lists, to helping deliverability via rDNS, SPF, and DKIM records, to handling disk space requirements, and much more.
A third-party mail hosting provider handles all aspects of your domain's email by Web access and free mobile apps ensuring 100% email delivery. You point your domain's MX records to their mail servers so mail sent to your domain goes directly to their servers. They provide spam filtering and webmail. They also provide POP and IMAP access to your mail as well as SMTP servers that can be configured with local email clients like Outlook. The small expense of a mail service is typically worth the time and frustration saved.
We cannot offer any technical assistance at all for hosting email server. If email troubles arise, we could not provide help.
Free & Paid Email Hosting

OX App Suite
$1.99 p/m
OX App Suite is a powerful email, communication and collaboration solution that gives you secure, reliable and professional email, calendaring, contacts and more.
- 99.9% Uptime SLA
- Premium Anti-Virus & Anti-Spam
- email@your-domain.com
- Mailboxes Size 10GB
- Full-Featured Webmail
- Mobile & Desktop Access (IMAP)
- Shared Calendars, Contacts, Tasks
- CardDAV & CalDAV
- Integrated Portal Page
- Self-Service Migration Tool
OX App Suite + Productivity
$2.99 p/m
OX App Suite + Productivity takes all the features of OX App Suite email, communication and collaboration and adds Productivity Apps and Cloud Storage enabling you to create, edit and share Microsoft Office docs online.
- 99.9% Uptime SLA
- Premium Anti-Virus & Anti-Spam
- email@your-domain.com
- Mailboxes Size 25GB
- Full-Featured Webmail
- Mobile & Desktop Access (IMAP)
- Shared Calendars, Contacts, Tasks
- CardDAV & CalDAV
- Integrated Portal Page
- Self-Service Migration Tool
- Cloud File Storage 25GB
- Online Office Suite
- Create / Edit Word Docs
- Create / Edit Spreadsheets
- Create / Edit PowerPoint

Free ZOHO Mail Box
Free
Get free Zoho Mail accounts for your domains if you are hosting single or multiple websites. Zoho Mail is one of the more popular choices on the market when it comes to third-party mail services. It comes with a clean and minimalistic user interface, and it is completely ad-free.
- Up to 5 users per domain
- mail@yourdomain.com
- 5GB storage space per user
- 25MB file attachment limit
- Web & mobile app access
1. How to Manage OX Email Accounts
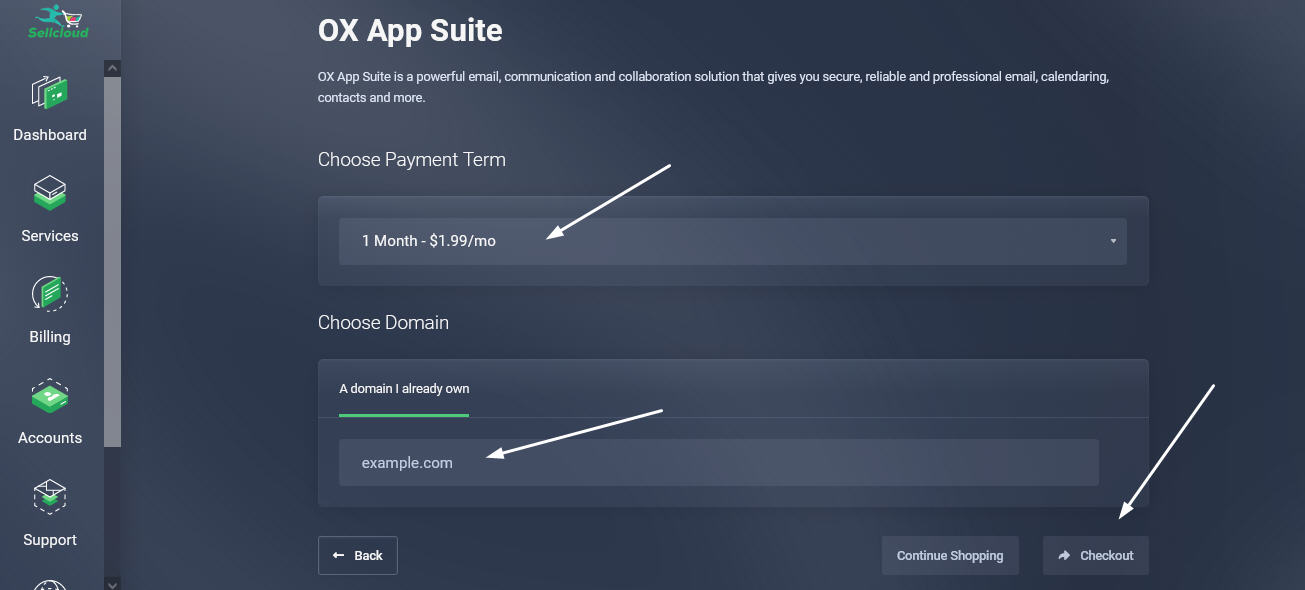
You can setup OX Mail directly from your Sellcloud panel. You can buy the OX Mail Plan from this link. Follow the steps to purchase the OX Mail as shown.
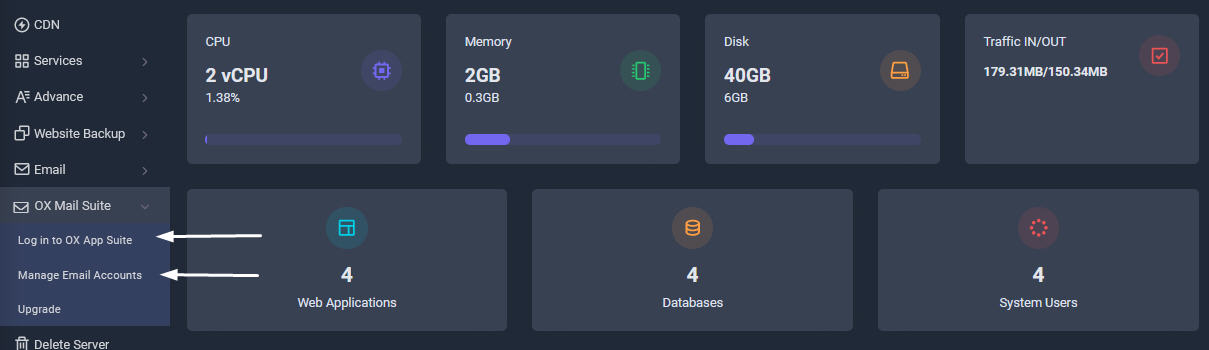
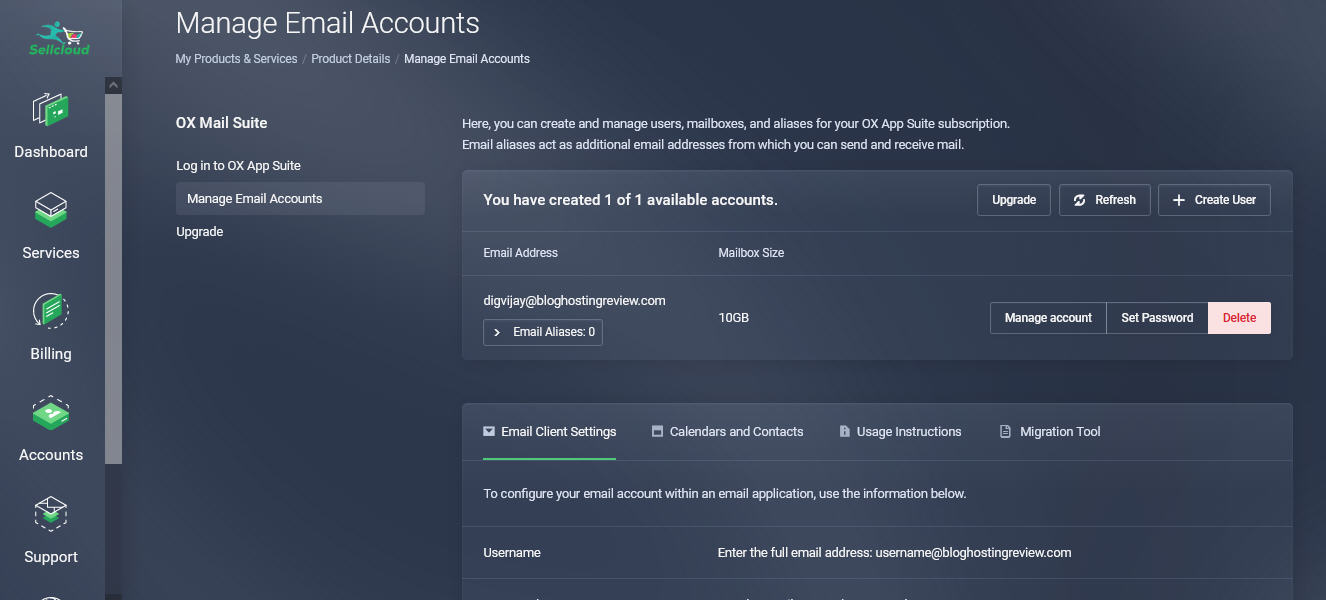
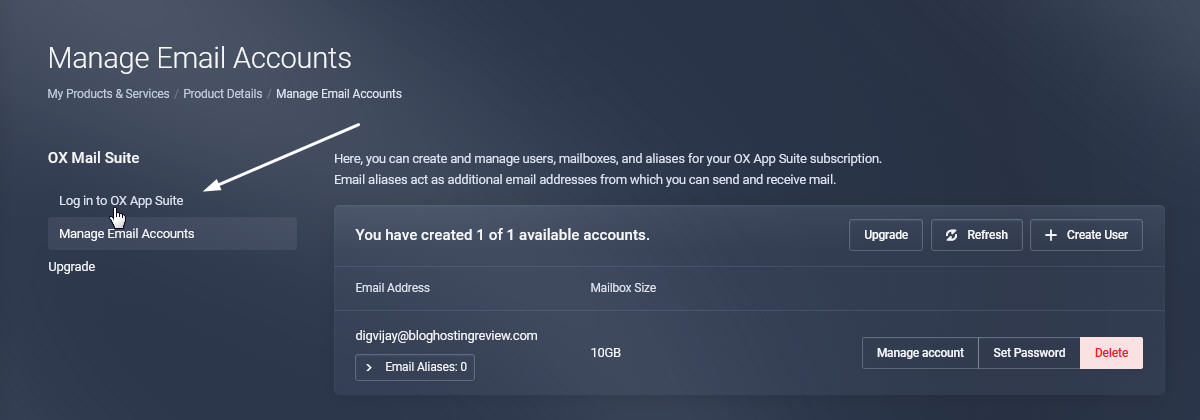
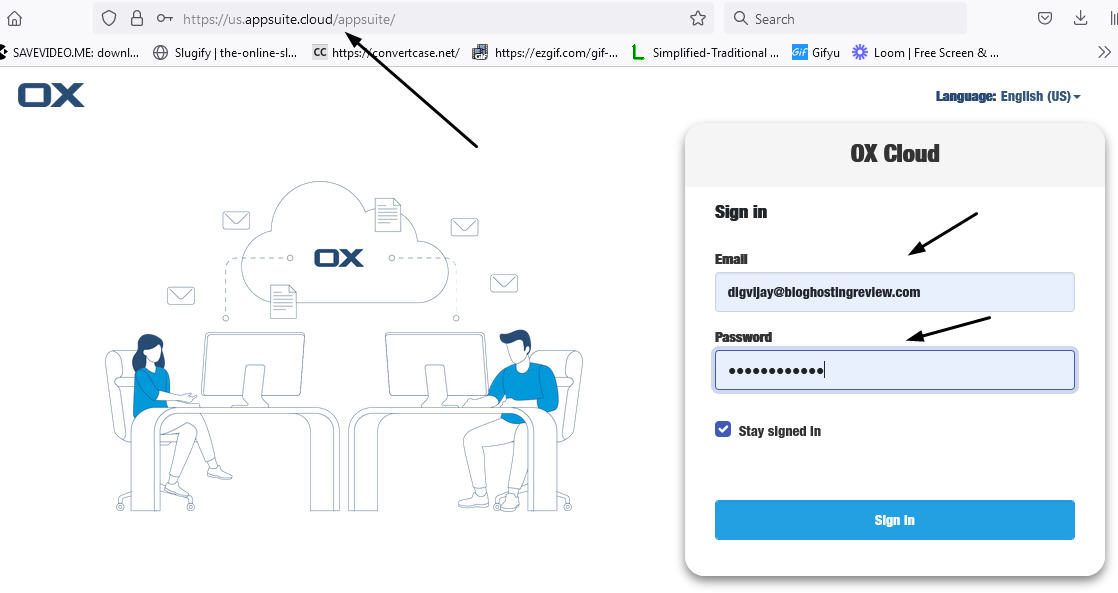
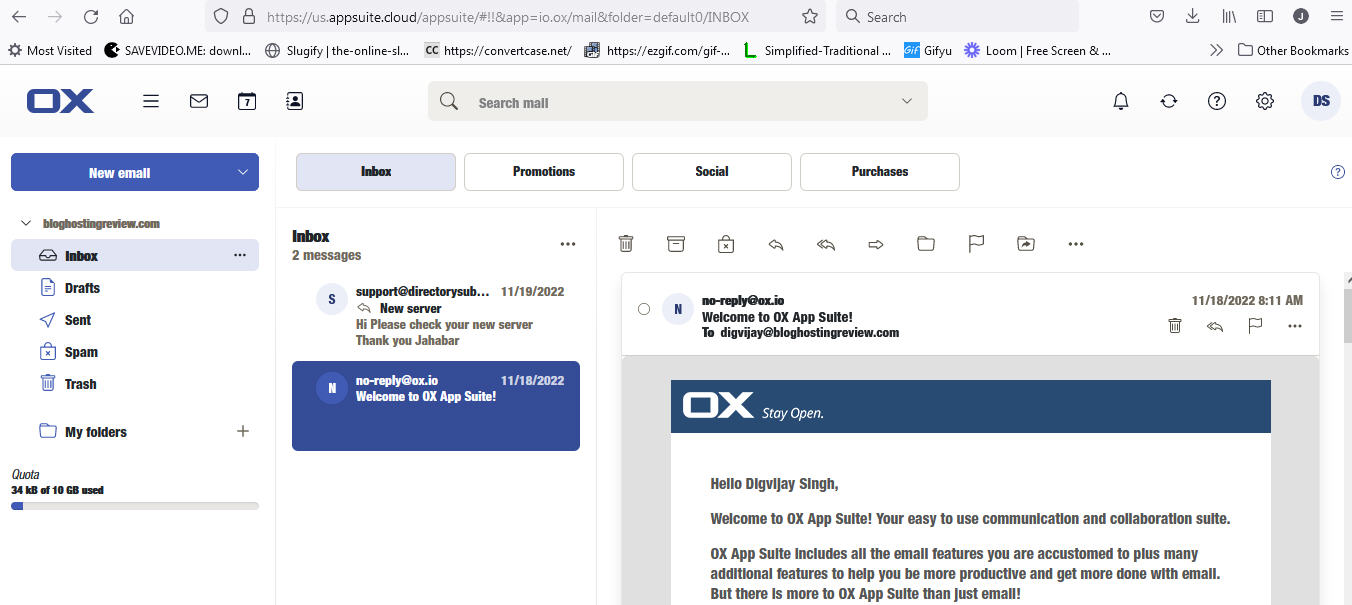
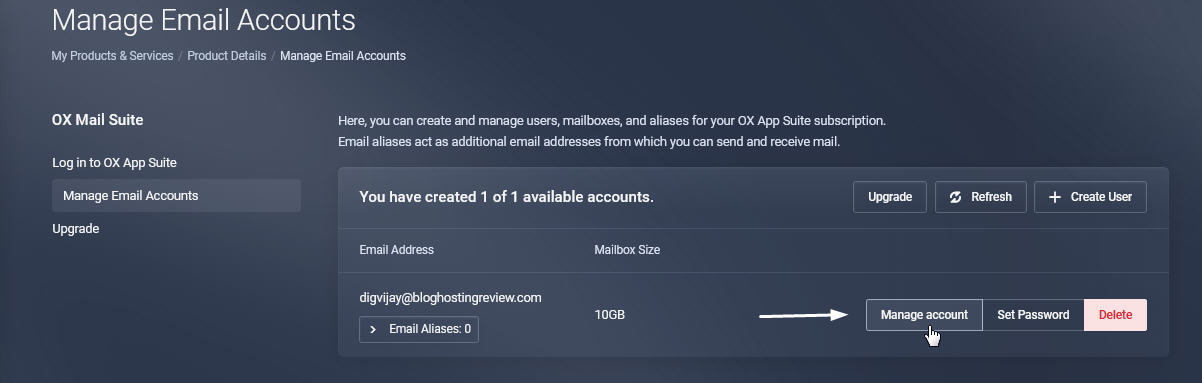
Next click the Manage Email Accounts tab and you will be directed to your Email setting area. To manage OX App Suite for a domain, you can also select that domain in the Client area and click Manage. You will see a list of OX App Suite email addresses and, below the email addresses, email client details, and other information.
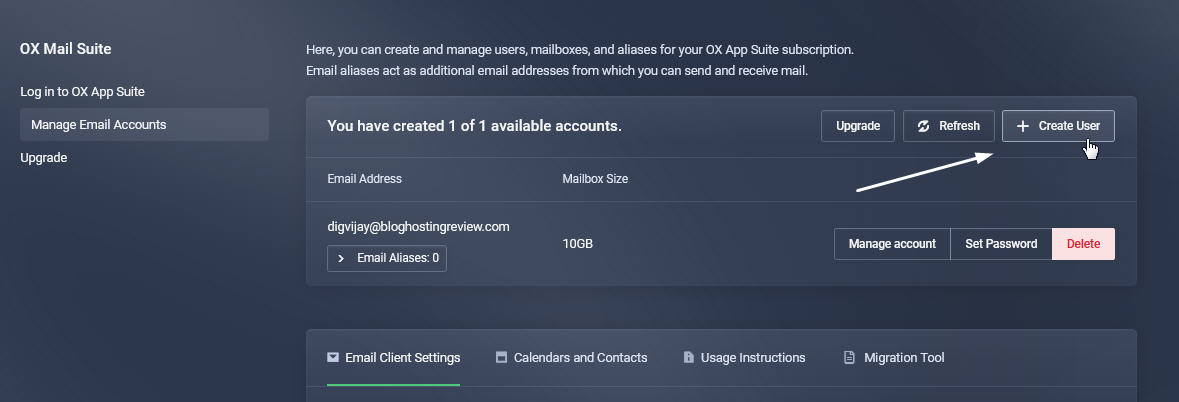
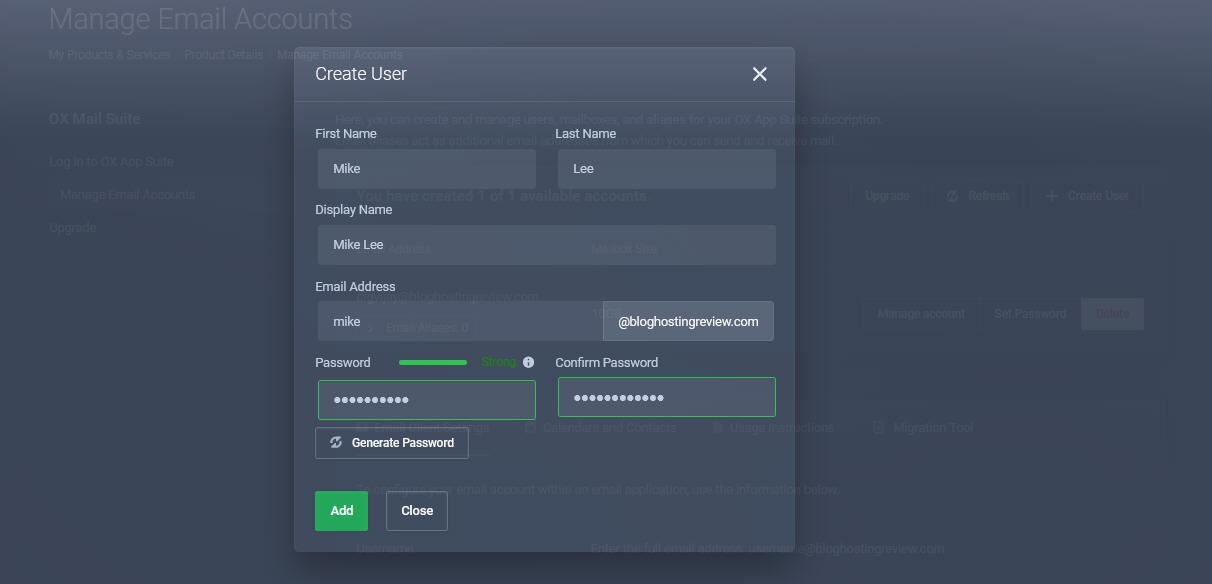
Create User
To add an email address, click Create User.
Manage Account
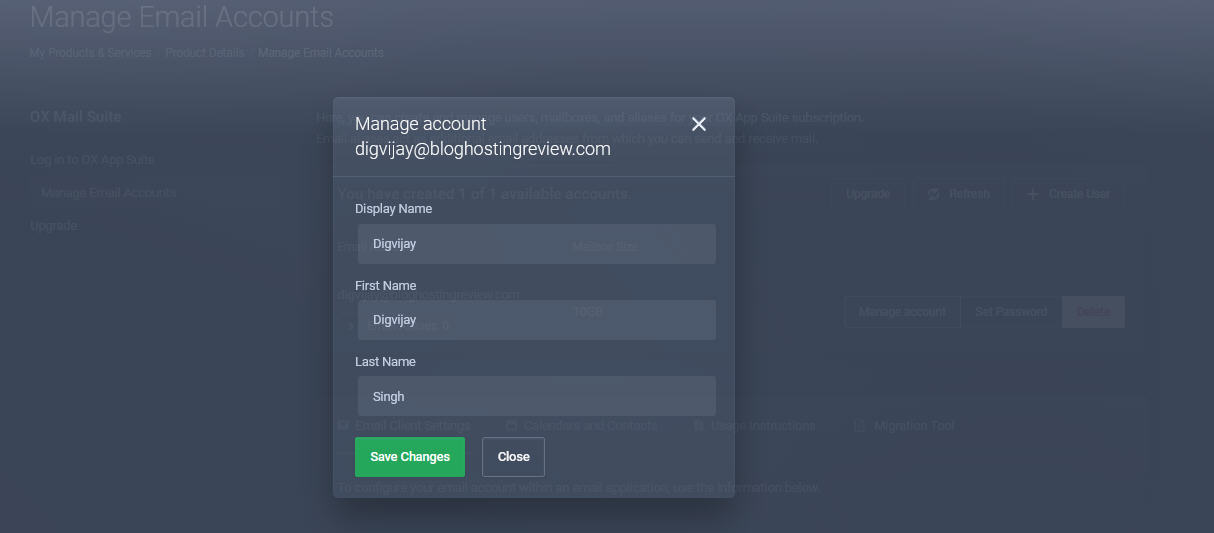
To manage an email address, click Manage Account.
Set Password
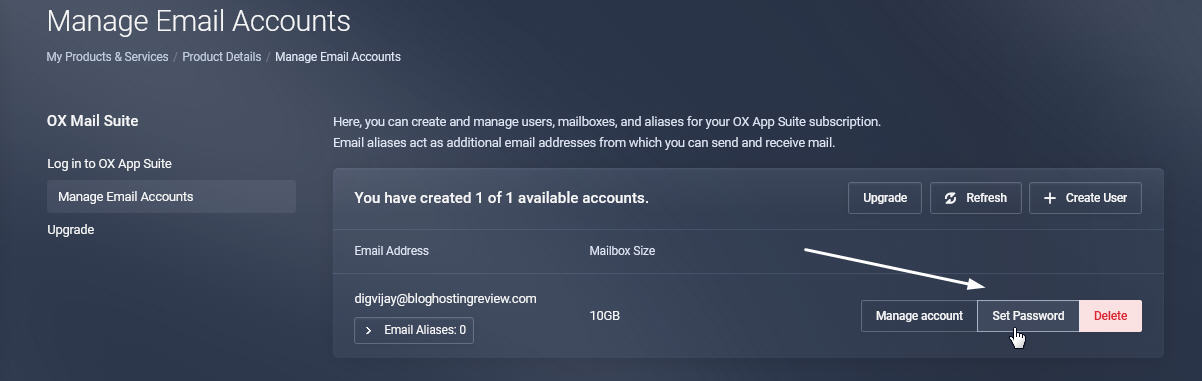
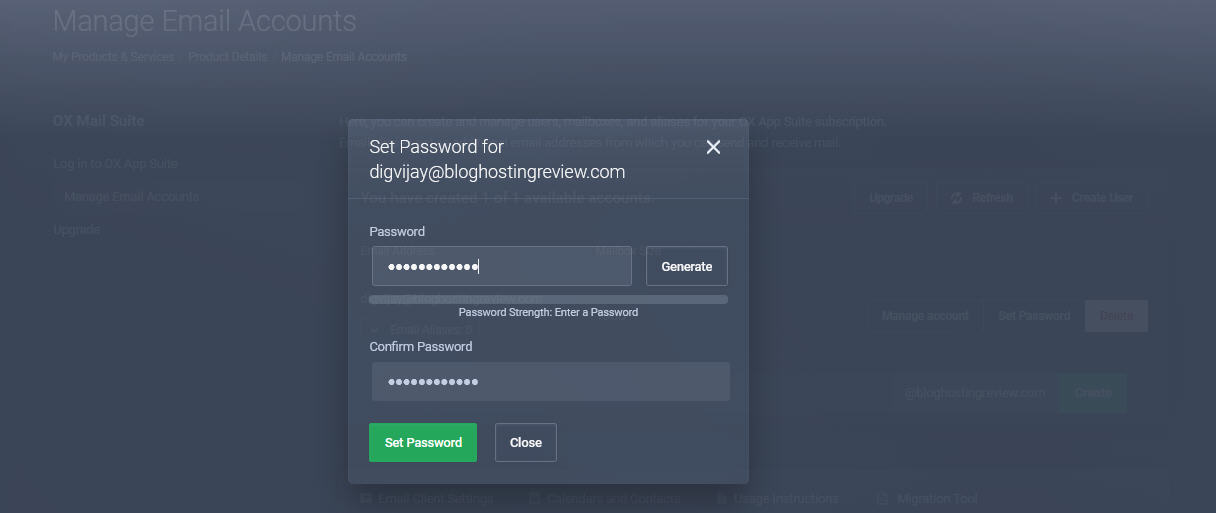
To set the password for an account, click Set Password.
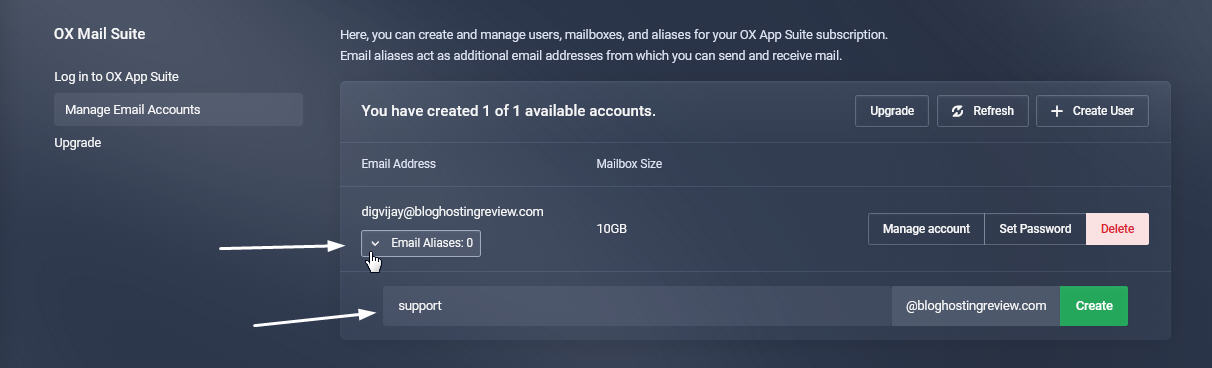
Create an Email Alias
Functionally, aliases are additional mail addresses for a single mailbox. OX App Suite will route all mail for any of those aliases to the same mailbox. OX App Suite's native features allow you to choose which alias to use as the FROM address in either the webmail interface or in a desktop or mobile mail client. You can only select email addresses or aliases that already exist in OX App Suite and not other arbitrary addresses for the same domain.
To add a new email alias, enter the desired name in the blank field at the bottom of the list of aliases and click Create. The alias will appear in the list and you will be able to send and receive email using that alias and mailbox immediately. Clicking Delete for an existing email alias will delete it.
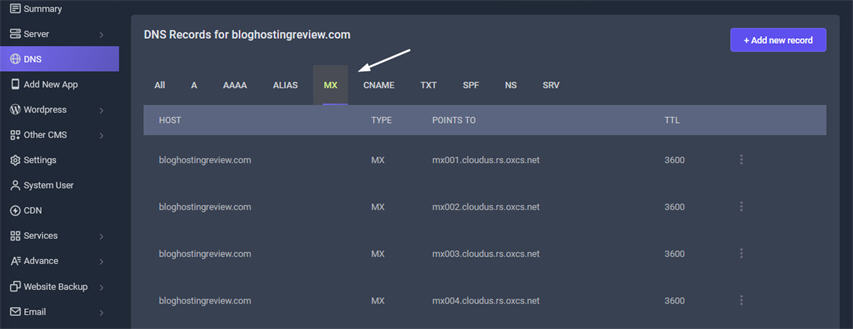
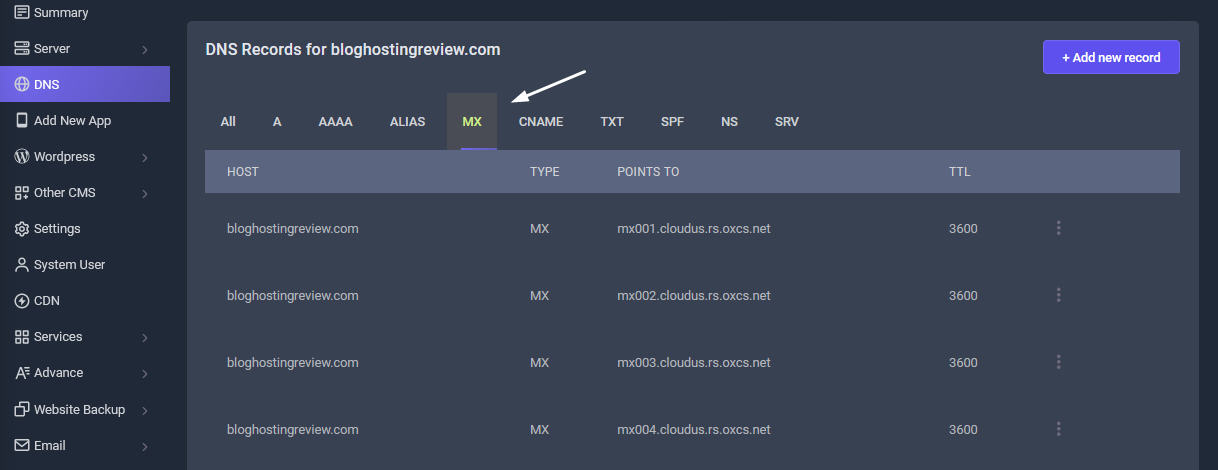
2. Where should I point my MX Records
You need to create MX Records to point your domain to OX Mail Suite. Go to your DNS Tab in your Sellcloud panel.
Below is a list of all the OX MX records information. All have the same priority, we recommend adding them all for maximum resilience:
Name/Host/Alias |
Time to live (TTL) |
Record Type |
Priority |
Value/Answer/Destination |
|---|---|---|---|---|
@ or leave blank |
3600 |
MX |
10 |
mx001.cloudus.rs.oxcs.net |
@ or leave blank |
3600 |
MX |
10 |
mx002.cloudus.rs.oxcs.net |
@ or leave blank |
3600 |
MX |
10 |
mx003.cloudus.rs.oxcs.net |
@ or leave blank |
3600 |
MX |
10 |
mx004.cloudus.rs.oxcs.net |
An example of the MX record configuration for bloghostingreview.com:
Create MX Record
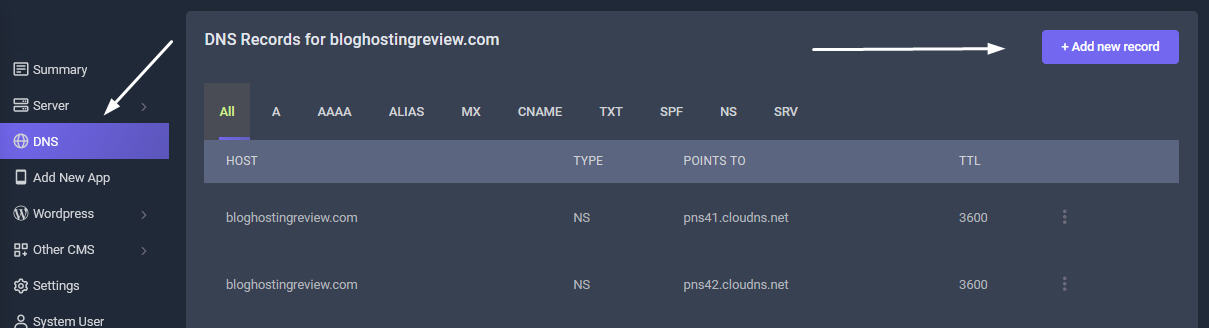
Go to your DNS Tab in your Sellcloud panel and click Add New Record
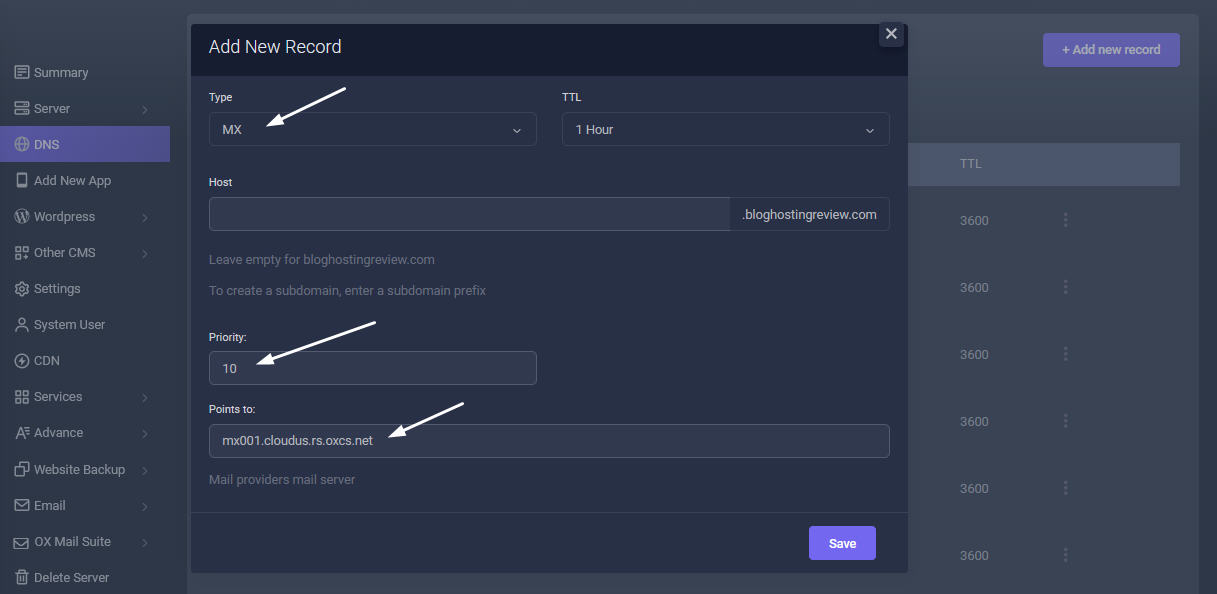
So there will be 4 different records added seaparately. Copy and paste each different as the above points to: mx001.cloudus.rs.oxcs.net host name for each record separately. Remember mx001.cloudus.rs.oxcs.net, mx001.cloudus.rs.oxcs.net, mx001.cloudus.rs.oxcs.net, mx001.cloudus.rs.oxcs.net accordingly.
3. What SPF records should I use?
Below are the SPF records you will need to set to have your email work with OX Mail. You need to add this record so that your mail does not end up in spam folder.
Name/Host/Alias |
Time to live (TTL) |
Record Type |
Value/Answer/Destination |
|---|---|---|---|
@ or leave blank |
3600 |
TXT | v=spf1 include:spf.cloudus.rs.oxcs.net ~all |
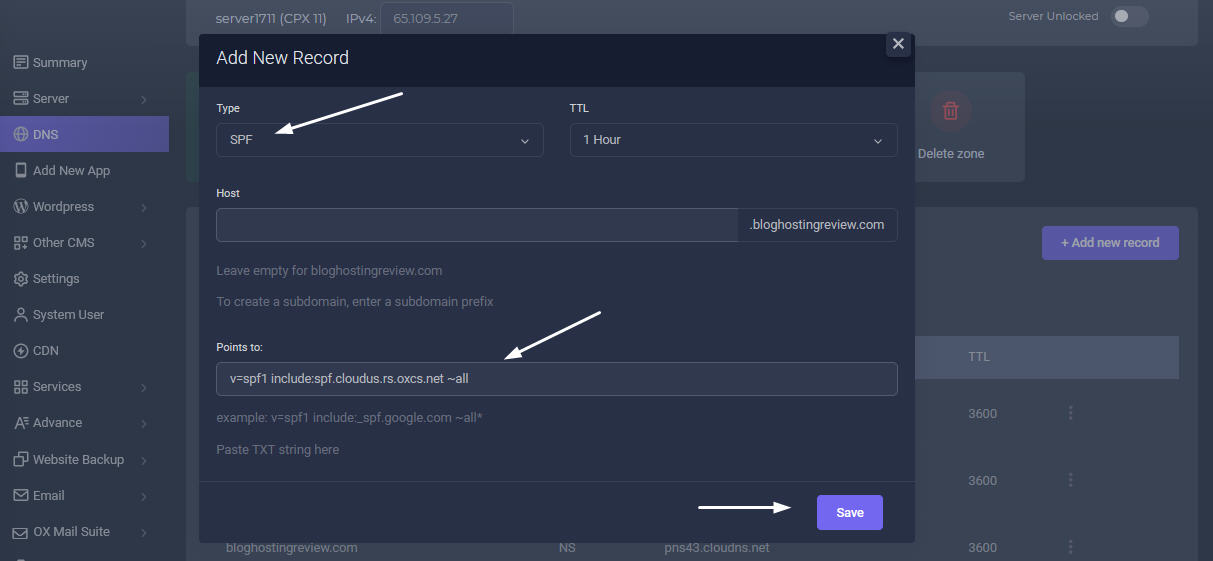
Add SPF records
In your DNS tab, click Add New Record button. Then Choose Type: SPF, Host: Leave blank, Points to: v=spf1 include:spf.cloudus.rs.oxcs.net ~all