Having an SSL certificate on your site is one of the best ways to build trust with your visitors, especially if your site is an ecommerce store. SSL creates a private, encrypted connection from your server to your visitors' browsers and allows personal information to be relayed without eavesdropping, tampering, or forgery.
SellCloud offers two ways to deploy SSL on your site: by using one of SellCloud's free AutoSSL certificates or by deploying a certificate you bought from a certificate authority (CA).
Once you have deployed SSL, you can then enable redirection to HTTPS.
Method One: Using AutoSSL
SellCloud's AutoSSL issues, deploys, and renews trusted SSL certificates to your apps automatically.
Before AutoSSL will be available for an app, you must first add the app's domains in SellCloud.
Once you've added your app's domains, you'll have an AutoSSL option available in your app's SSL tab.
Click Enable AutoSSL, and SellCloud will enable SSL for your app using an AutoSSL certificate.

This certificate will be automatically renewed by SellCloud before it expires.
Method Two: Providing Your Own Custom SSL Certificate
This method will walk you through the complete process of buying your own SSL certificate and installing it through SellCloud.
How to order SSL certificate
1. Make an order for your certificate from this page:
https://sellcloud.io/ssl-certificates.html
Once you bought, your custom certificate, you will receive email and steps to install the certificate on your website.
Step One: Generate an SSL Key and CSR
Generating an SSL key and certificate signing request (CSR) is the first step in making your website securely available over HTTPS.
Using SellCloud is the easiest way to create your key and CSR.
First, go to your app's SSL tab in SellCloud.

You'll see that SSL is not enabled.
Now, enter your app's domain followed by your location and organization name. Click Generate Key and CSR.

SSL will now show as enabled on your app, and SellCloud will display your app's SSL key and CSR.

Step Two: Purchase a Signed SSL Certificate
After generating your SSL key and CSR, you will need to buy a signed SSL certificate from a CA. A CA issues the digital certificate verifying that you are the owner of your app's public key.
One option for an inexpensive SSL certificate is the PositiveSSL certificate from ssls.com. SellCloud does not have any affiliation with PositiveSSL or Comodo. We only mention this option because it is inexpensive, and we believe they will issue certificates that work when your domain is accessed both with and without www.
When buying your certificate, select Nginx as the server type. If Nginx is not available as an option from your CA, then select either Apache or Apache+OpenSSL.
You'll receive a file labeled YOUR_DOMAIN.crt. (This file might be contained within an archive with other files.)
Open the .crt file. Its content is your SSL certificate. Copy the content of your .crt file and return to your app's SSL tab in SellCloud.

Paste the content of your .crt file into this field, and click Update SSL Key and Certs.
Now, visit your site using HTTPS to make sure your certificate works. It should load over HTTPS and display a little lock in the address bar.
If you have a single app on your server that will be using multiple subdomains, you will need a wildcard SSL certificate.?
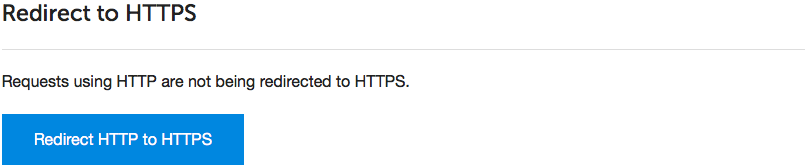
Forcing HTTP to Redirect to HTTPS
If you would like to ensure your users see the HTTPS version of your site when they visit, you can force SSL by redirecting all HTTP requests to HTTPS.
Simply click Redirect HTTP to HTTPS.
Alert: For Control Panel Help & Tutorials, click here: Panel Tutorials


