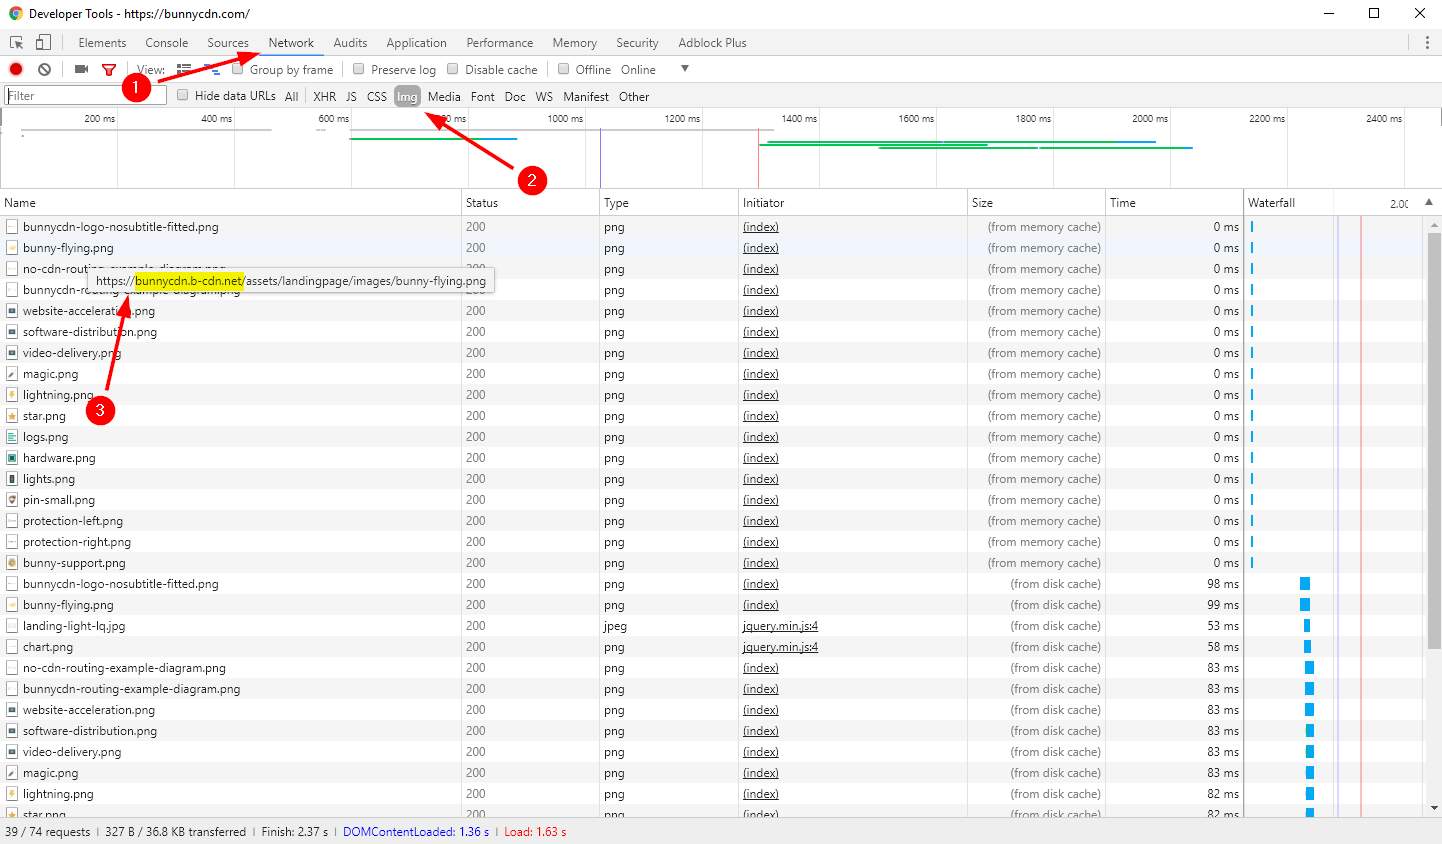
After setting everything up and configuring BunnyCDN with your website, you will, of course, want to check the results. This article provides a few tips on how you can check if BunnyCDN is working correctly and test how your website performance improved around the world.
Check your website network waterfall and source code
After setting up BunnyCDN, you will, of course, want to check if your website is configured correctly at all, especially if using a third party plugin or such as WordPress. This is pretty straightforward. The first thing you will need to do is open your website in your web browser and press Ctrl + Shift + I on your keyboard. This will open up the developer tools.

Now you will want to click on the Network Tab (1) and then Img (2) and refresh your website.
If everything went right, you will start seeing a list of requests to image files on your website as illustrated in the image above. By hovering over a specific request, you will get the URL of the image. To check if the images were served from BunnyCDN, pay attention to the hostname they were served from as illustrated by point (3). If the images were served from the hostname you have configured in your BunnyCDN account, such as bunnycdn.b-cdn.net, this means that the website is successfully integrated with BunnyCDN and serving data from it.
You can do the same if you open up the source code of your website by pressing Ctrl + U. This will open up the code used to render your page, and you can check there if the URLs to static files, such as images, CSS and JavaScript files are using the correct BunnyCDN hostname.
Check your BunnyCDN statistics page and cache hit rate
Another simple way to test if BunnyCDN is serving your data is to open the CDN tab in your dashboard. If you see traffic and requests there, it's a good sign that BunnyCDN is delivering traffic for your website.
Alert: For Control Panel Help & Tutorials, click here: Panel Tutorials


