What Is SendGrid?
SendGrid delivers your transactional and marketing emails through the world's largest cloud-based email delivery platform. SendGrid has a 30-day free trial in which you can send up to 40,000 emails. After that, you can continue the free trial forever for free and send up to 100 emails/day.
If you need more emails than that, their Essentials plan starts at $14.95/month and you can send up to 40,000 emails per month. The cost per extra email is $0.001. But you can also upgrade to a higher plan to save more money.
Again, while there are different free SMTP services, I'm going to choose SendGrid for this tutorial because:
- It's free forever for up to 100 emails per day, which should work for most WordPress sites.
- It offers an API that gives you a simpler way to send emails instead of needing to enter standalone SMTP server credentials.
- I've been using it on my own sites for a while and have had a great experience.
The basic process goes like this:
- First, signup for a free trial at SendGrid.com. Then verify your account by clicking on the confirmation email you receive.
- Access your SendGrid API key.
- Use a WordPress SMTP plugin to configure your site to send its emails using the SendGrid SMTP API.
Let's go through it in more details
1. Register for a SendGrid Account
To get started, go to SendGrid and register for a free account.
2. Create SendGrid API Key
Once you've activated your SendGrid account, you need to create an API key. The API key is what you'll use to connect your WordPress site to SendGrid. It's also more secure/reliable than entering SMTP credentials directly (e.g. a server, username, password, etc.).
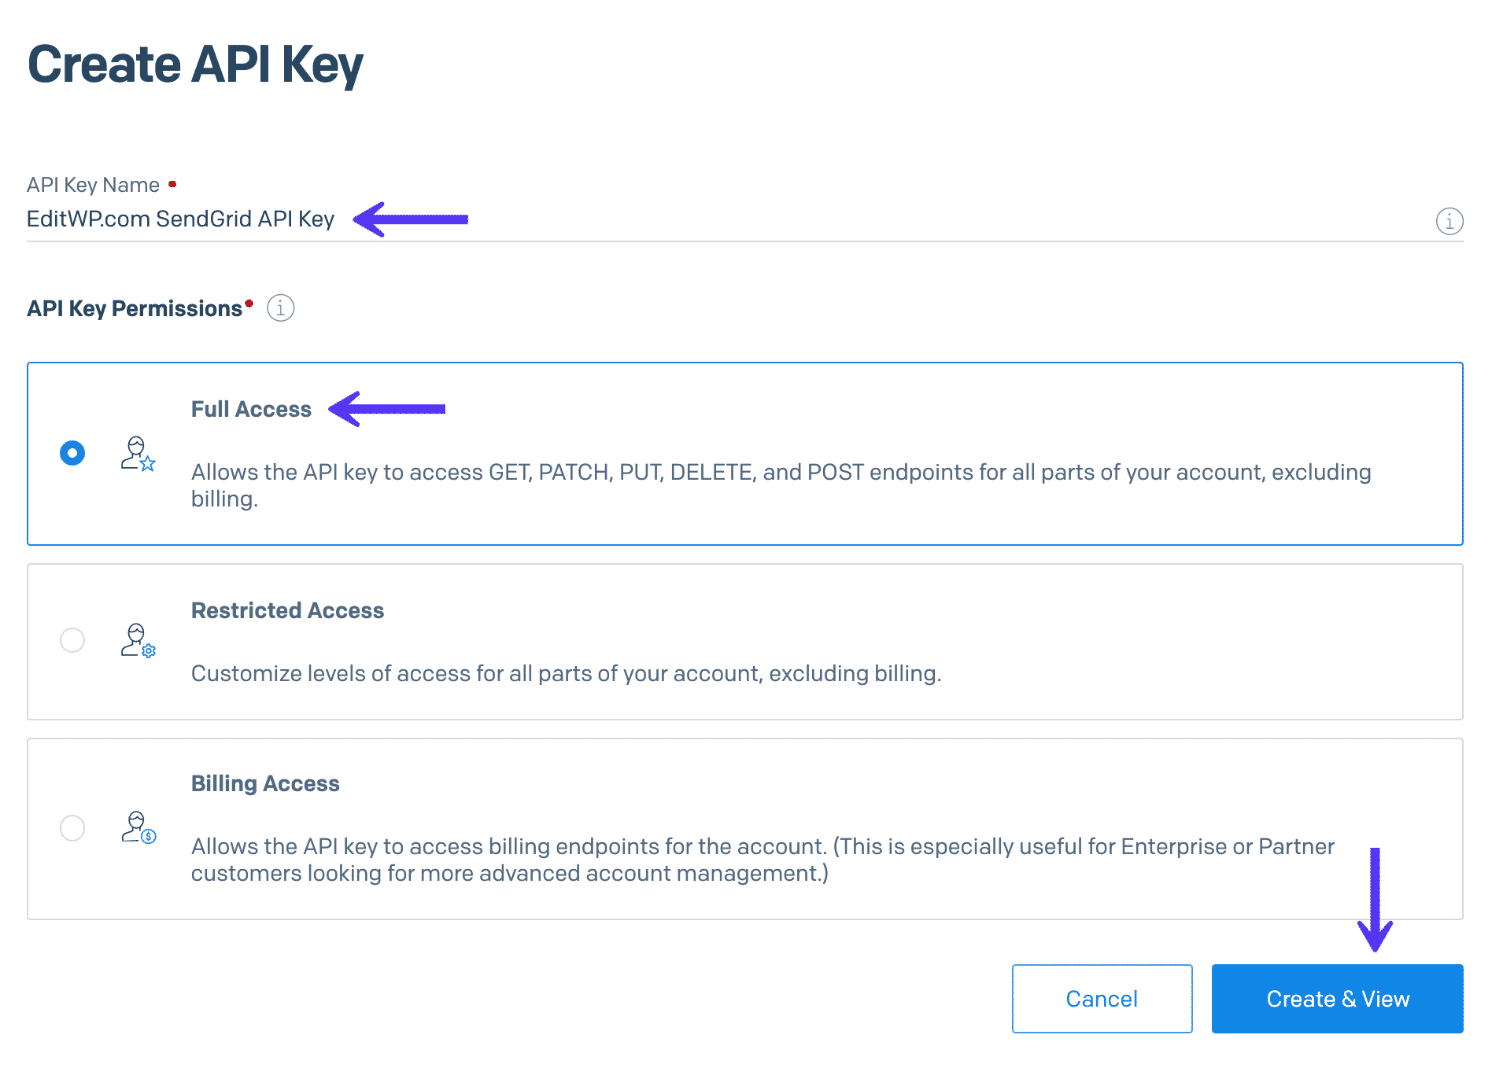
To create your API key, click this link or go to Settings - API Keys in your SendGrid dashboard. Then, click the Create API Key button:
Give your API a name you can recognize. This can be anything. Select "Full Access" and click on "Create & View."
Next, you will need to generate your SendGrid API key. Click into "Settings" - "API Keys." Then click on "Create API Key."

Give your API a name you can recognize. This can be anything. Select "Full Access" and click on "Create & View"
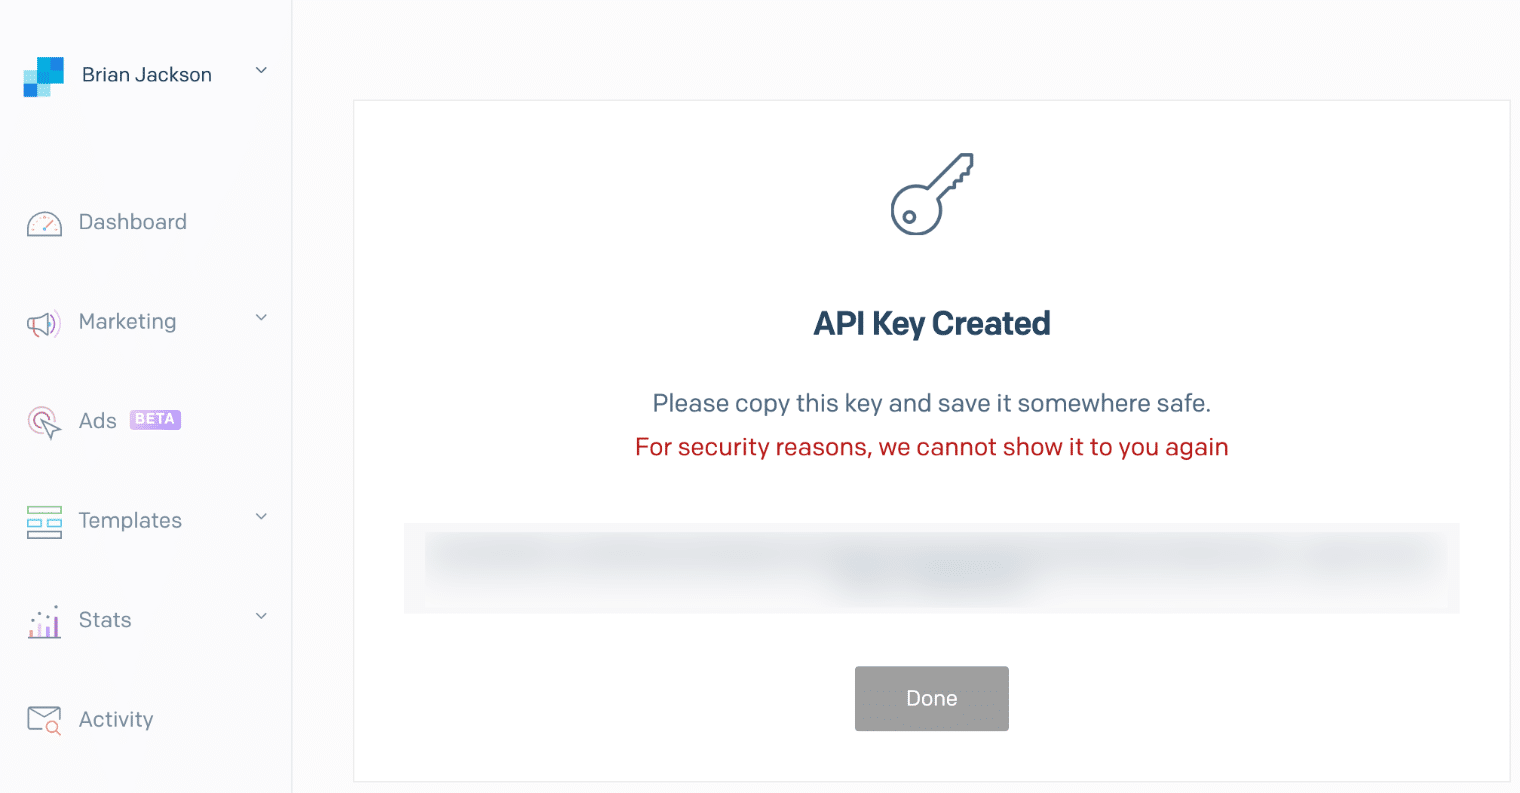
You will want to copy your API key and save it somewhere safe as they won't show it to you again. You will need this to configure the plugins below.
Install Post SMTP Mailer/Email Log Plugin
Next, you need to install the free Post SMTP Mailer/Email Log plugin on your WordPress site. There are lots of different WordPress SMTP plugins, but I like this one for several reasons:
- It's 100% free.
- It lets you connect to the SendGrid API and has a ton of other services.
- You can view a log of the emails that your site sends, which helps you make sure everything is working.
- It lets you set a fallback SMTP server so that you can still deliver emails even if SendGrid fails for some reason.
- It's a fork of the previously-popular Postman SMTP plugin. This plugin was very popular until the developer stopped supporting it.
Here are a couple of reasons why you might want to use the Web API method vs SMTP:
- SMTP connections have multiple points of failure.
- The Web API method is typically faster with less latency than SMTP.
- The Web API adds an additional layer of security with API keys, vs the standard credential method with SMTP.
- Sometimes WordPress hosts block outbound connections with SMTP on ports 25, 465, and 587. Or they might not even support SMTP at all. With the Web API method, you don't have to worry about this.
- Replaces the default wp_mail function to send emails.
If you are our client, SellCloud enables an iptables firewall on your server. The firewall allows only the following incoming ports:
- TCP port 22 (SSH)
- TCP port 80 (HTTP)
- TCP port 443 (HTTPS)
Step 1
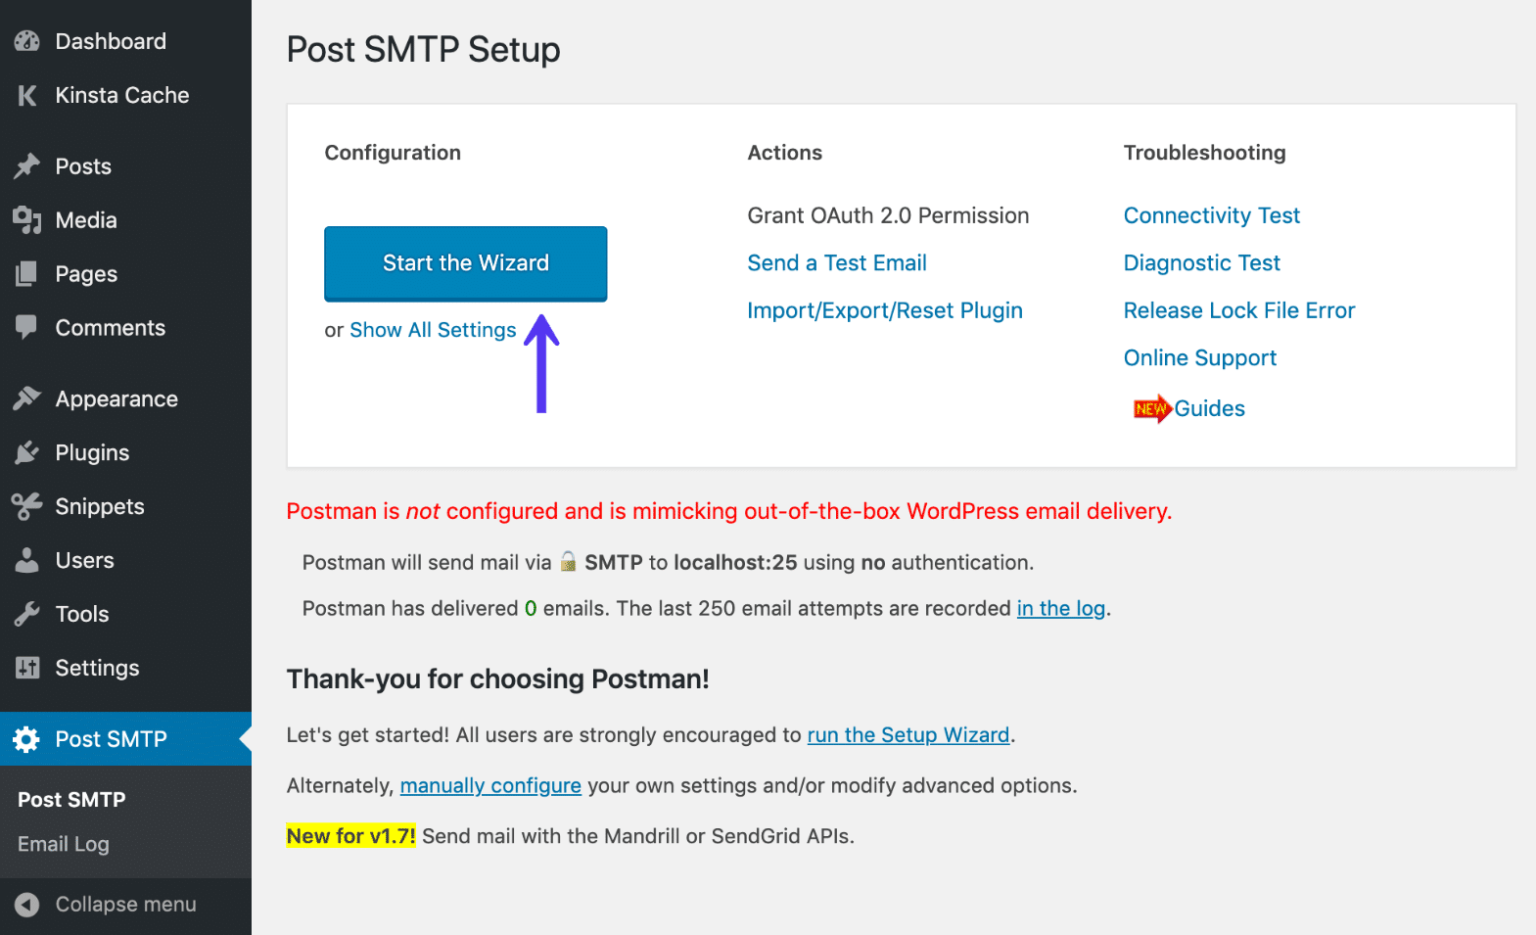
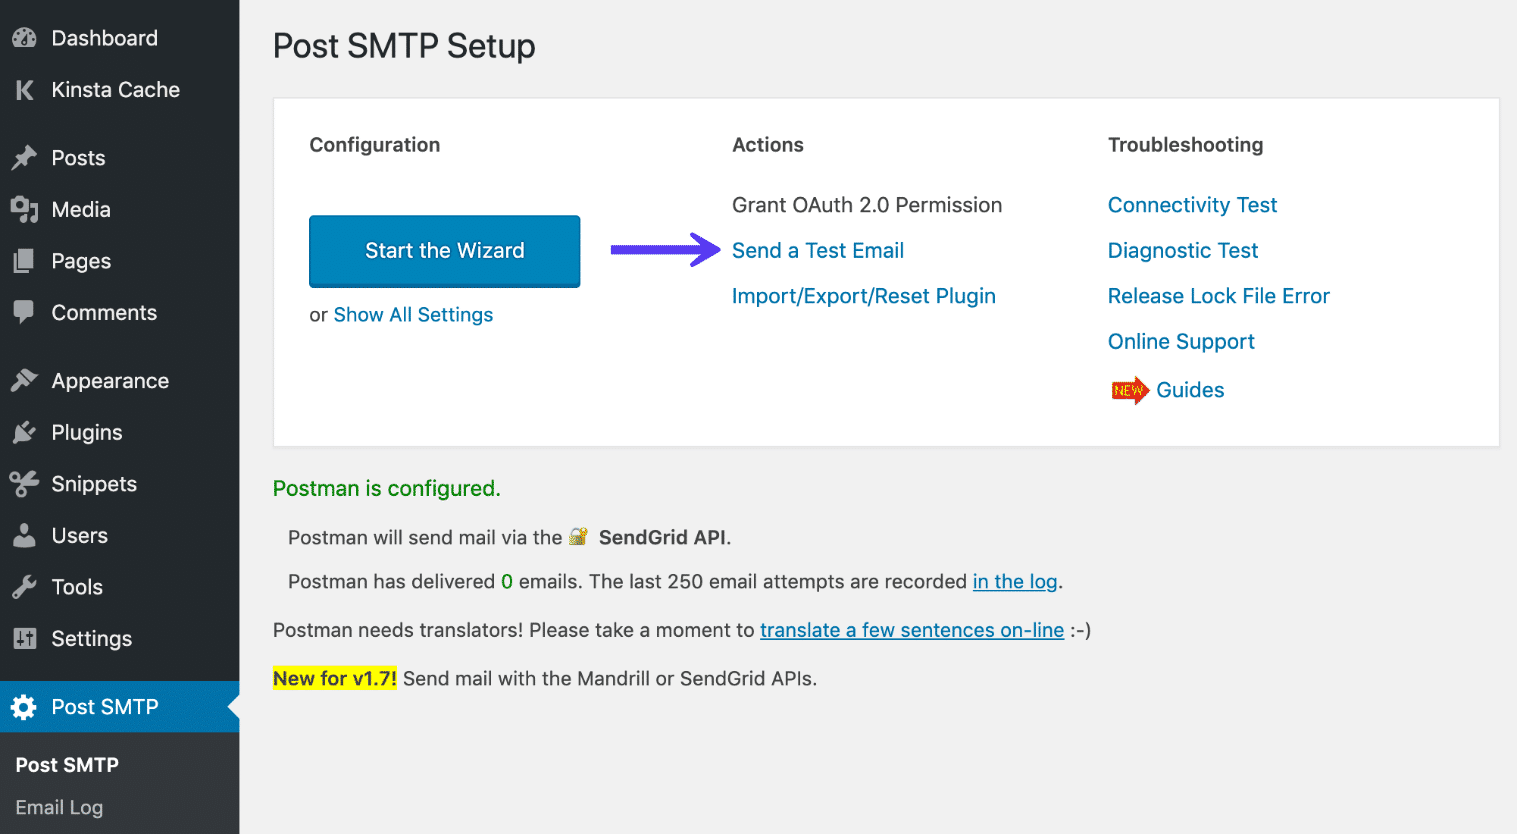
After you install the plugin, click on "Post SMTP" - "Start the Wizard."
Step 2
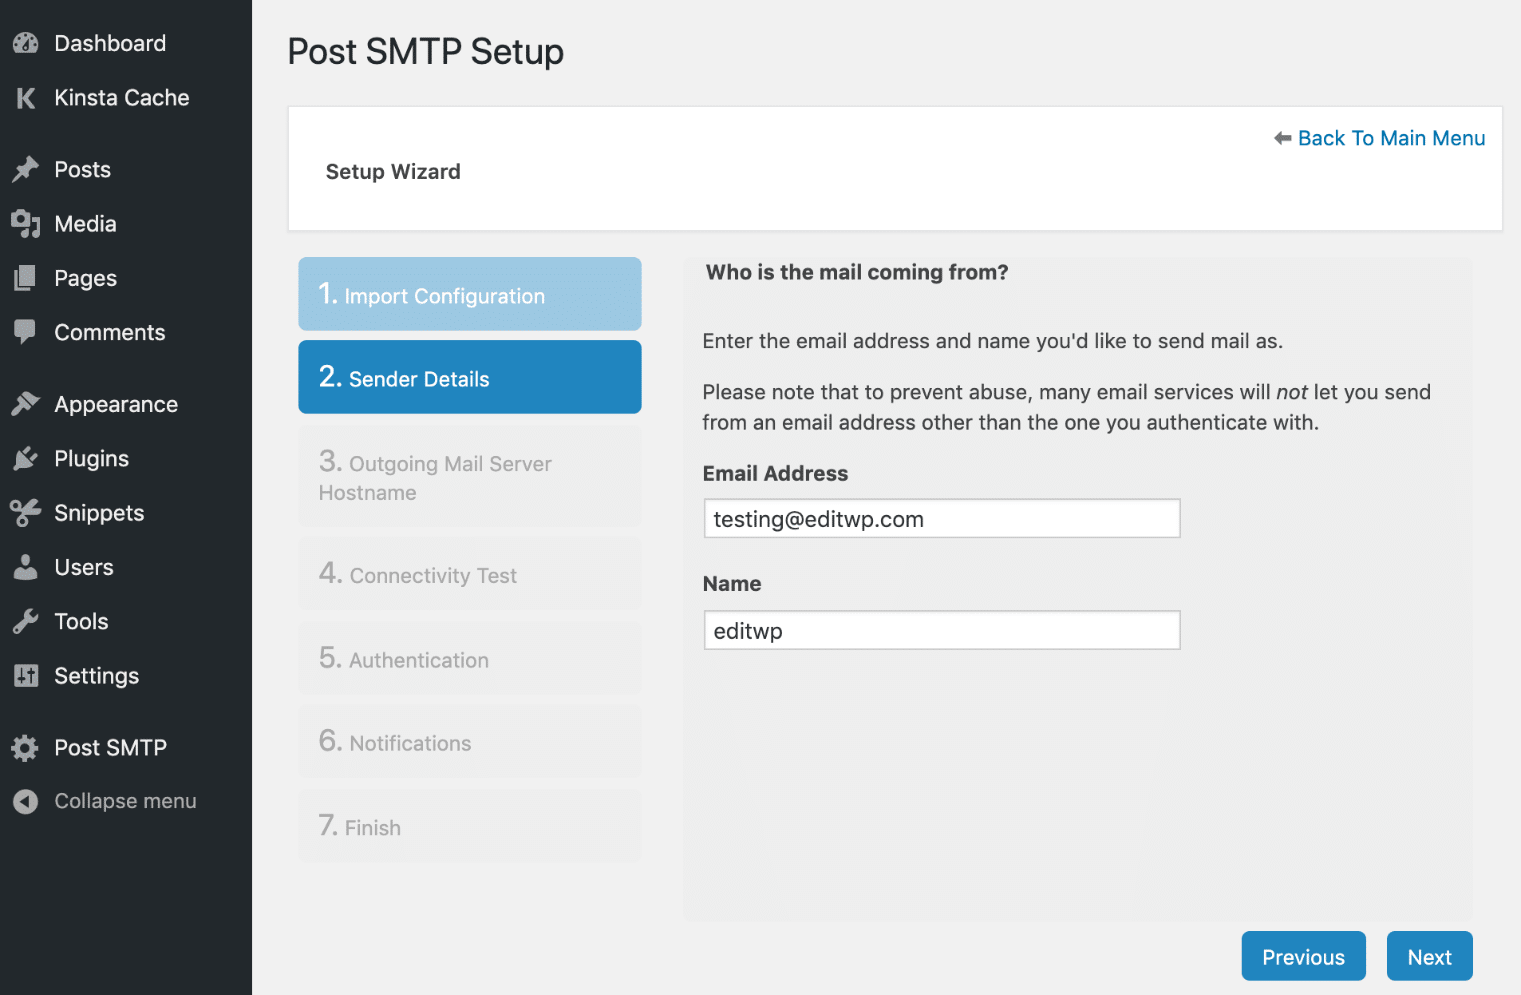
Enter in the email address and name that you would like to "send mail as." This is what users will see when they get an email from your site. Then click "Next."
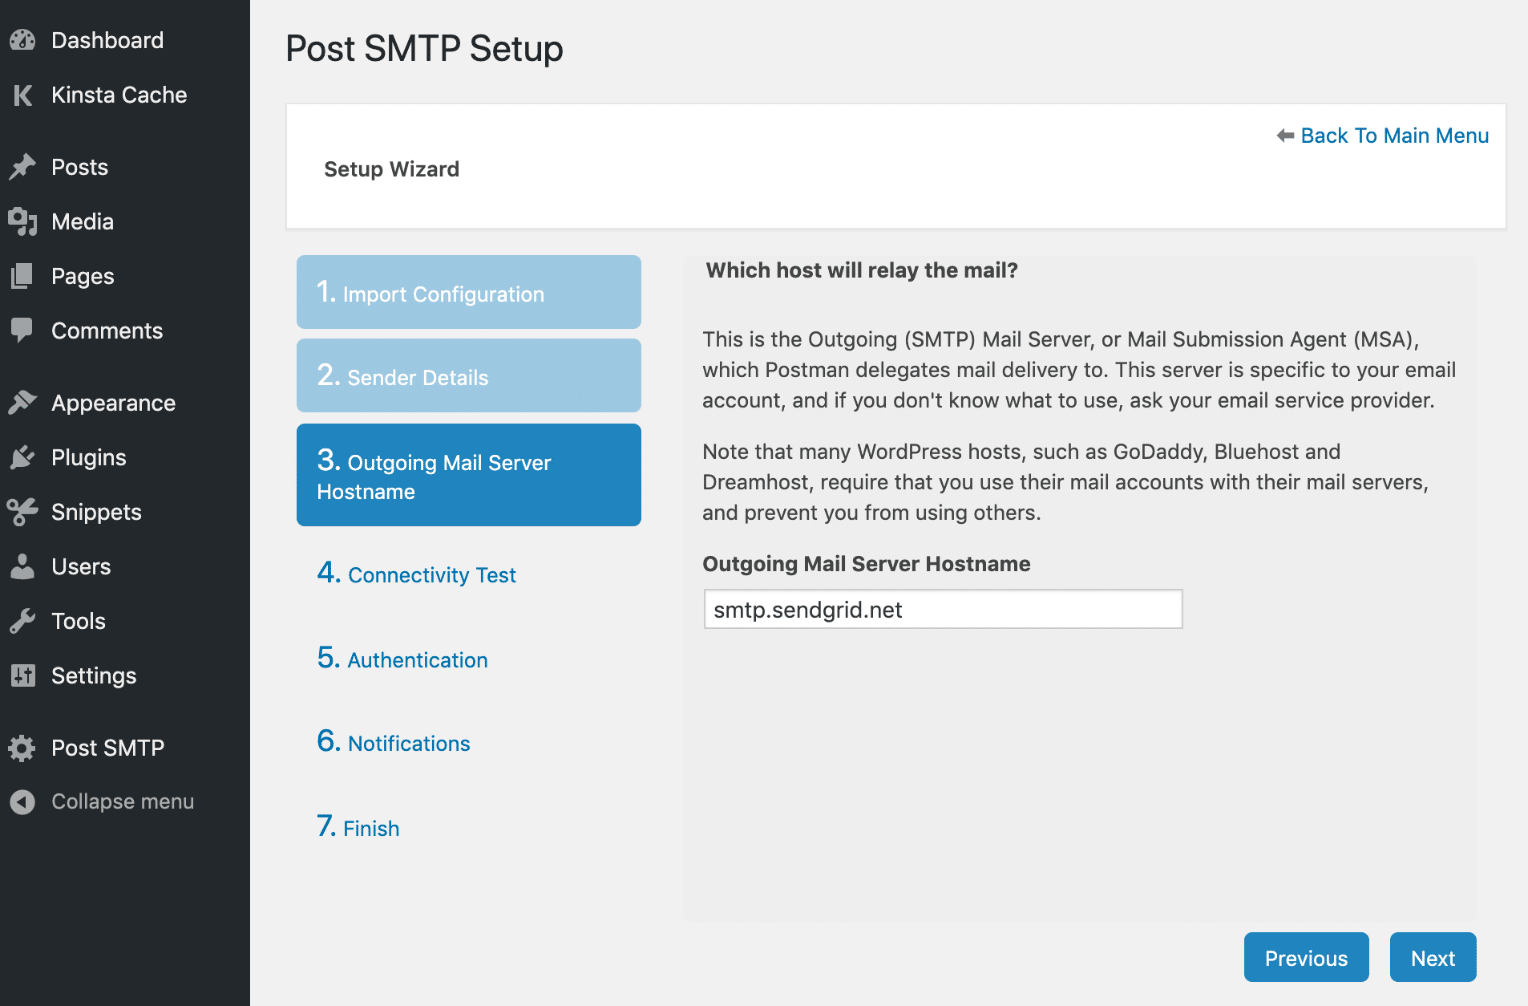
Step 3
We are going to use SendGrid's API, not SMTP. But having the SMTP server will be a fallback in the future in case there is anything wrong with the API. So enter in SendGrid's SMTP server address which is: smtp.sendgrid.net. Then click "Next."
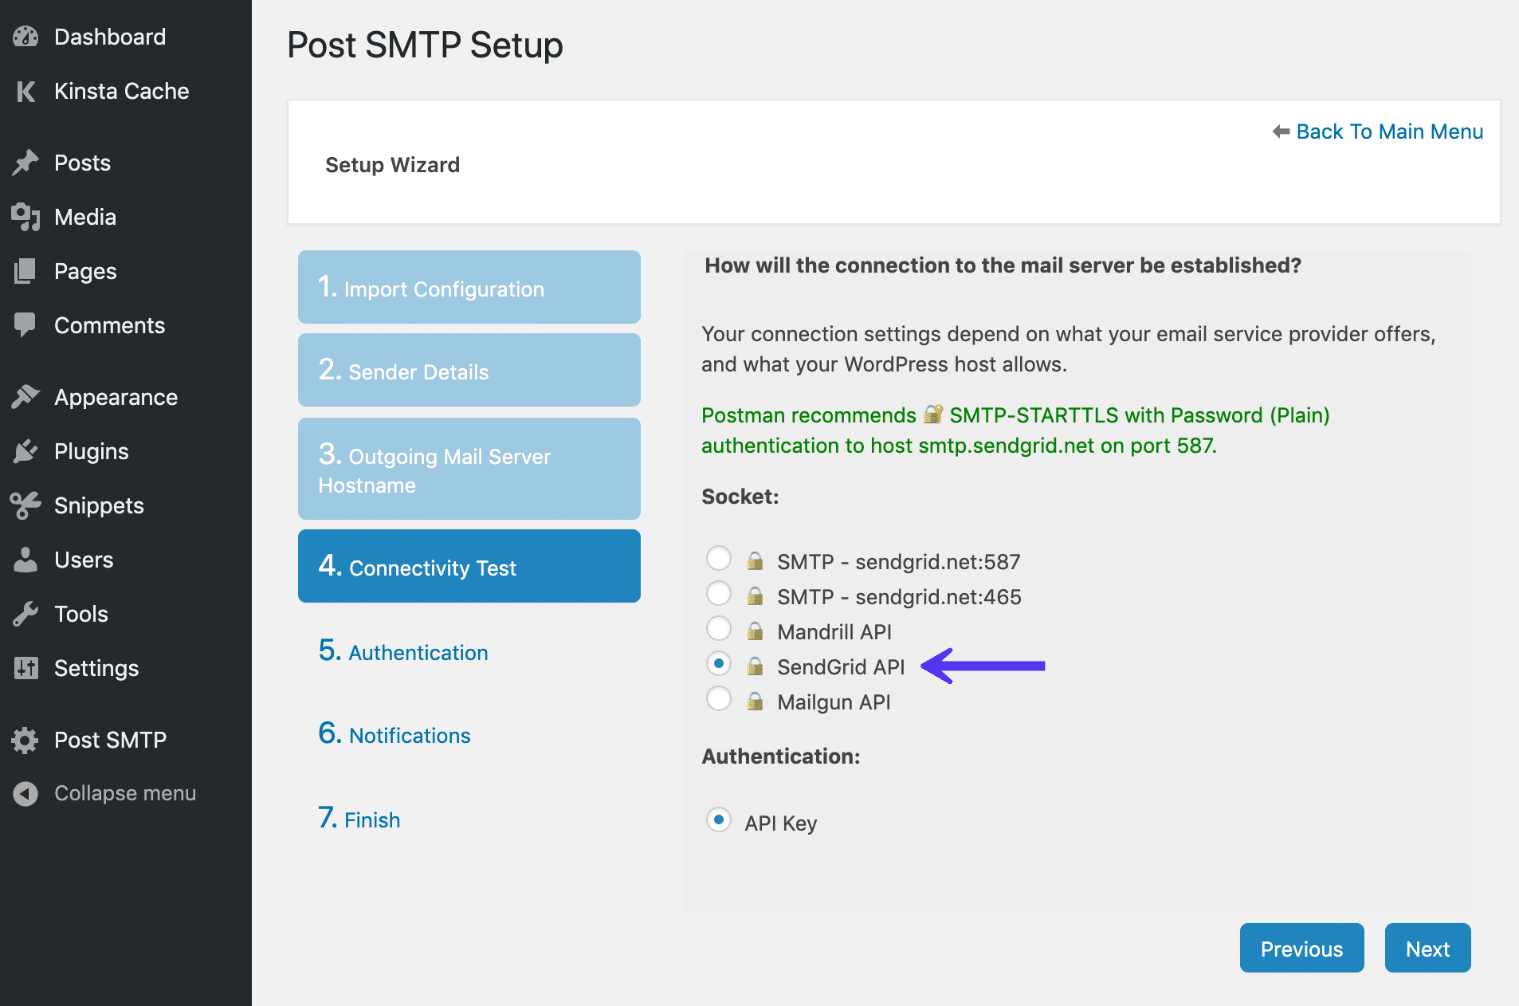
Step 4
Select "SendGrid API"¨ and click "Next."
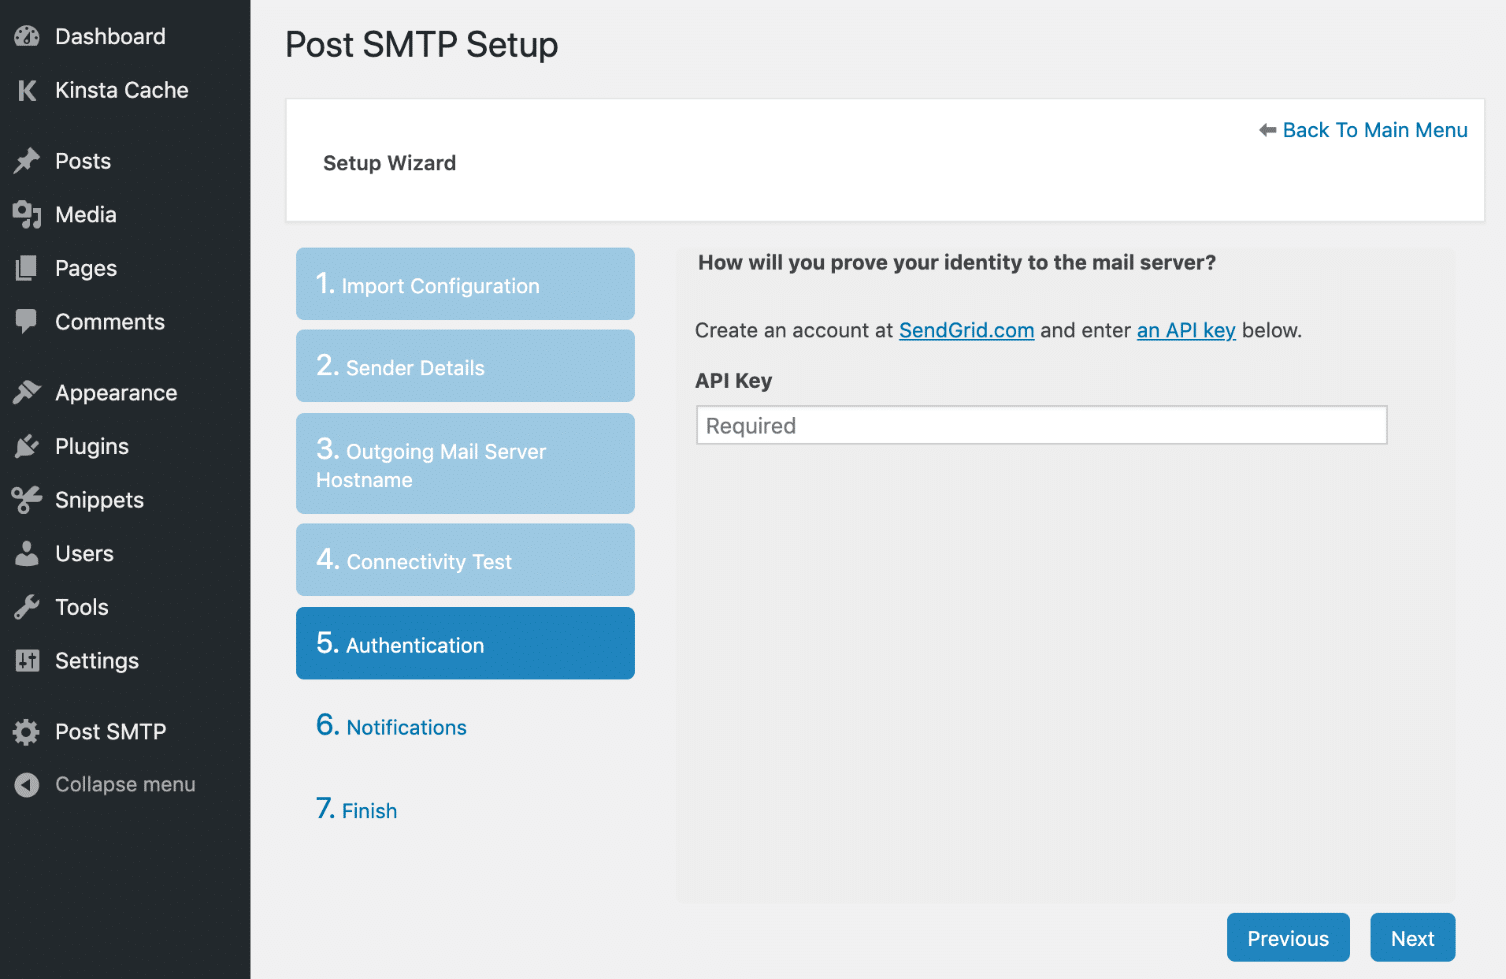
Step 5
Now back in the Post SMTP Setup, paste in your SendGrid API key which you generated earlier and click "Next."
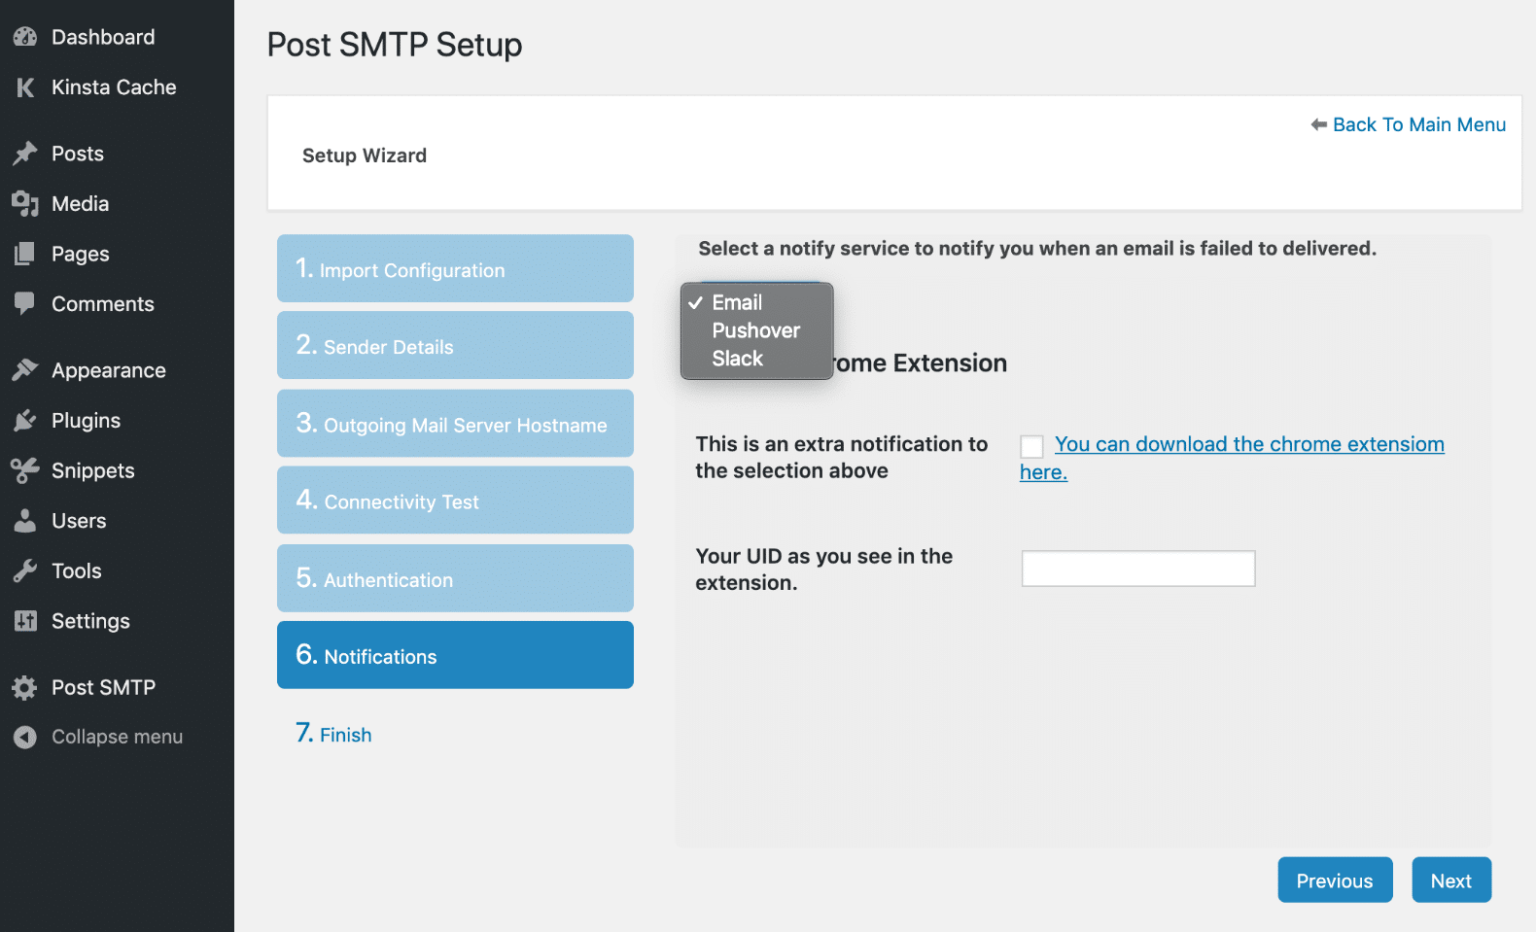
Step 6
You can then choose how you want to be notified when an email is failed to be delivered. Email is the default and easiest option. Post SMTP even has a Slack option. Then click "Next."
 Step 7
You can then send a test email to ensure everything is working properly. Under the Actions menu click on "Send a Test Email."
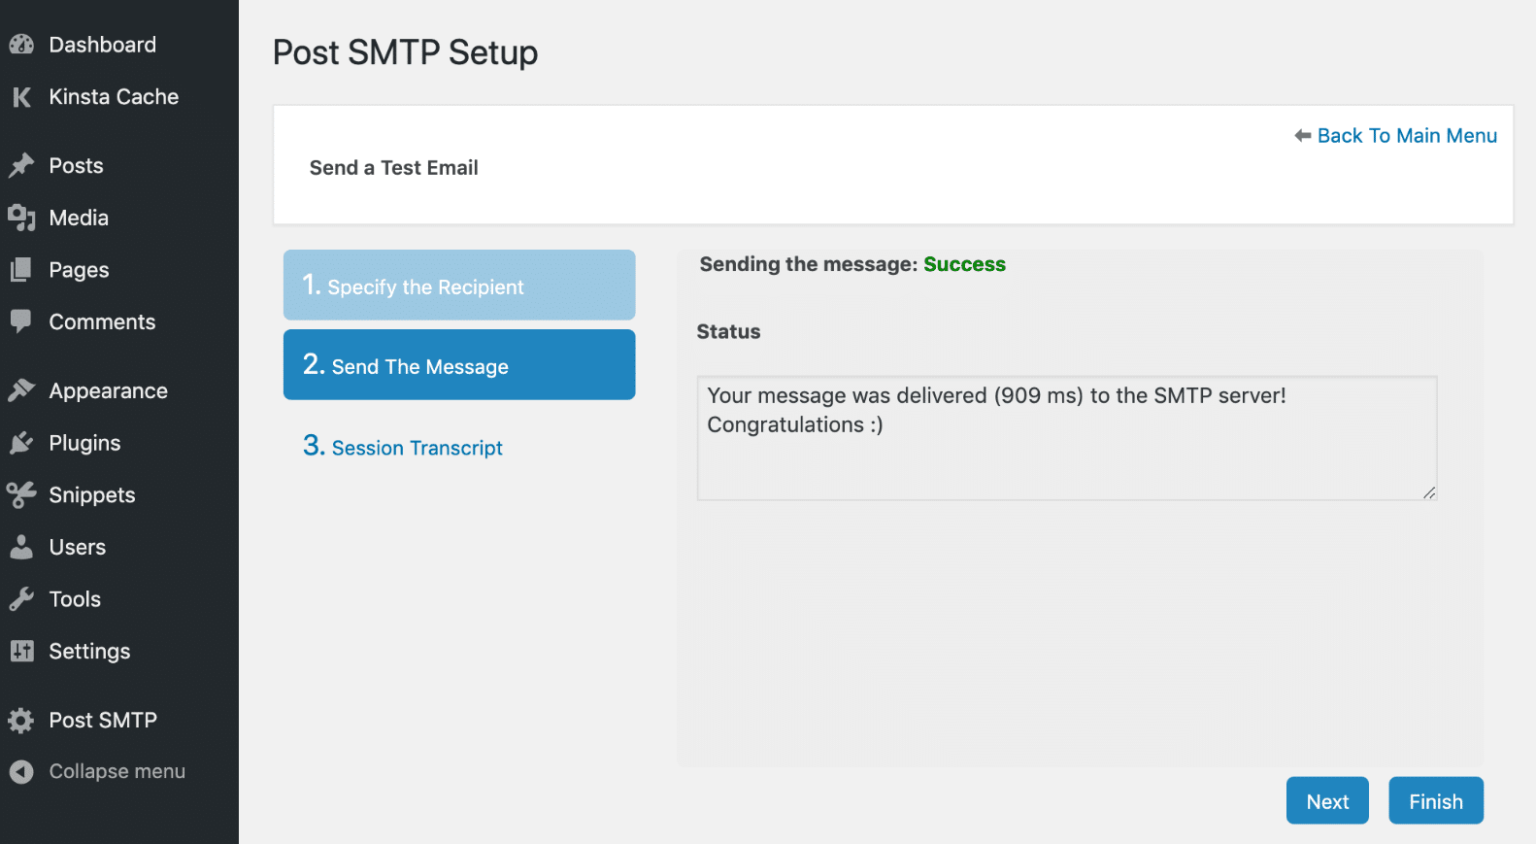
 Step 8
Type the recipient email address you want to send a test to and click "Next." If everything is OK you will see a "Success"¨ message.
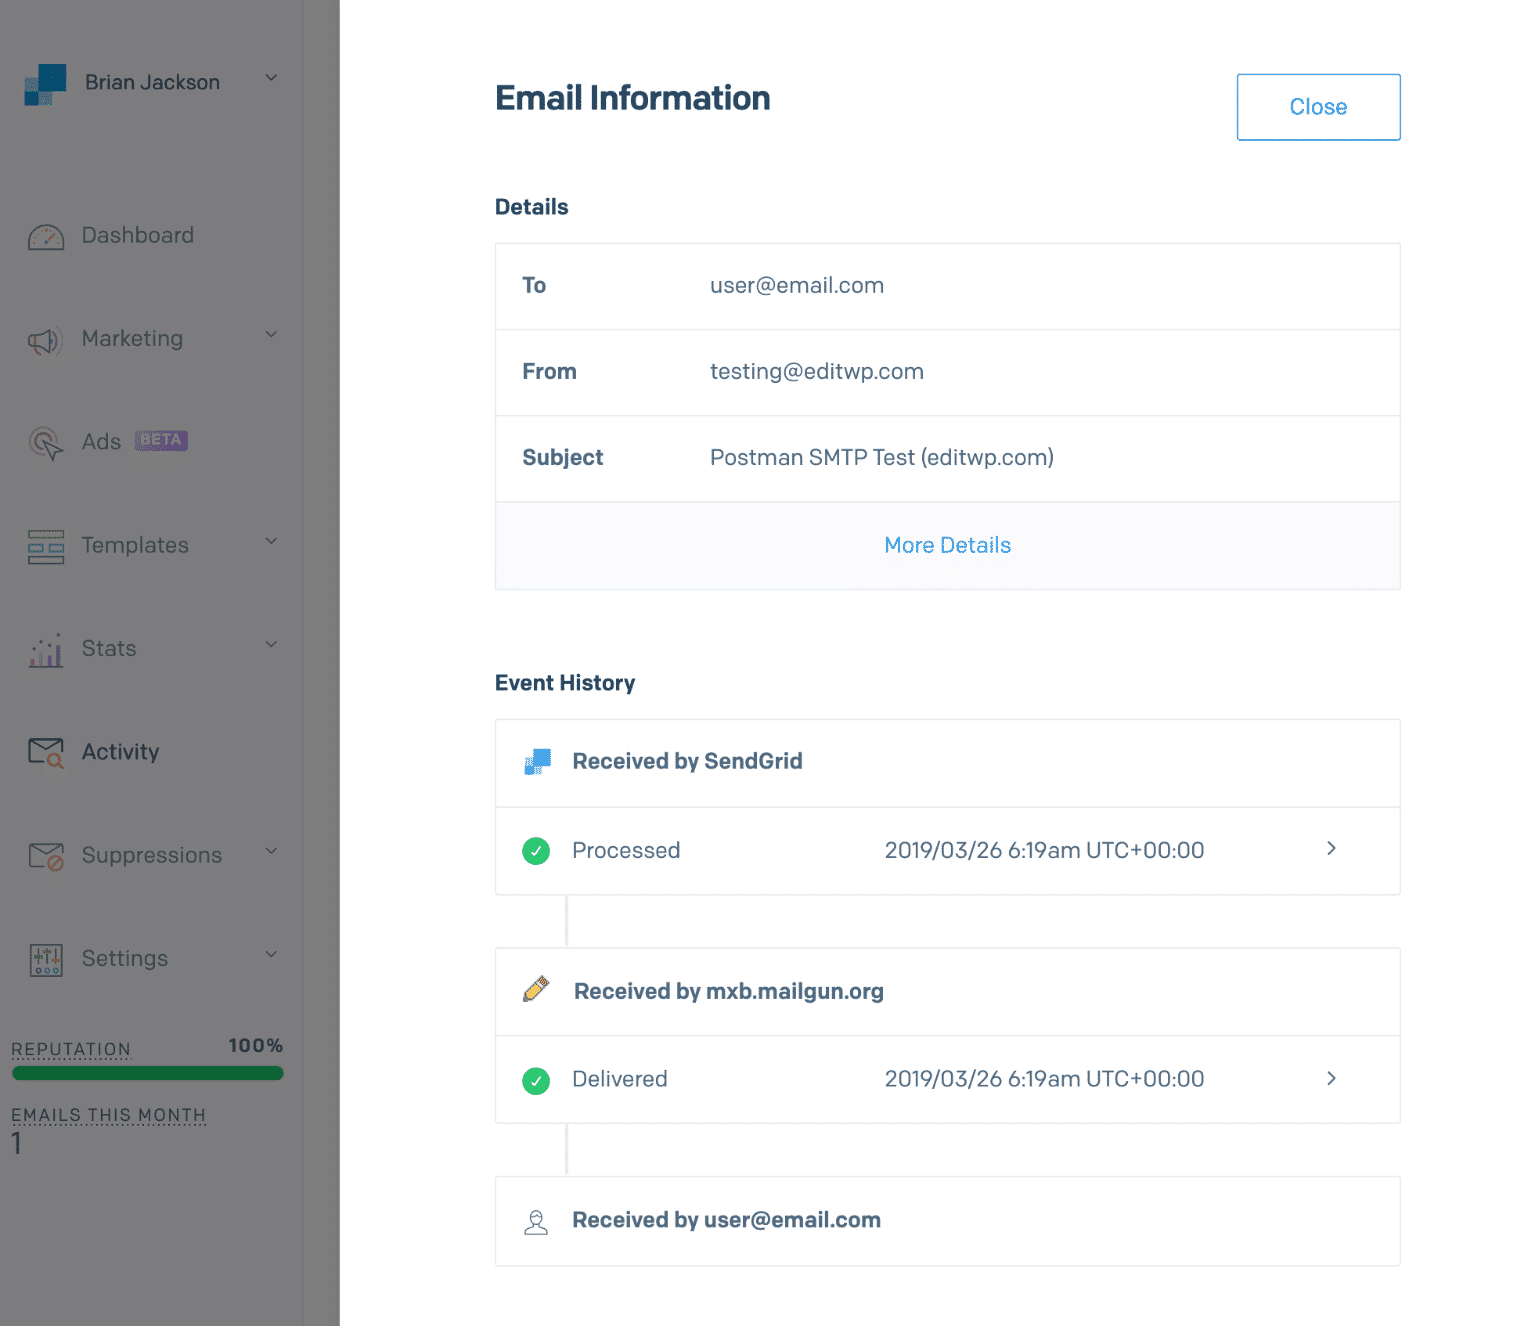
And that's it! All emails from your WordPress site will now go out via SendGrid's mail servers. Make sure to check your inbox and your spam folder to ensure the test email went through. You can also check the SendGrid activity feed.
You should then skip down to the section below to configure your SendGrid domain authentication.
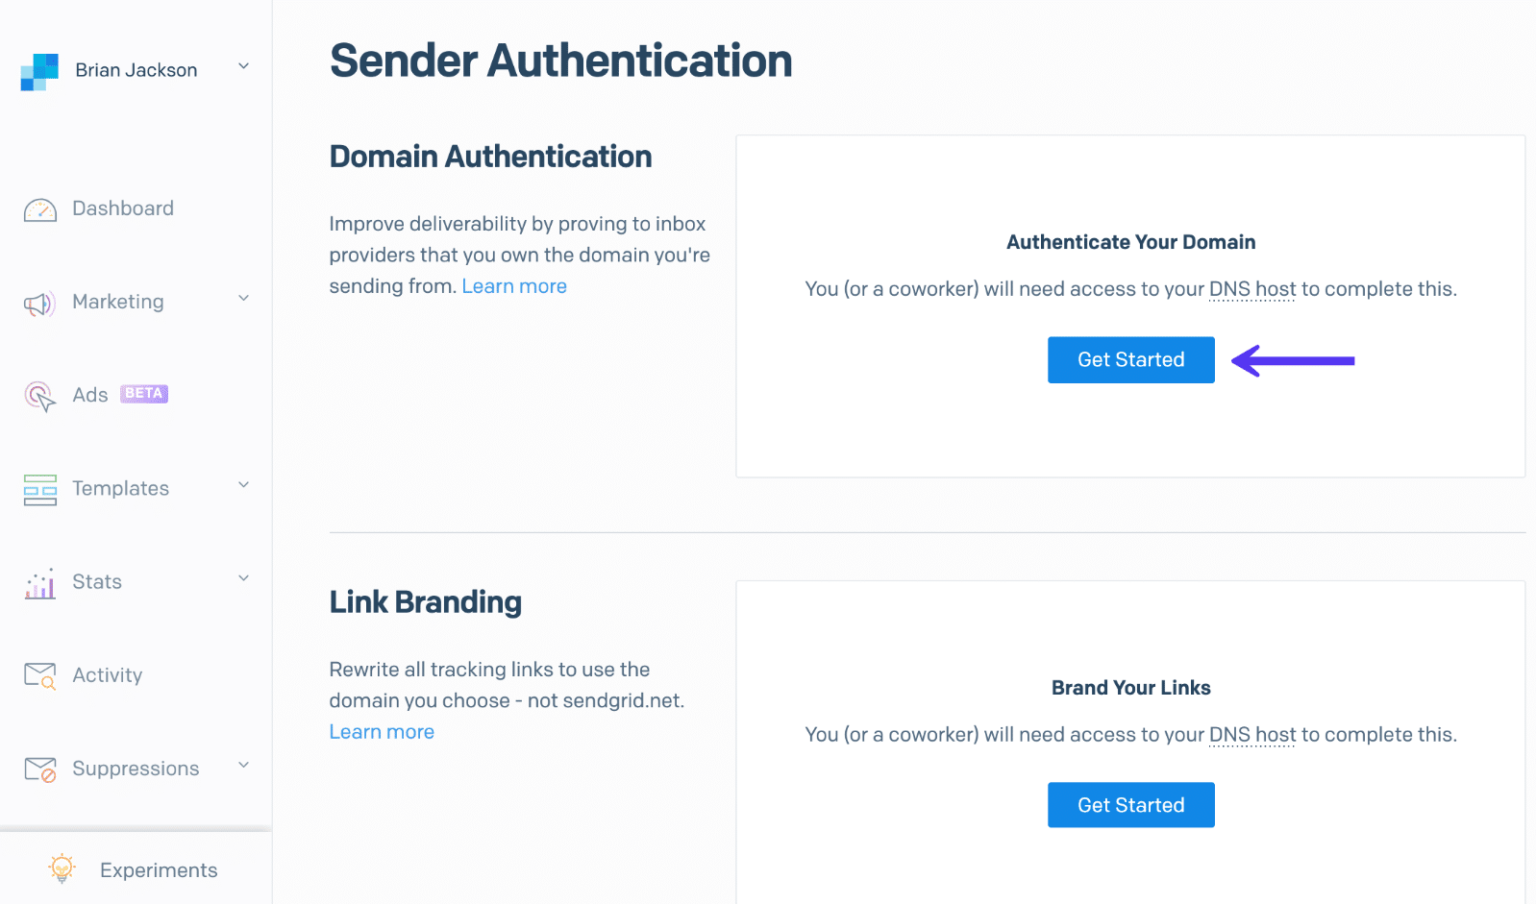
Configure SendGrid Domain Authentication
Configuring your SendGrid domain authentication will improve deliverability by proving to inbox providers that you own the domain you're sending from. Without this, your emails might end up in the spam folder.
Step 1
In the SendGrid dashboard, click into "Settings" - "Sender Authentication." Under the Domain Authentication section, click on "Get Started."
Step 2
Pick the DNS host you are using. If you are using SellCloud DNS, you can choose . Then click "Next."
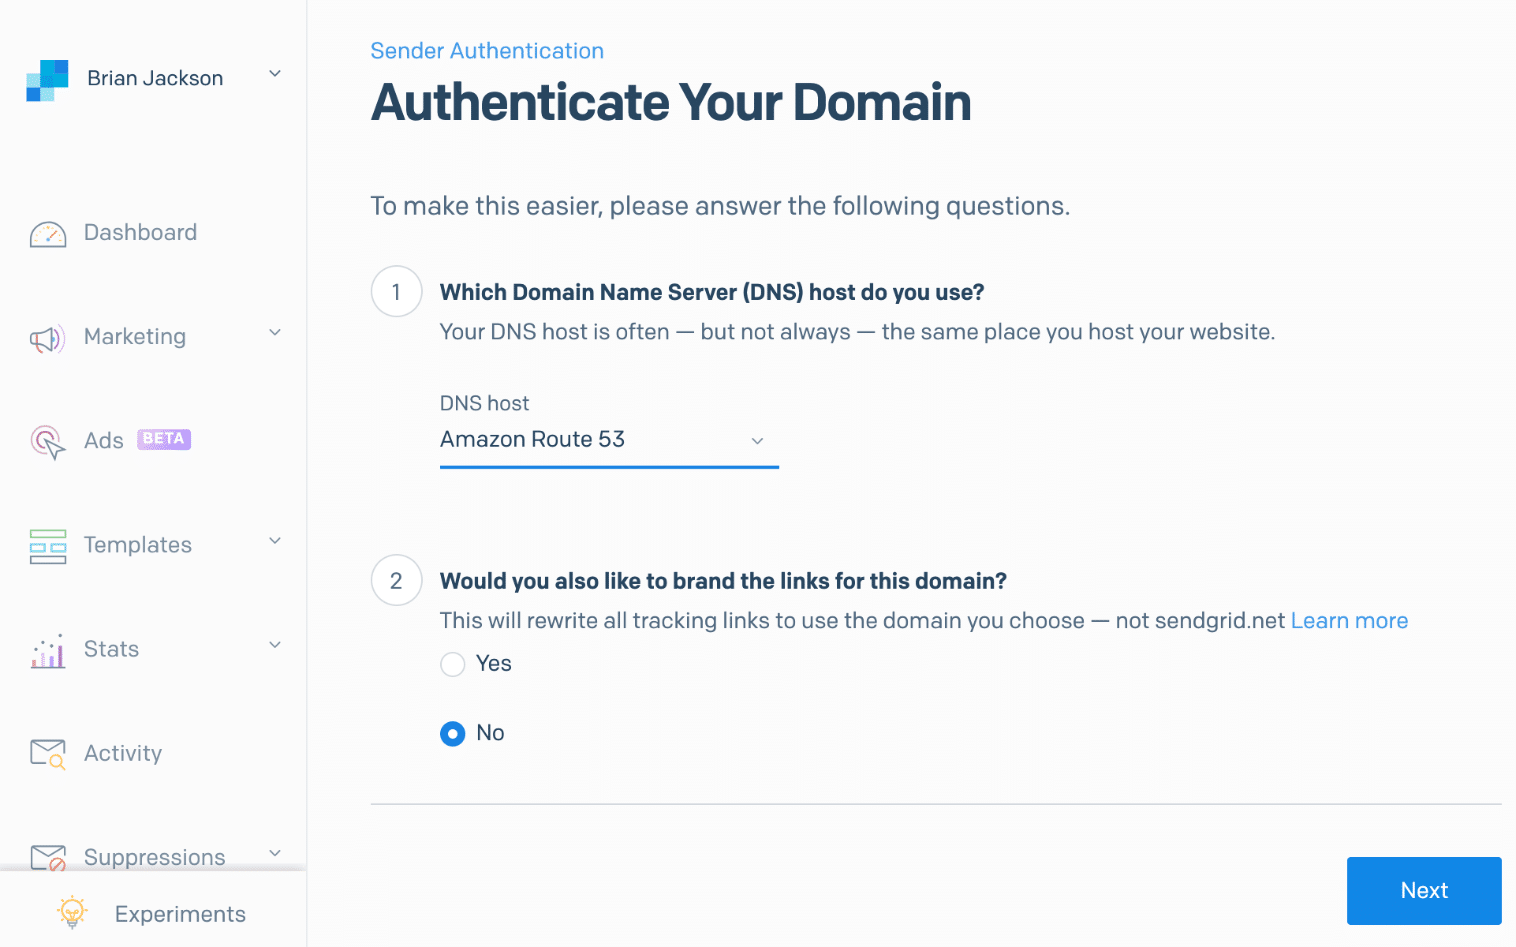
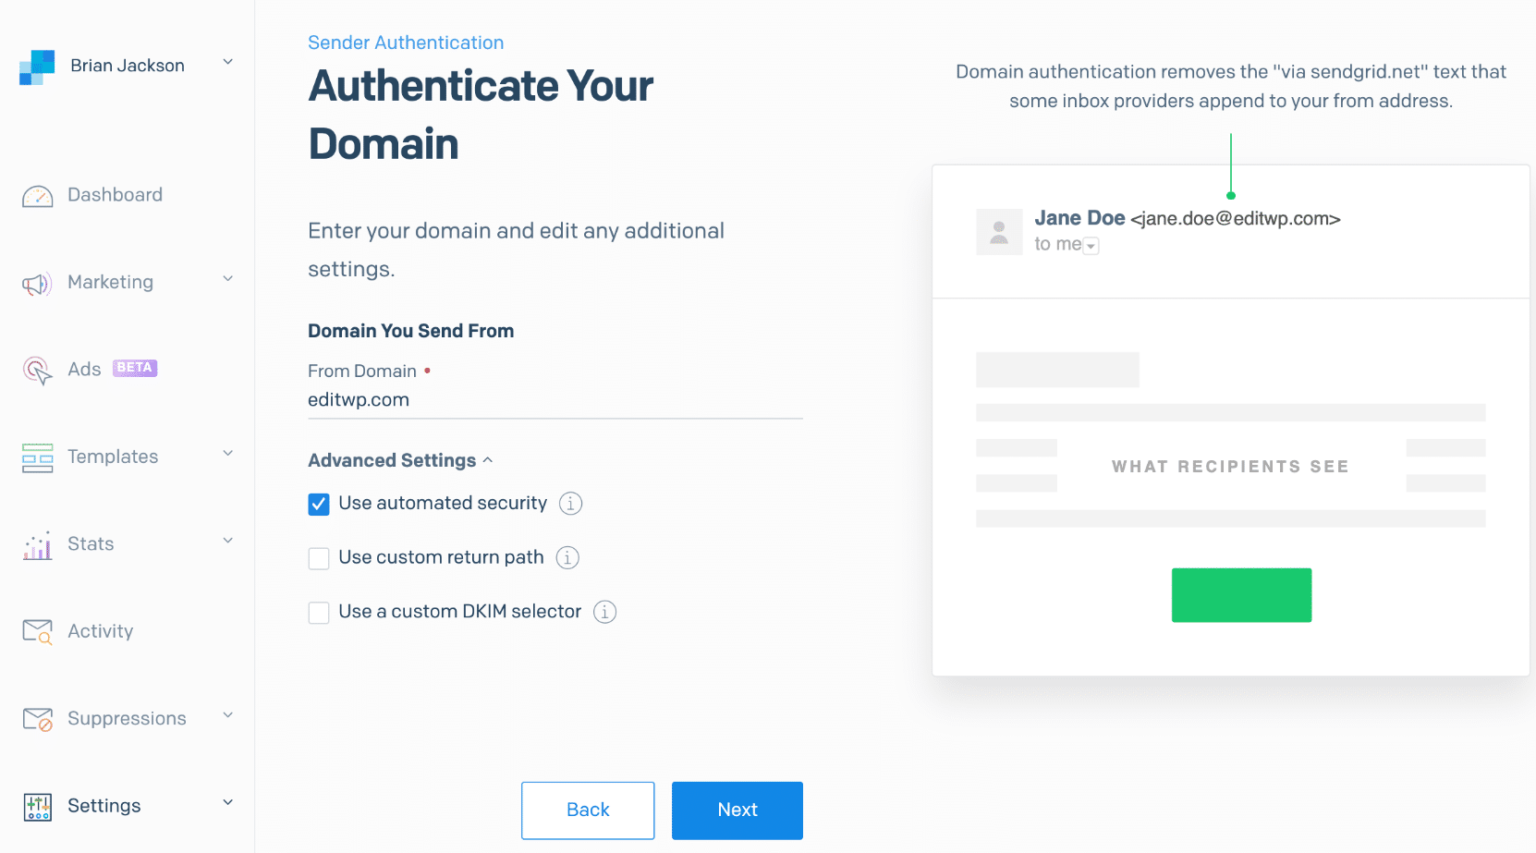
Step 3
Enter in the domain you are sending from. You can then choose which type of security you prefer. The default and recommended option is "Use automated security." When Enabled, SendGrid will automatically rotate your DKIM keys so that they are impossible to break. Then click "Next"
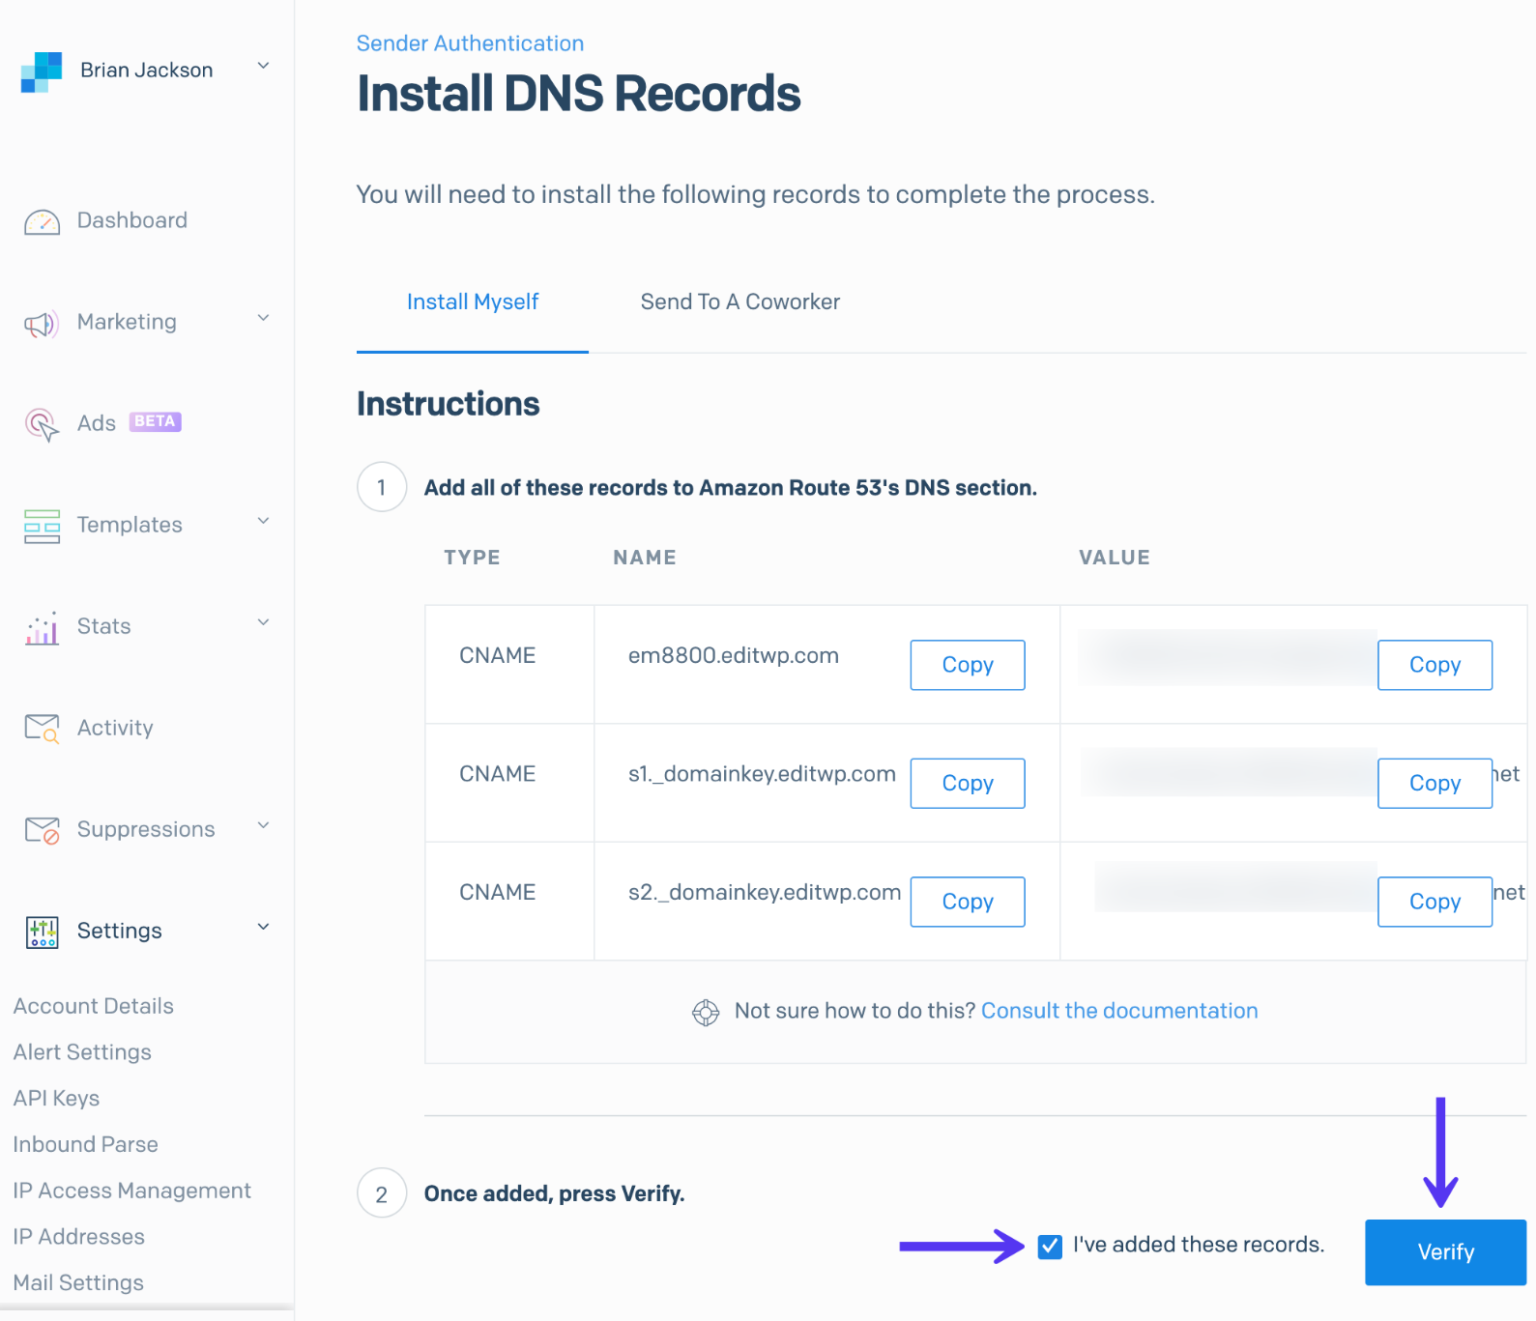
Step 4
You will then need to add DNS records so that your email points to SendGrid. You can do this at your domain registrar or third-party DNS provider. They require three CNAME records.
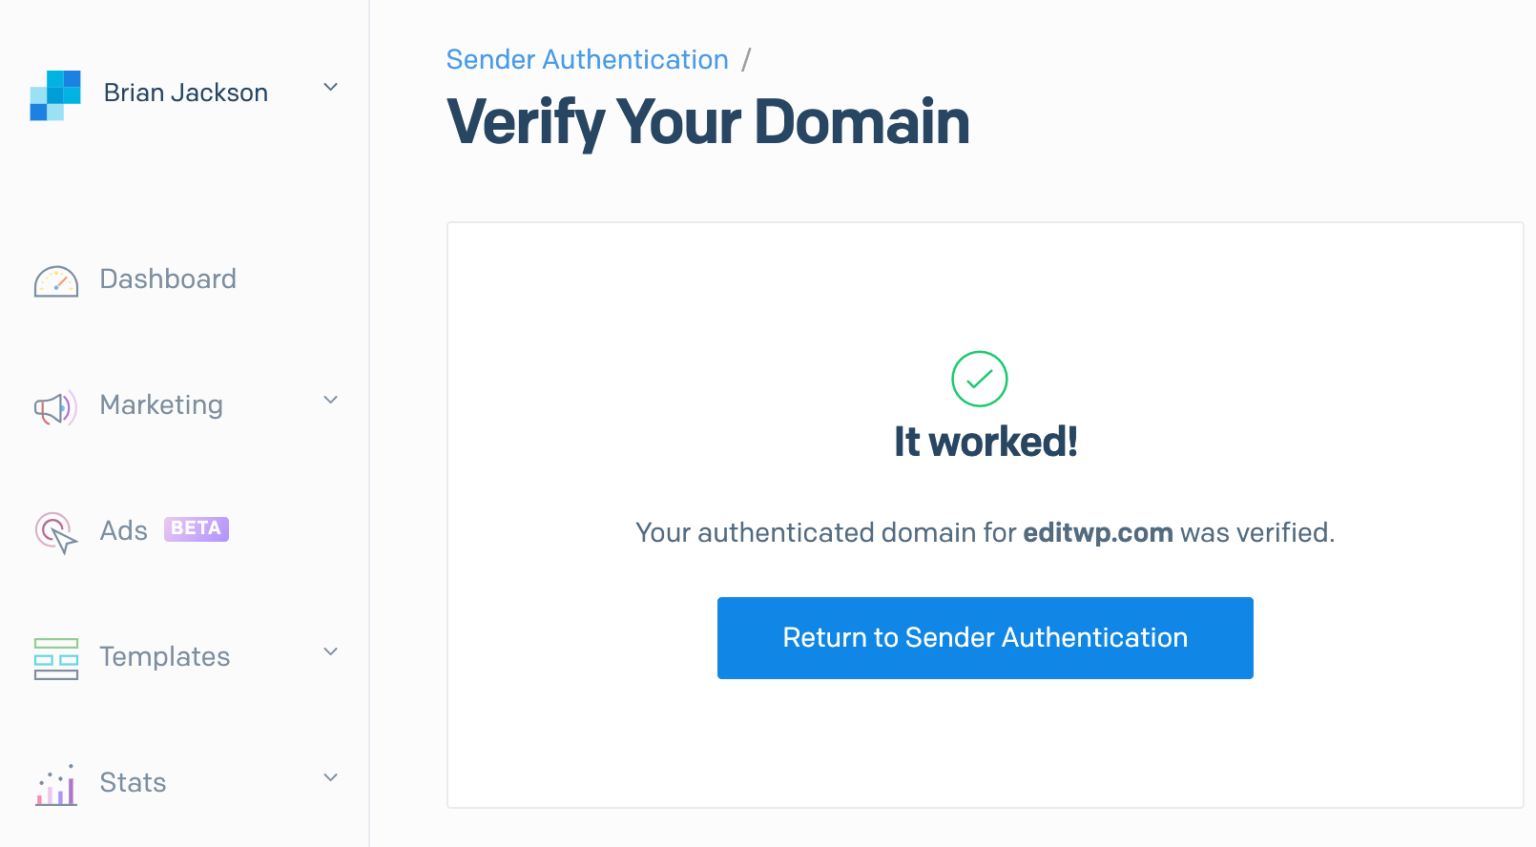
You should then see a "It worked!" message when the domain verification is complete.
You should be all set up now for sending emails! Remember, the plugins above replace the default wp_mail function. This means all emails going out from your site will now route through SendGrid.
Alert: For Control Panel Help & Tutorials, click here: Panel Tutorials


