Running your website via HTTPS helps protect your WordPress site and user data. However, your site may sometimes encounter mixed content warnings.
These warnings are generally bad for your site because users tend to lose trust in sites that are not fully secured. Luckily, in this guide, we have shown you how to easily fix mixed content warnings in WordPress.
The mixed content warning does not prevent your website from displaying content on a page. However, you need to resolve it as soon as you start seeing the warning because it can negatively impact your sites¡¦ SEO ranking.
Luckily, resolving the warning is fairly straightforward. In this guide, we will show you 4 ways you can easily fix mixed content issues on your WordPress site.
Mixed content error in WordPress occurs when moving your website from HTTP to HTTPS. Some of the resources on your website may retain their HTTP links even after you successfully installed SSL on your site.
Secondly, mixed content warnings may be caused by the static files on your website such as media files or javascript files. If you are using an absolute URL to link to your website files, then you may also encounter mixed content warnings on your site.
Lastly, a mixed content warning might occur if you are hardcoding the URLs to images on your pages or widgets using HTTP connections in the URL (eg http://yoursite.com/photo.jpg).
How to Easily Fix WordPress Mixed Content Issue
You can use an online tool such as Why no Padlock? to check for mixed content warnings on your website.
To do this, go to their website using the link above.
When there, enter your site address in the box and then click on Test Page.
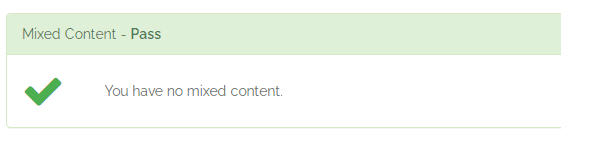
If there are no mixed content warnings on your site, you will see a result similar to the one in the image below.
However, if some content on your website is using HTTP connections, then you will see a mixed content warning with the links to the resources causing the error as seen below.
1. Using SSL Insecure Content Fixer
One easy way you can fix mixed content warnings on your site is using the SSL Insecure Content Fixer Plugin. The plugin helps in resolving insecure links or files on WordPress sites.
It has different levels of action from which you can choose. The default is the Simple level.
With the simple level, the plugin will go through your site and check for mixed content errors in your stylesheets, scripts, and images.
If there are mixed contents, it will resolve the issue. However, if you hardcoded the URL to an image on your posts or pages, the simple level may not resolve it on your site.
For this, you will need to try out a higher level of fixing. Below are other levels that come with the SSL Insecure Content Fixer.
- Content: This level, in addition to all the features you get with the simple level, will further scan through your posts and pages to find insecure content. Also, it will go through the resources available in your text widgets.
- Widgets: With this level, you get all the functionalities in the simple and content levels mentioned above. In addition, it will scan through all the widgets available on your WordPress site. If there are insecure contents on any of your widgets, the plugin will resolve it.
- Capture: This level goes through all the content on your page. From the header, to the page content, and then the footer. It performs a thorough check and fixes any entry of insecure content on your site.
- Capture All: Includes all the functionalities in all the levels mentioned above. In addition, it will go through AJAX (Asynchronous JavaScript and XML) calls on your website. However, this can affect your site performance.
How to Use SSL Insecure Content Fixer
To get started, install and activate the plugin on your WordPress admin dashboard. After that, Go to Settings > SSL Insecure Content.
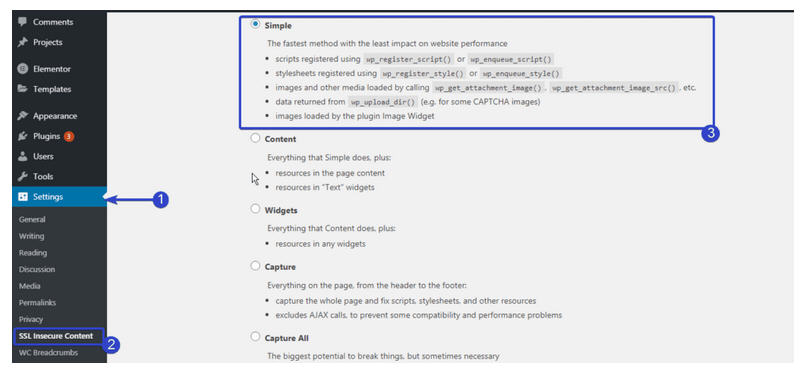
Now, select the level you wish to apply on your site.
Then scroll down and click on the Save Changes button.
Side Note: As you go higher with the level of the fix, the impact on your site grows as well. This means, when you select the Capture All level, it may affect your site speed.
Therefore, it is best to begin with the Simple level, then walk your way up to the advanced levels if the previous level does not completely fix the warning on your website.
2. Test and Replace HTTP files
You can manually replace the files by editing your theme files directly. However, some plugins like "Better Search Replace" or "Elementor Page Builder" can make this process really easy. It is recommended to backup your site and database before proceeding.
Using Better Search Replace
This plugin lets you update your database tables directly using the search and replace feature. Thus, you can search for all entries with the non secure http protocol, and replace them with the secure https protocol.
To start, you need to install and activate the Better Search Replace plugin on your WordPress site. Please read this guide, to learn how to install WordPress plugins.
After activating the plugin, go to Tools > Better Search Replace and then click on the Search/Replace tab.
Now, enter your website address in the ¡¥Search for¡¦ textbox using the HTTP format (eg http://yoursite.com).
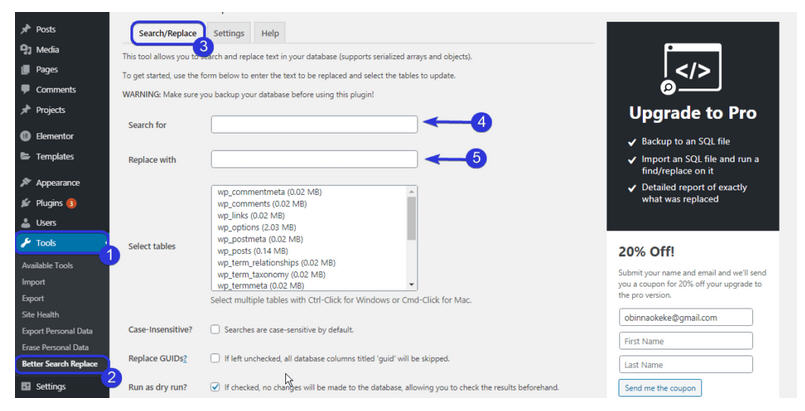
In the ¡¥Replace with¡¦ textbox, type your site address using the secure HTTPs format (https://yoursite.com).
Next, select the database table(s) on which you want to run the search/replace. This should be the wp_options, wp_posts, wp_terms, wp_term_relationships and wp_term_taxonomy tables.
To select multiple tables, hold the "ctrl" key and then click on the table name.
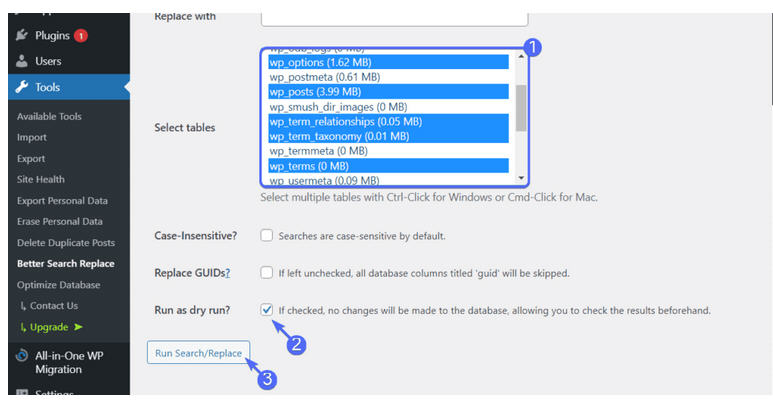
You can enable the Dry run option. When enabled, it will show you how the changes you make will affect your database before committing the changes. Finally, click on the Run Search/Replace button.
Using Elementor Page Builder
The Elementor plugin enables you to build a WordPress site using its drag and drop features. However, it also has a feature that lets you find and replace insecure links on your website.
You should ideally use this option if you already have Elementor installed. If not, use the Search and Replace plugin above.
In your dashboard, go to Elementor > Tools and then click on the Replace URL tab.
Now, enter your website with the HTTP format in the old URL textbox. Then enter the secure HTTPS version of your site in the new URL textbox.
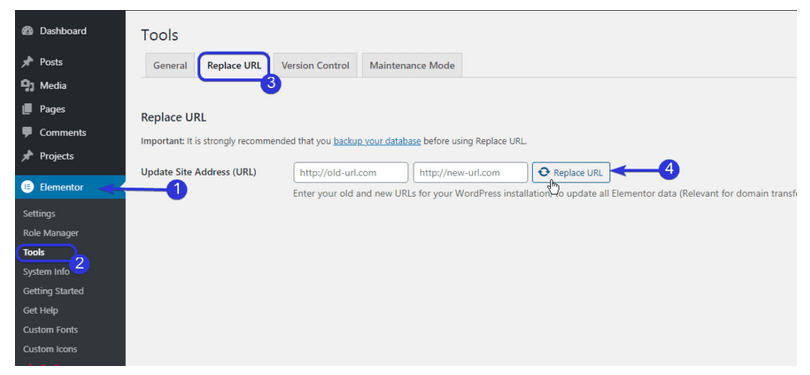
Afterward, click on Replace URL.
If using any of the plugins above fixes mixed content warnings on your WordPress site, great. However, if you are still seeing them, it is likely a hardcoded script/image is the cause. For this, you will need to manually replace the links on your theme files.
Alert: For Control Panel Help & Tutorials, click here: Panel Tutorials


