

Sometimes when you make changes on the staging site, there can be new data generated on the live site at the same time. In this case, you may also want to update the new data to the staging site before finally pushing it to the live site. To do that, go to Wordpress Dashboard > SellCloud Staging plugin > Staging Sites tab, click the Update the Staging Site button after the site.
Next, choose what you wish to update from the live site to the staging site.
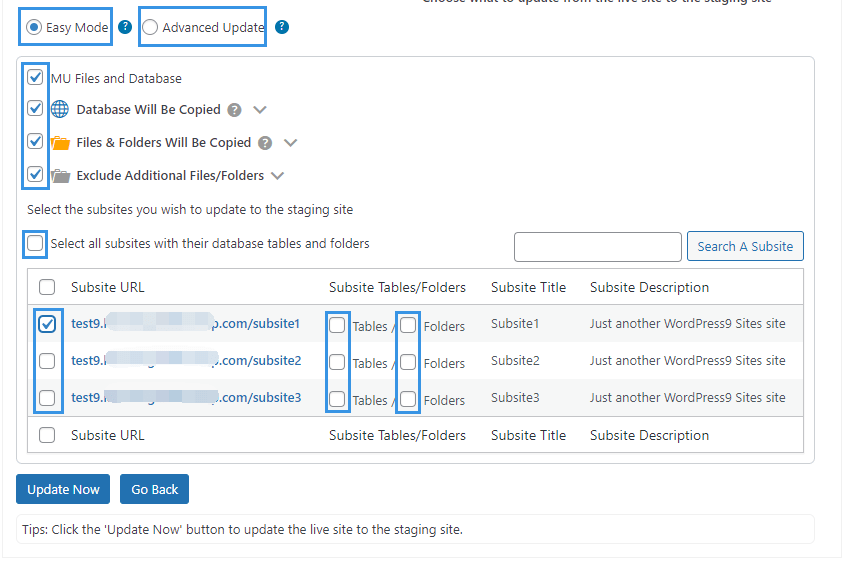
If the staging site is a Multisite network as you chose when creating it, you'll also have the options of:
Easy Mode: Quickly get started by choosing the entire MU database and custom files and/or specific subsites and updating them to the staging site.
Advanced Update: Give you the freedom to choose custom files and database tables of the entire MU network and update them to the staging site.
Once done, click the Update Now button to start the process.
Note: Please do not close or refresh the page while the plugin is updating the staging. It can take some time depending on your connection speed and the size of the copy.
Once the update is done, you'll receive a popup message saying "Updating the staging site completed successfully".