

Product categories
Categorizing products is a great a way to de-clutter your WooCommerce shop and intuitively guide users to the page they are looking for. In WooCommerce you can easily group your similar products under a category or sub-catgory, making it easy for users to scan and find the products. Adding a category in WooCommerce is very simple. Go to Dashboard > Products > Categories
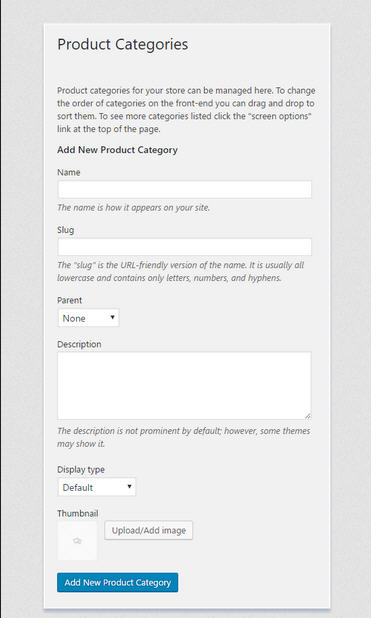
How to add Products Categories
- Go to Dashboard - Products Categories
- On the left pane, you will find these fields (Name, Slug, Parent, Description, Display type & Thumbnail)
- Name: Your product category name (e.g. Shoes)
- Slug: determines the URL (e.g. if you write shoes it will translate into
www.yoursite.com/product-category/shoes) - Parent: If this category is the parent category or does it falls under another category
- Description: Detailed category info.
- Display Type: Determines when visitors lands on the category page what (products, subcategories or both) they will see.
- Thumbnail: Image of the product category
- After filling out all the category information, click on Add New Product Category button.
Product tags
Product tags are another way to relate products to each other, next to product categories. Contrary to categories, there is no hierarchy in tags; so there are no "subtags." For example, if you sell clothing, and you have a lot of cat prints, you could make a tag for "cat." Then add that tag to the menu or sidebar so cat lovers can easily find all t-shirts, hoodies, and pants with cat prints.

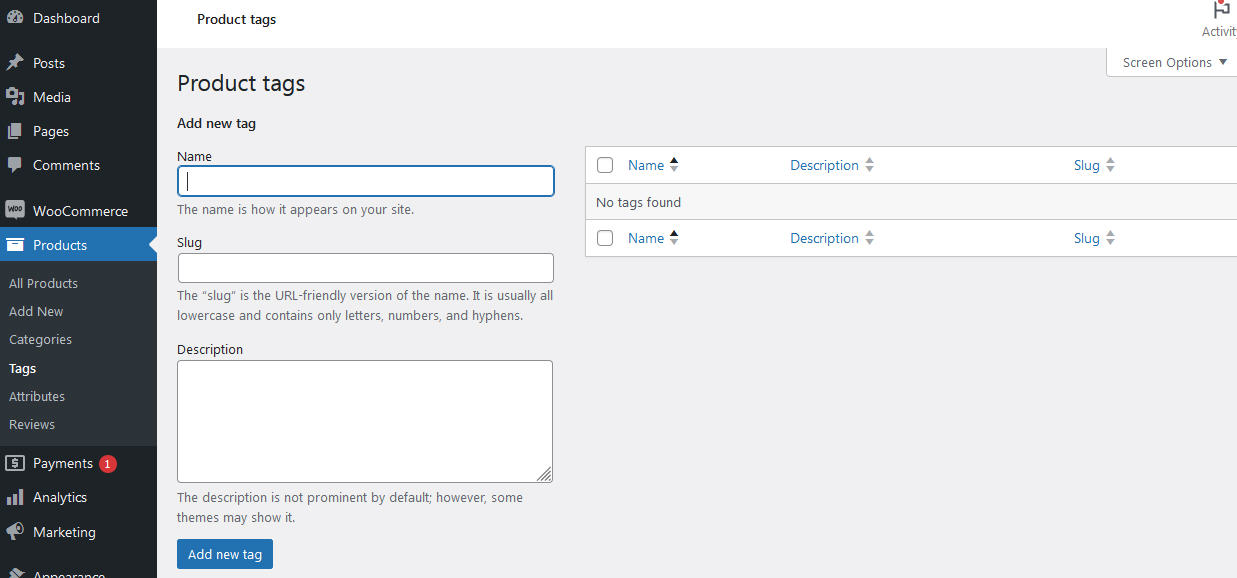
How to Add WooCommerce Product Tags
- Log into Wordpress admin panel and go to Products > Tags.
- Enter a tag name, slug and description.
- Press the Add new tag button.

What are WooCommerce Attributes?
Attributes add extra data to your WooCommerce products. Attributes are also useful for searching and filtering products. If you give attributes to products, users can filter using them. Often this filtering is done by WooCommerce widgets that allow users to filter products. Attributes are confused with Variations but they are different. Variations are not for searching or filtering. Variations allow users to choose different options for a product. This means you can sell a T-Shirt in different sizes and colors.

How to add WooCommerce Attributes
- We are going to create a name for our first attribute. We could call it "Styles".
- Name the new attribute "Styles".
- The slug will automatically be created, and we can leave the rest of these options untouched. They primarily control how you can search for attributes.
- Click "Add attribute" and your attribute will be added.

Create some different styles
Now that we have created our attribute, we can create some different styles. Click "Configure terms" in the same row as "Styles".

Add types of styles
Let's add our three types of styles: Polo, Circle Neck, and U Neck. You'll have to do them one at a time.
- Enter the Product Style Name.
- Give it a short description.
- Click "Add new style".

Attributes completed list
After adding the 3 styles product you'll know you're done when you see the completed list, as in the image