
Note:
- If you install Wordfence plugin, it needs to be temporarily deactivated or uninstalled before the migration, as it will write some absolute paths in the .htaccess file that may cause problems when replacing the .htaccess file.
- By default, the migration will replace the themes, plugins, uploads, database and/or other files and directories(except the wp-config file) of the target site.
Step 1. Export the Source Site to Localhost(Web Server)
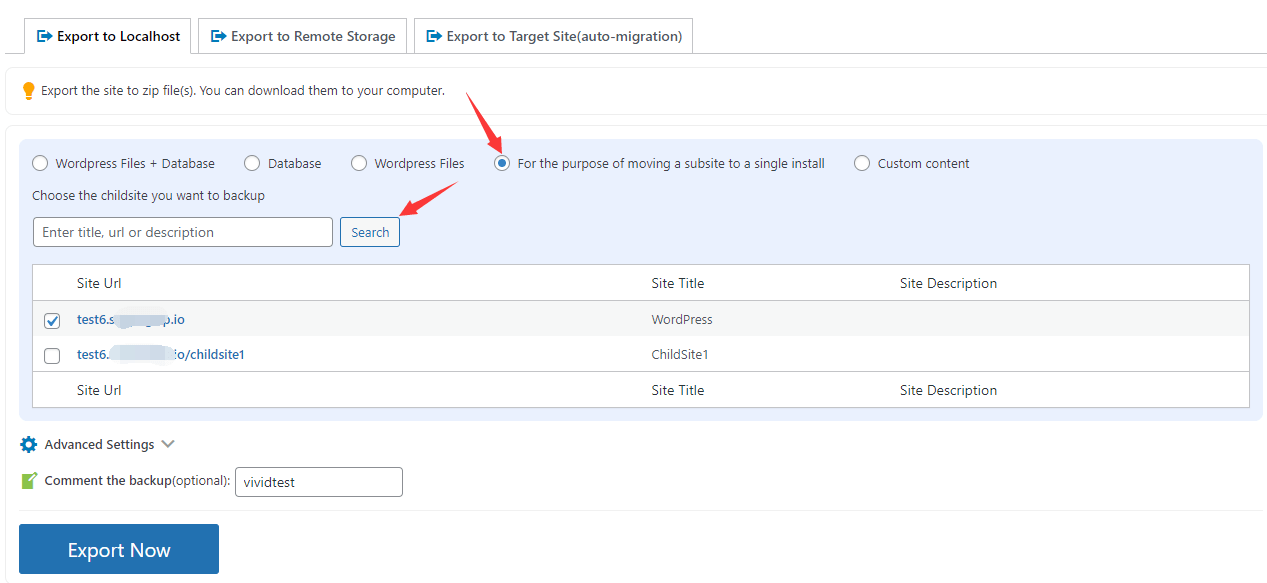
First, go to the source site > WPvivid Backup Pro > Export Site > Export to Localhost(Web Server).
Choose the option "For the purpose of moving a subsite to a single install".
Enter a subsite title, or click Search directly to show all subsites, then select a subsite to migrate.

Step 2. Import the Source Site to the Target Site
Go to the target site, go to WPvivid Backup Pro > Import Site > Import from Localhost(Web Server). Click Select Files to select the exported zip(s) or just drag and drop the zip(s) to the field.
Note: Please make sure to upload all the parts(zips)(if any) of the backup at a time.
Once done, click Upload button.
