Website performance is one of the key factors for Google rankings starting from 2021. We get a number of messages from our clients every day asking about their WordPress website speed. This article will cover most of the WordPress website aspects that affect the speed and may increase Google Core Web Vitals.
We are always struggling to optimize our themes' performance in every update. Our WoodMart WordPress theme 7.0 update was mostly dedicated to its performance and as a result, we optimized most of the aspects related to our theme and reduced our CSS and JS on average by 50%.
After all these steps we will get a super-fast website that has a 90+ score on mobile and desktop devices in Google Page Speed.

Step 1. Install the theme and fill it with your content
Firstly, when you install our theme on a fresh WordPress installation you usually import our dummy content as well. Our dummy content is created in order to help you to start working with your website faster and understand how everything is built and configured. But it is not optimized for the best performance since it contains a lot of images, pages, posts and products that you probably will delete soon. That is why you don't need to measure the performance on this step.
After theme installation, you need to go through your website sections and fill it with real images, products, posts and pages. By doing that, you remove all the obsolete data and make your website usable for your future visitors. Only after this step, you need to care about the website speed. Here is a list of our recommendations for you before creating your pages, posts and uploading the images:
1. Check if your website has a valid SSL certificate. It is the basic thing you need to care about in terms of performance and security. If you don't have the certificate on your website yet, you need to contact your hosting provider for help.
2. Optimize all the images before uploading and use the right image size. (Step 3)
3. Make sure that you replace all the images from our dummy content with your own. Some of them might be loaded from our server and slow down your website.
4. Don't create bloated pages with tons of different sliders, animations, carousels and products. Note that every element on the page increases its complexity and DOM size. That would lead to further problems with performance. So keep it as simple and clean as possible.
Step 2. Check your server response time and optimizations
It is very important to have a fast and reliable hosting server for your future website. As our test case is hosted with SellCloud we don't have any worries about the server response time. This parameter depends on a lot of different factors but with a clean installation and without any plugins it shouldn't be more than 0.5s-1.2s (without even cache plugins installed). Here is a few recommendations about how to measure the server response time properly:
1. This parameter may vary from page to page. Usually, we test it on the shopping cart page since it doesn't have any extra elements and the cache plugin (if enabled) doesn't affect it.
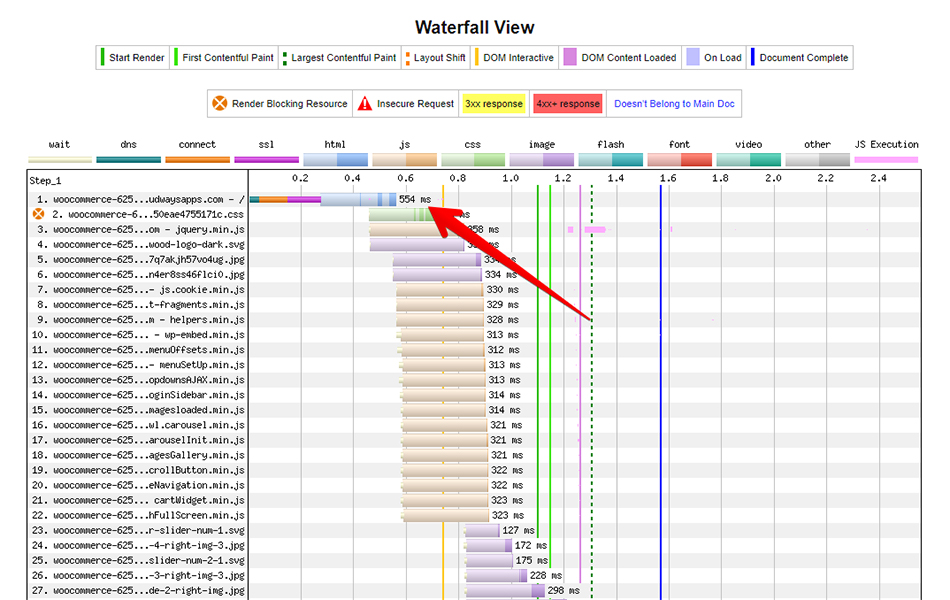
2. You can run this test using the WebPageTest service https://www.webpagetest.org/ Your server response time will be the first request in the "Waterfall"
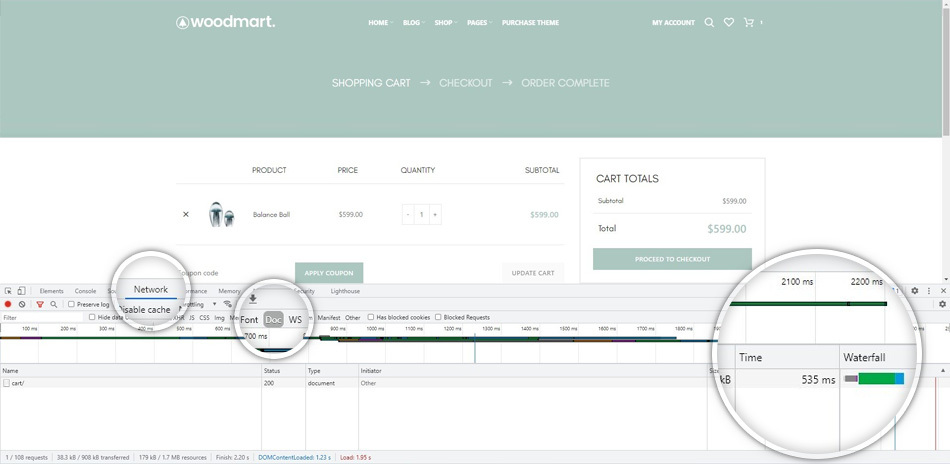
We also use Google Chrome inspector for this. Click on the right mouse button somewhere on your page and open the "Inspector" (Ctrl+Shift+I). Then switch to the "Network" tab and reload the page. Filter the results by "Doc" and check the response time as shown on the screenshot
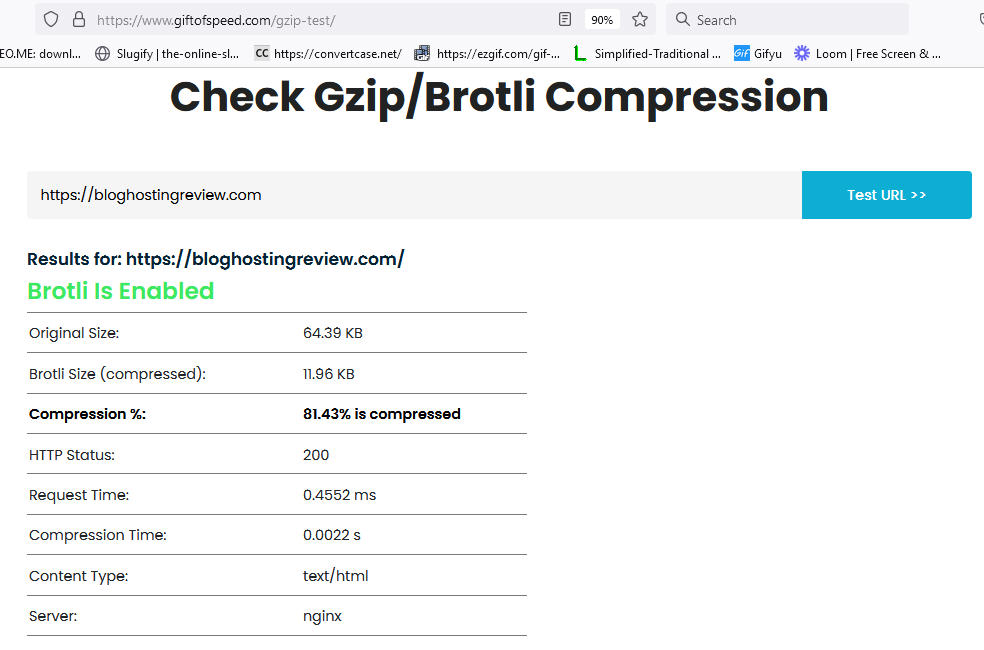
It is necessary to have GZIP compression activated on your server to optimize the resources loading size and time. It is enabled by default in SellCloud. If it is not enabled on your server, then you need to contact your hosting provider for help. Check if works correctly using the following service https://www.giftofspeed.com/gzip-test/
Step 3. Configure theme performance settings
Our theme by default is configured to have a good performance and support most of the functions. But if you don't use some functionality you can disable them and get even better performance. Here is a list of options that you might want to configure right after the installation:
1. Theme Settings -> Performance -> CSS -> Light bootstrap version. Our theme uses only the grid system so you can reduce the CSS file size by enabling this option.
2. Theme Settings -> Performance -> CSS -> Disable Gutenberg styles. Since in most cases you use Elementor or WPBakery page builder, it would be better to disable all Gutenberg CSS and JS files completely.
3. Theme Settings -> Performance -> Fonts & Icons -> "font-display" for Google fonts and icons. We recommend setting the "Swap" value there for better performance. Read more information about all the available options here https://developers.google.com/web/updates/2016/02/font-display
4. Theme Settings -> Performance -> Lazy loading. We don't always enable this option but it can reduce the page size if you display a lot of different images on your pages.
5. Theme Settings -> Performance -> Plugins -> Load Elementor optimized CSS. Almost all our demo pages are built with our own elements and we don't use default Elementor widgets. That is why we have included a "light" version of the Elementor CSS file. Note that if you are using some standard widgets that come with Elementor by default then you don't need to enable this option. This also relates to options: Load Elementor animations CSS file, Load Elementor icons CSS file, Elementor dialog.js library, Elementor frontend. Be careful disabling them since they break default widgets. You need to test every page of your website after configuring this section.
6. If you are using WPBakery page builder, then you can reduce the CSS size by disabling those widgets via Dashboard -> WoodMart -> WPBakery CSS Generator.
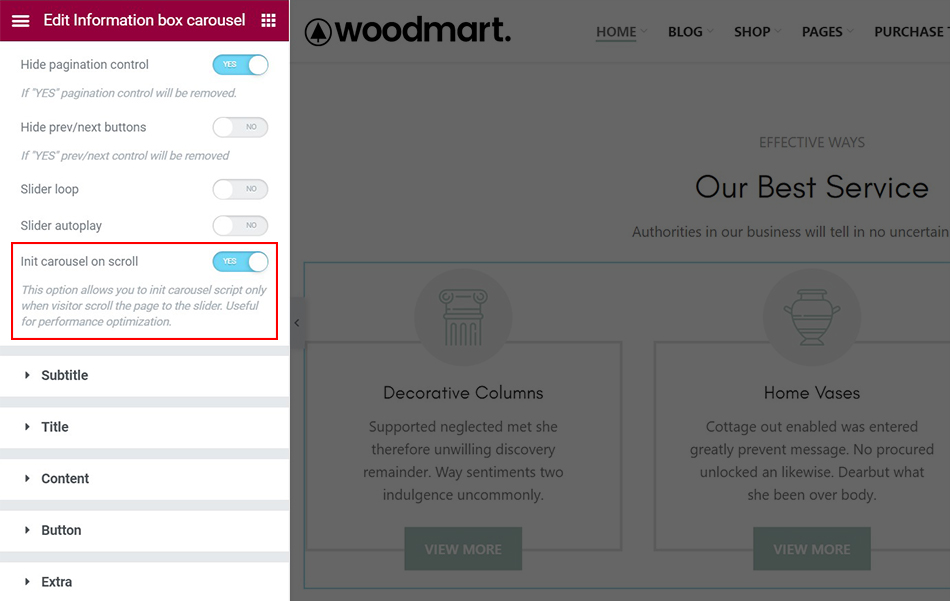
7. Init carousel on scroll. This option is very useful for all carousel elements on the page that are not on the initial screen. We recommend you walk through all the carousels on your pages and enable this option. It will reduce the initial JS execution time.
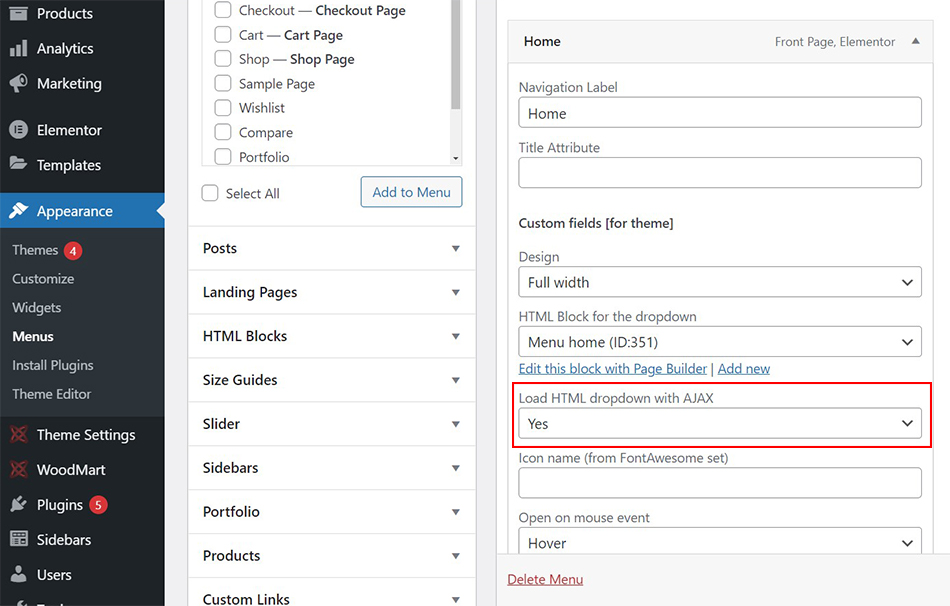
AJAX menu dropdowns. Enable this option for all dropdowns with HTML blocks via Appearance -> Menus. It is very useful to reduce the DOM size on the initial page load and improve the performance.
All these options can reduce your page size by 10-40% but you need to check everything carefully after enabling/disabling any of the mentioned options.
Step 4. Images optimization
Large, not optimized, and not properly sized images are one of the most popular problems that slow the page down dramatically. Usually, images take 50-80% of the page's total weight. That is why by optimizing all the images and reducing their number (if possible) you can increase all Core Web Vitals scores.
Image weight mostly depends on its size in pixels. But it shouldn't exceed 100-200KB for any image. The average size for product and post image should be up to 50-150KB and only large images for hero sections and sliders can be 150-200KB but not more. You can optimize all the images before uploading using popular services like https://tinypng.com/
Just upload your image there and download the optimized one. If you don't want to do this manually you can install an automatic image optimization plugin. We recommend Imagify as the best choice for this task. https://imagify.io/
This plugin also creates a WEBP format for your images that reduces their weight by 20-40% more. Our theme supports the WEBP format so we recommend enabling it for your website.
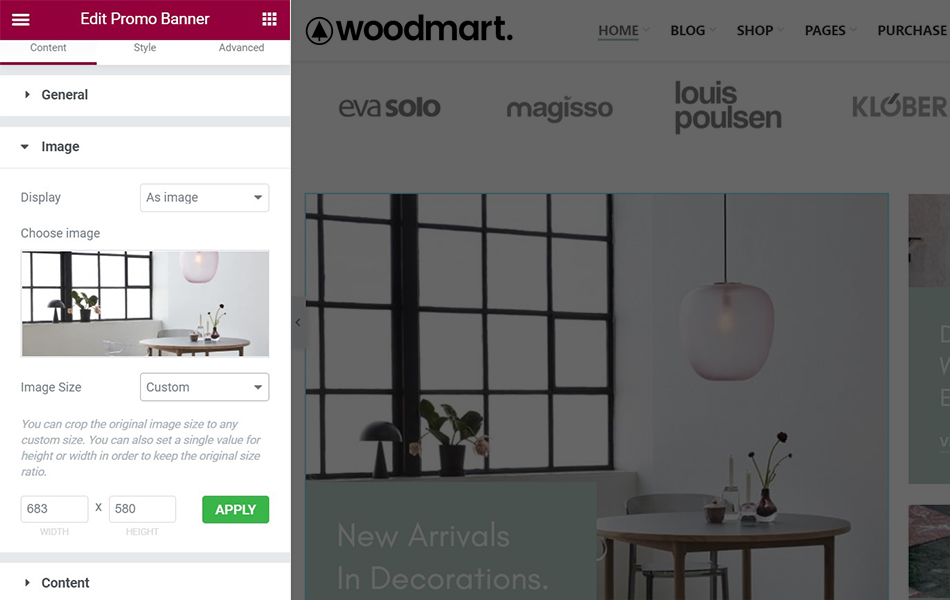
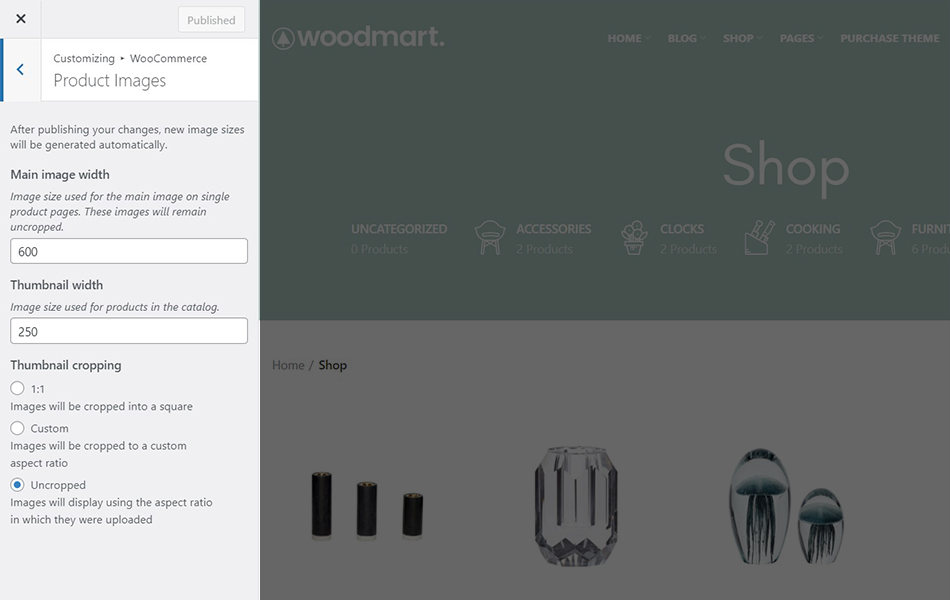
Now, when you have optimized and uploaded the image you need to take care of its size on the page. For example, if you have a website container size of 1200px and 6 columns of products then your product thumbnail size shouldn't exceed ~200 pixels. The image size can be set in different places for particular sections of your website:
1. For products on the shop page via Dashboard -> Appearance -> Customize -> WooCommerce -> Product images
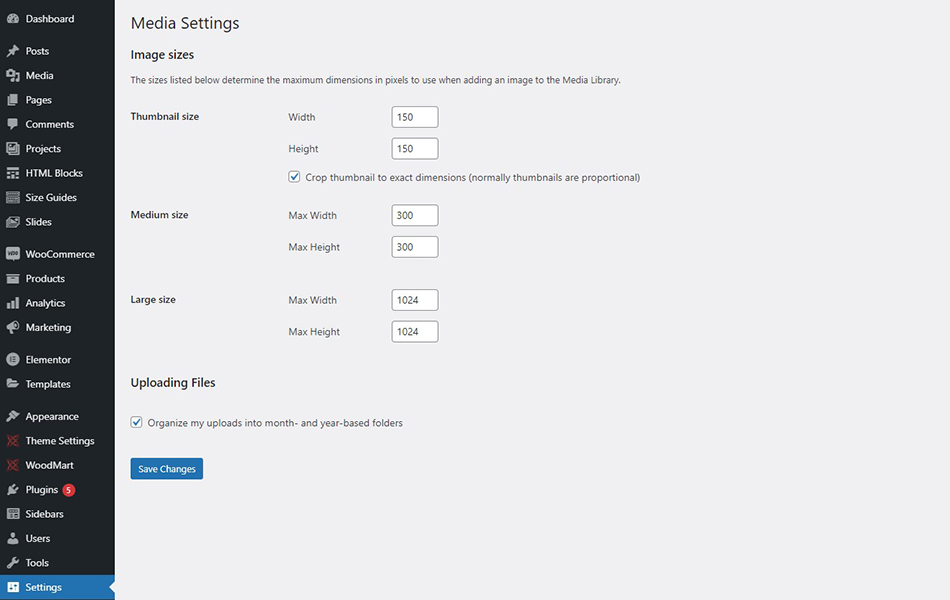
2. For blog posts Dashboard -> Settings -> Media
3. For particular elements on the page (banner, infobox, gallery, etc.) you can set image size while editing this element with the page builder (WPBakery or Elementor)