What is a pull zone?
To start using BunnyCDN, you will first need to create a pull zone. Usually, a pull zone is created for each website. It tells our system where to find your files and how to serve them to your users.
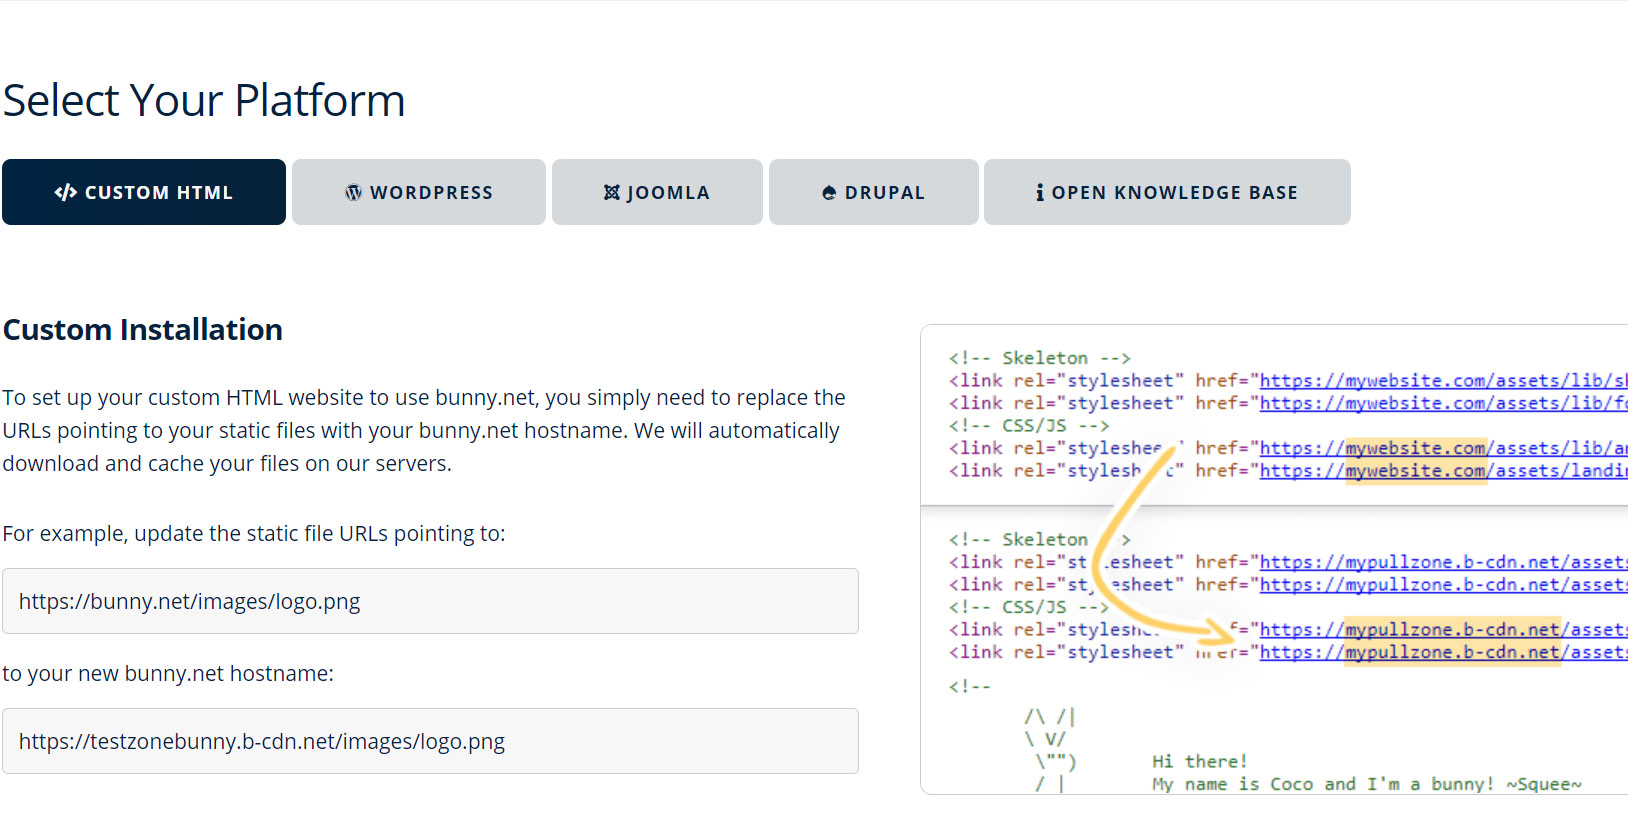
After creating a new pull zone, BunnyCDN will create a new hostname address such as mywebsite.b-cdn.net. You will then be able to use this address to quickly deliver your content. BunnyCDN will automatically fetch and cache files from your existing server and make them available on the same URL.
For example, if you have a file at:
https://mywebsite.com/image.jpg
the same file will now be available at
https://mywebsite.b-cdn.net/image.jpg
Understanding the basic pull zone settings
When creating a pull zone, there are two simple fields you should pay attention to. These are the origin URL and name of your zone.
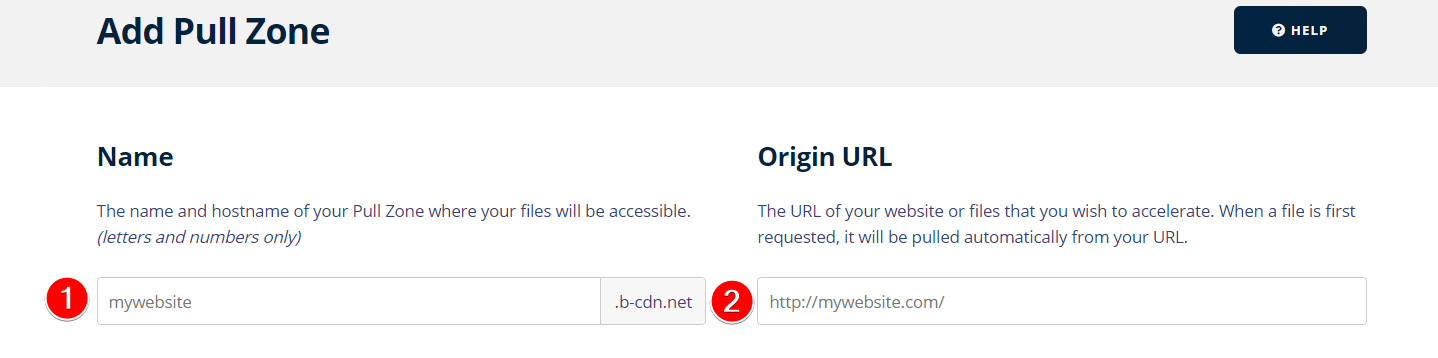
1. Name
The name of your pull zone is a globally unique name that identifies your zone. Based on it, BunnyCDN will also generate a new hostname for you, where you will be able to access your files as described in the introduction.
2. Origin URL
The origin URL is the main setting of your pull zone. It tells our servers where to fetch files that we don't yet have in cache. In the majority of cases, this will simply be the URL of your website or storage service. Make sure that if your website is using HTTPS to make your origin URL is set up with HTTPS as well to make sure the connection is encrypted throughout the network.
Next: Configuring your website with CDN
After creating a zone, the next step is to configure your website to use it. We provide simple to follow instructions straight in the dashboard itself that will allow you to get BunnyCDN integrated in less than 5 minutes on all major platforms.
Alert: For Control Panel Help & Tutorials, click here: Panel Tutorials


