This article contains a step by step guide on how to speed up your Drupal website with our CDN. Drupal comes with CDN support via a plugin that can be easily deployed on your Drupal installation.
1. Create a Pull Zone for your website
In order to be able to use CDN to accelerate your Drupal website, we need to first set up a Pull Zone inside CDN panel tab.
Ensure that you use the protocol that matches your website address exactly otherwise, you will get errors. If you deploy HTTPS on your main Drupal website, enable HTTPS on your BunnyCDN zone. If you deploy an HTTP only site, deploy a BunnyCDN zone without HTTPS. We have a guide on how to deploy a CDN Pull Zone.
When you create a Pull Zone, you can set the Cache-Control time very high for Drupal. The reason behind this is that the CDN plugin will ensure that any update you make to an element of your site is served out of a new URL, so you do not have to wait for your cache to expire before your new content is viewable.
2. Installing the CDN plugin
In order to configure Drupal to use a CDN, we need to install the Drupal CDN plugin from here. You will need access to your website, either via SSH or FTP for this. From this page, copy the URL for the latest .tar.gz download, you will need this for the installer.
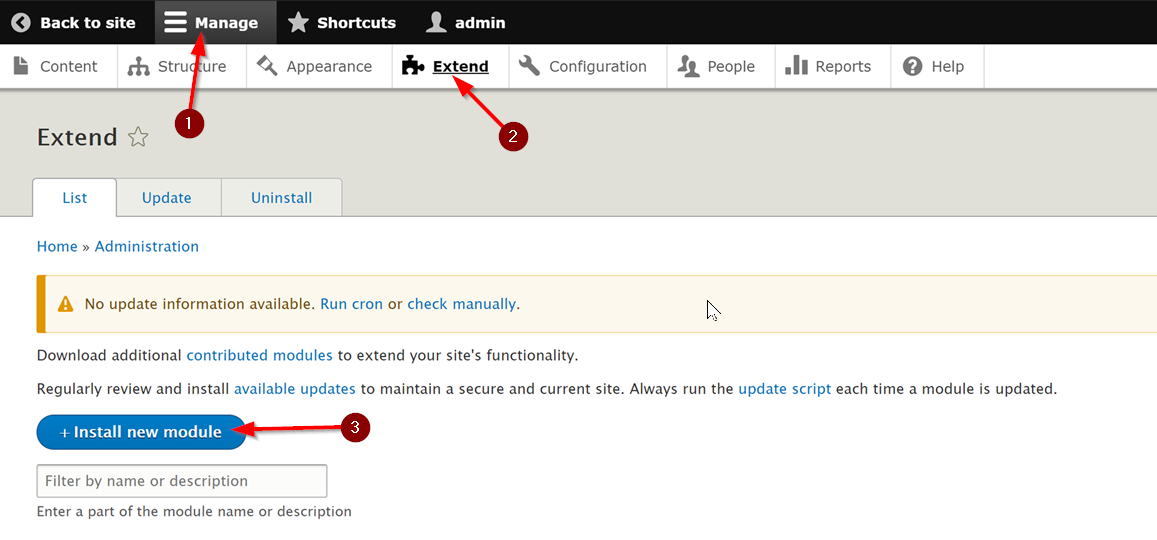
Inside the Admin section of your Drupal site, select "Manage" (1) and then "Extend" (2) and then click on the "Install new Modules" (3) button
When you click "Install new module", you will then be asked for the URL for the module you want to install. Paste the .tar.gz download URL we copied earlier, and then press install. Provide the SSH/FTP credentials for your website on the next page.
Once the installer has finished, you will get a success page. Click on the "Enable newly added plugins" option, and this will take you back to the page in the screenshot above.
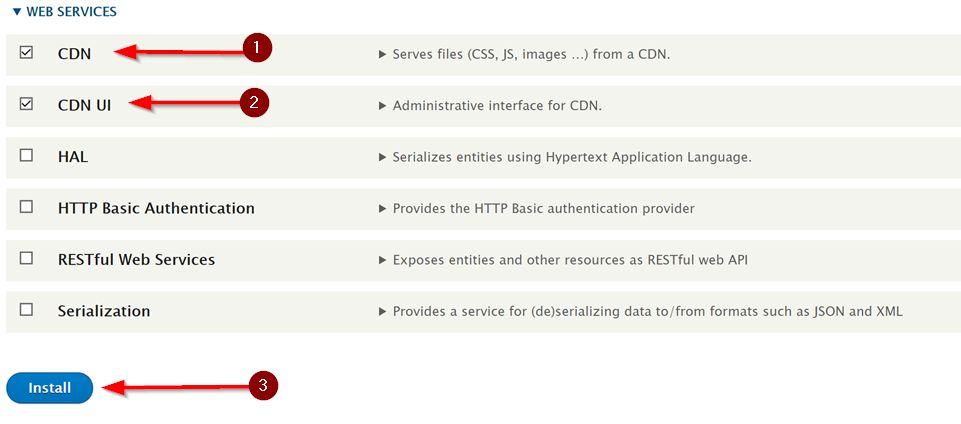
Scroll down until you see the "Web Services" section at the bottom, and select the "CDN" (1) and "CDN UI" (2) plugins (the plugin we installed earlier, installed both), then click the "Install" button (3)
3. Configure the CDN plugin to serve content with BunnyCDN
Now we have installed the CDN plugin, we now need to configure it to work with BunnyCDN. Navigate to "Manage", then click on "Configuration" on the bar below. Scroll down to the bottom, and click on "CDN Integration"
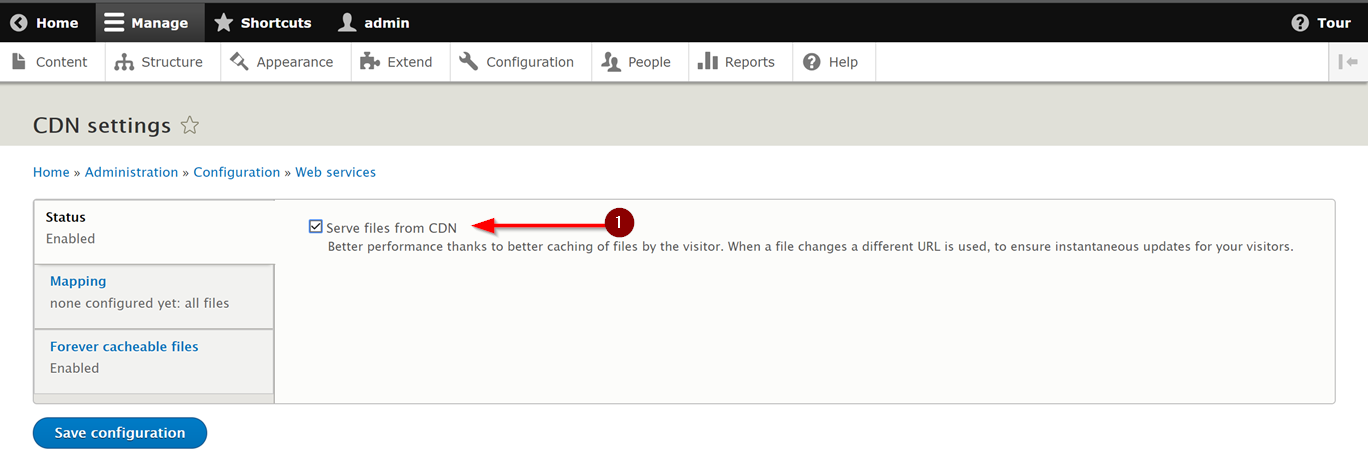
On the Status tab, make sure "Serve files from a CDN is enabled":
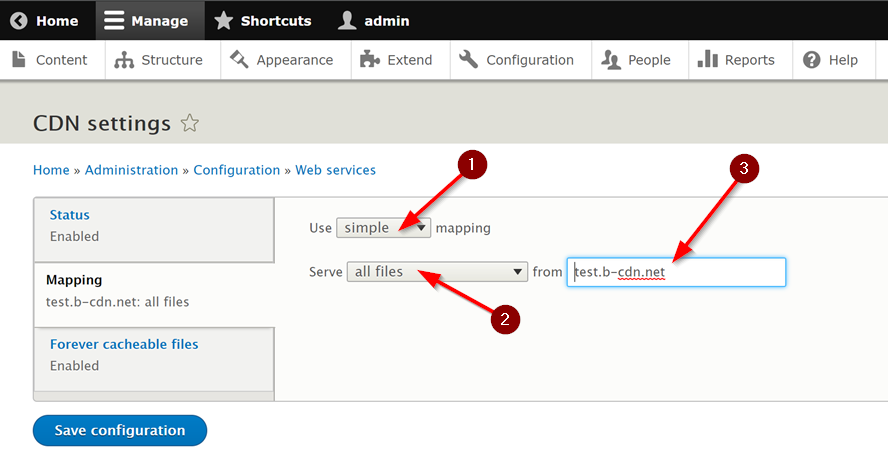
Next, click on "Mapping", select "Simple" mapping (1), and then select "Serve all files" (2) and enter your Pull Zone URL into the box on the right (3). Once you have done this, click "Save configuration".
Congratulations, you've just configured your Drupal site to serve content via CDN! You will now enjoy a much faster loading site for your users around the world, as well as a bandwidth saving on your origin server.
Alert: For Control Panel Help & Tutorials, click here: Panel Tutorials


