This article contains a step by step guide for speeding up your PrestaShop store using BunnyCDN. PrestaShop already comes with CDN settings ready out of the box, so the configuration is relatively simple.
1. Create a Pull Zone for your website
The first thing to do is create a pull zone for your website where your PrestaShop is installed and publically available. Make sure to use the correct protocol that matches exactly your website address, including the HTTP or HTTPS protocol. If you need help creating your zone, you can have a look at our article explaining how to create your first pull zone.
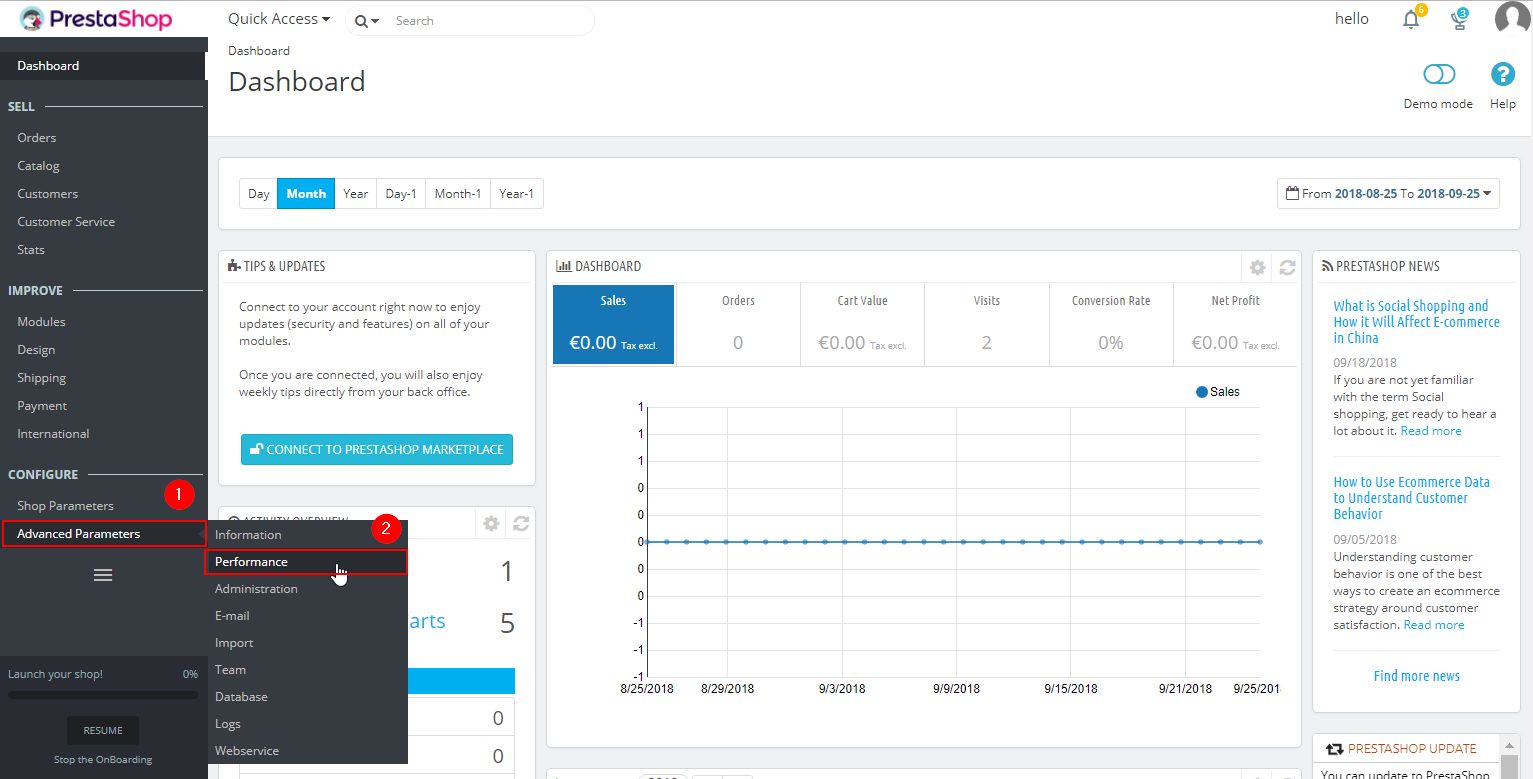
2. Open the PrestaShop
Next, log in to your PrestaShop admin panel, go to Advanced Parameters and then Performance panel.
3. Configure the CCC (Combine, Compress and Cache) section
A set of new configuration settings will open. The first thing you will need to set up will be the CCC (Combine, Compress and Cache) section. Here, you will either need to select Yes for the Smart Cache for CSS and Smart cache for JavaScript options as illustrated in the screenshot below.
If you are using an older version of PrestaShop, the dropdown menu will instead be replaced with 6 boxes. In this case, make sure the Use CCC for CSS, Use CCC for JavaScript are selected.
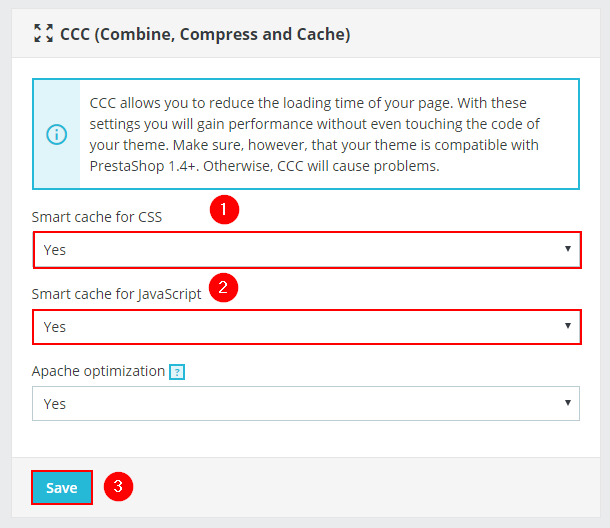
Next, click on the save button and continue to Step 4.
4. Configure the MediaServers
Finally, scroll further down to find the Media Servers section and enter the hostname of your BunnyCDN pull zone in the Media server #1 field as seen in the example below.

Click on the save button and your PrestaShop should be fully configured with BunnyCDN.
5. Clear Cache (Optional)
Finally, if you are using caching for your PrestaShop, just clear the cache with the Clear Cache on the top of the page and all of your pages should now be using BunnyCDN.
Alert: For Control Panel Help & Tutorials, click here: Panel Tutorials


