This article explains how to quickly set up your website to use BunnyCDN with a custom hostname using the CloudFlare DNS platform in three easy steps. We will assume that you have already created a pull zone.
1. Register the hostname on BunnyCDN
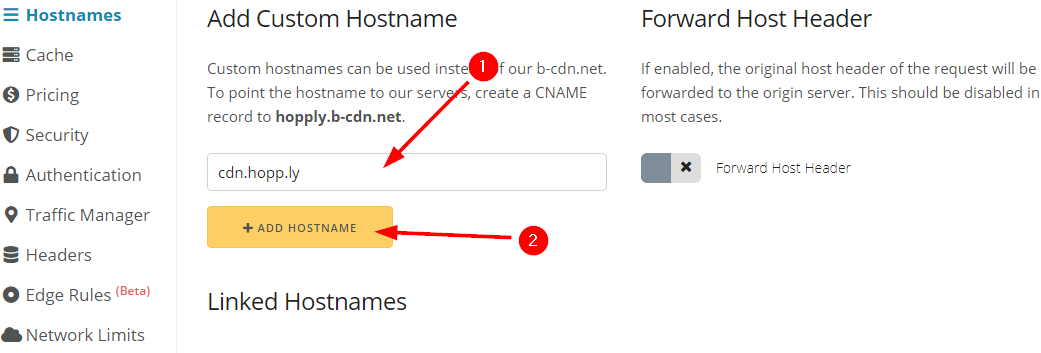
First, you will need to register the hostname in the BunnyCDN control panel. To do this, open your pull zone management page and select the Hostnames panel in the side menu. Now enter the full hostname that you want to wish, usually, this will be something like cdn.mywebsite.com. In our example, were are using cdn.hopp.ly. Next, click on the add hostname button and proceed to step 2.

2. Locale and copy your CNAME record
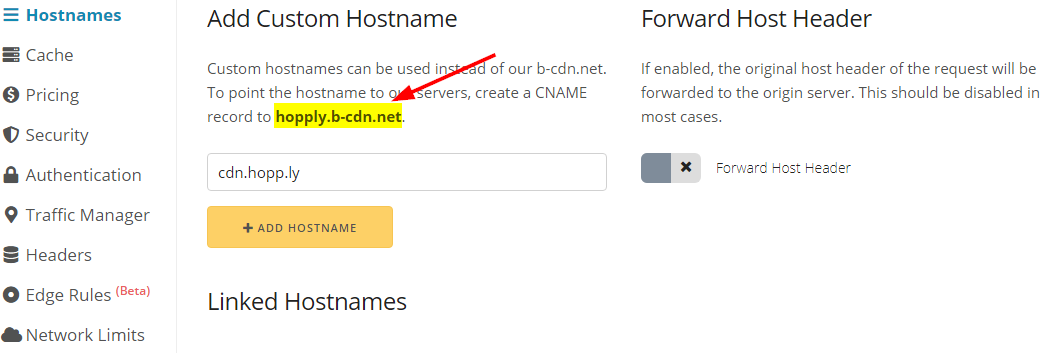
After the hostname is added, you will have to locate the CNAME record assigned to your pull zone. You can find this bolded in the Add Custom Hostname help paragraph as illustrated in the photo below. Either remember or copy this to your clipboard or remember this and then proceed to step 3.
3. Set up the CNAME record on CloudFlare
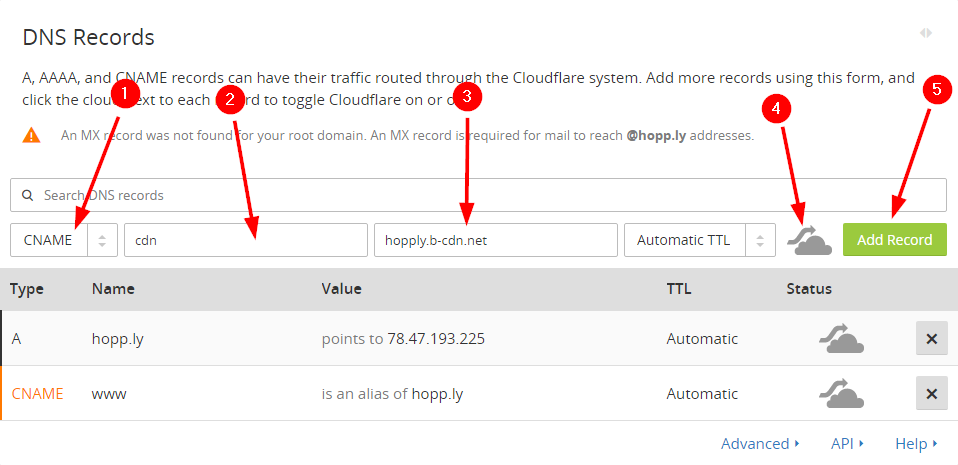
Finally, open your CloudFlare control panel for the domain you wish to add the custom hostname for and select the DNS settings in the top menu which will open a screen similar to the image below. Now follow the following:
1. First, select the CNAME record type from the dropdown menu.
2. Enter the subdomain of the hostname that you want to use and have added to BunnyCDN in step 1. Make sure to add the subdomain only, not the whole domain.
3. Enter in the CNAME record that you copied in step 2.
4. Disable the CloudFlare service on the hostname, making it DNS Only. This step is very important for optimal performance. Make sure the cloud has a gray icon.
5. Click on Add Record.

That's it! You should be all set up and BunnyCDN should be enabled on your hostname. Just make sure that before giving it a try to wait for a minute or so. Enough to allow CloudFlare to synchronize the DNS settings.
Alert: For Control Panel Help & Tutorials, click here: Panel Tutorials


