Setting up BunnyCDN with your Wordpress site is easy. It only takes a couple of minutes and can be done in 4 simple steps.
Step 1: Create your pull zone
First thing first, you need to create your pull zone. To do this, simply go to your BunnyCDN control panel, enter the name of the pull zone and enter the URL of your blog as the Origin URL. For a more advanced info check out How To Create Your First Pull Zone
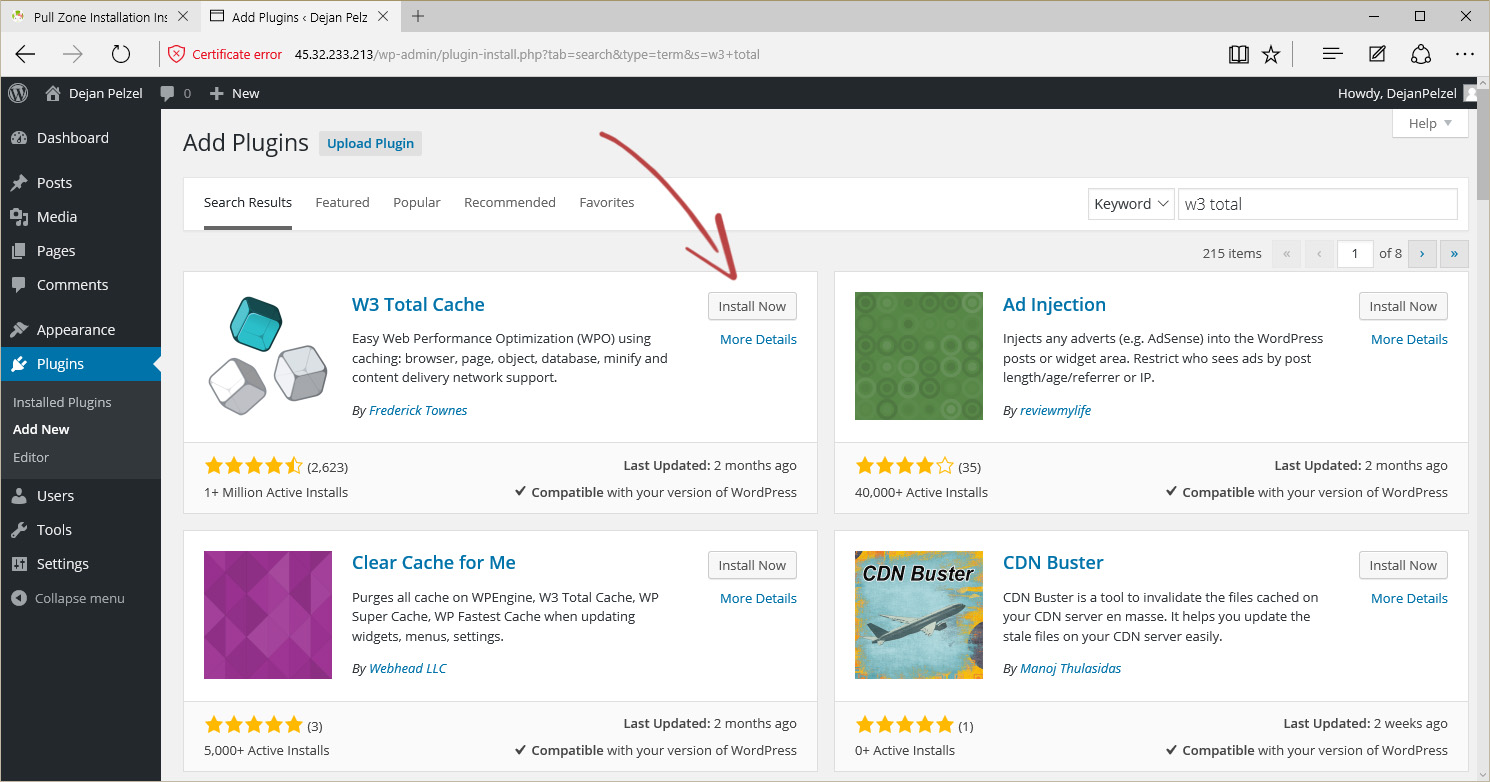
Step 2: Install W3 Total Cache plugin
Next, we will install the W3 Total Cache plugin. This will enable your Wordpress site to use the BunnyCDN. To install it, simply go to Plugins->Add New, search for W3 Total Cache and click on Install Now. After the installation is finished, click on the Activate plugin URL that shows up.
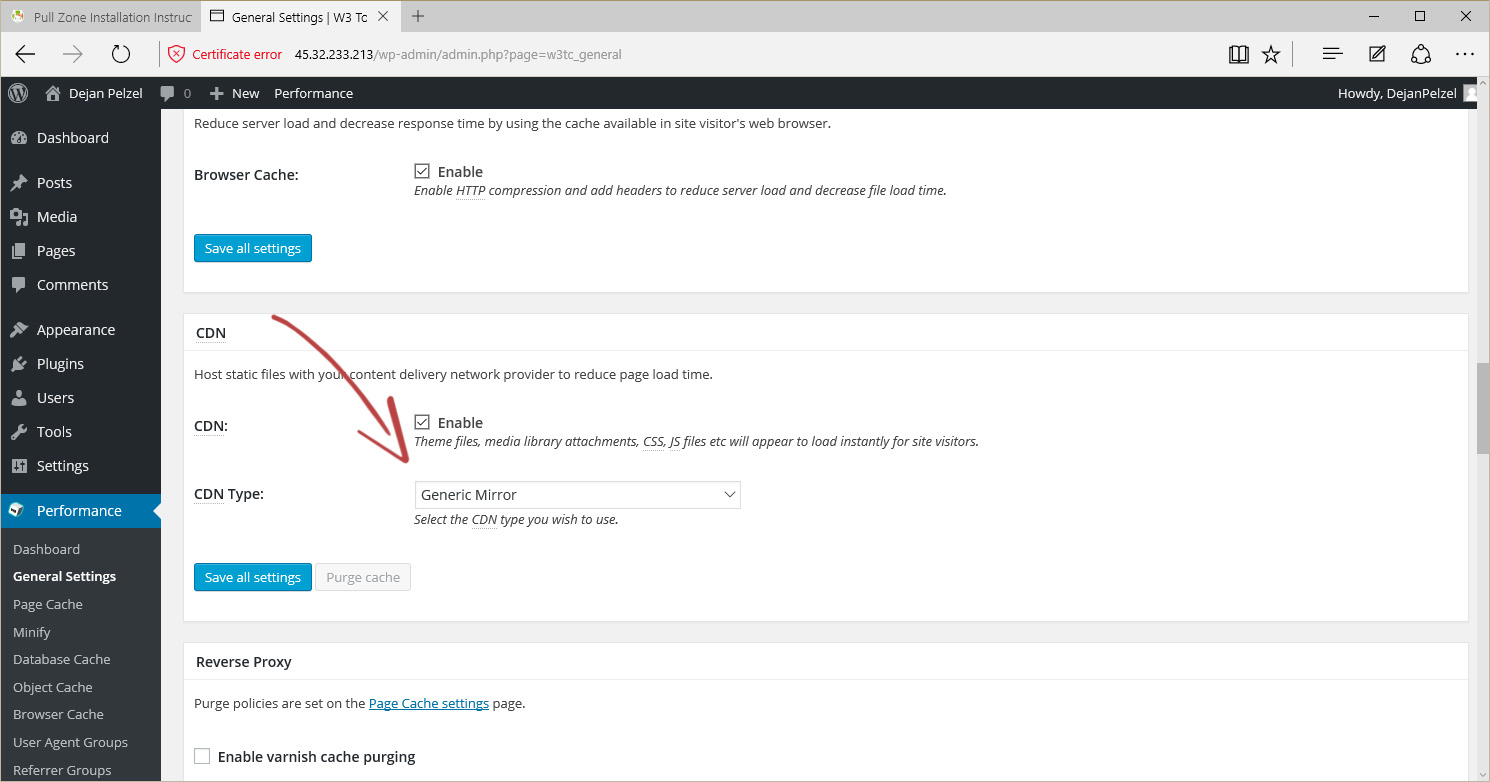
Step 3: Configure W3 Total Cache to use a CDN
In order for W3 Total Cache to use BunnyCDN as your CDN, you need to set some things up. First, go to Performance->General settings and scroll down to the CDN section. Do not open the CDN menu item on the left, this comes in step 4. Now set the CDN Type to Generic Mirror, click on the Enable checkbox and click Save all settings like shown in the screenshot.
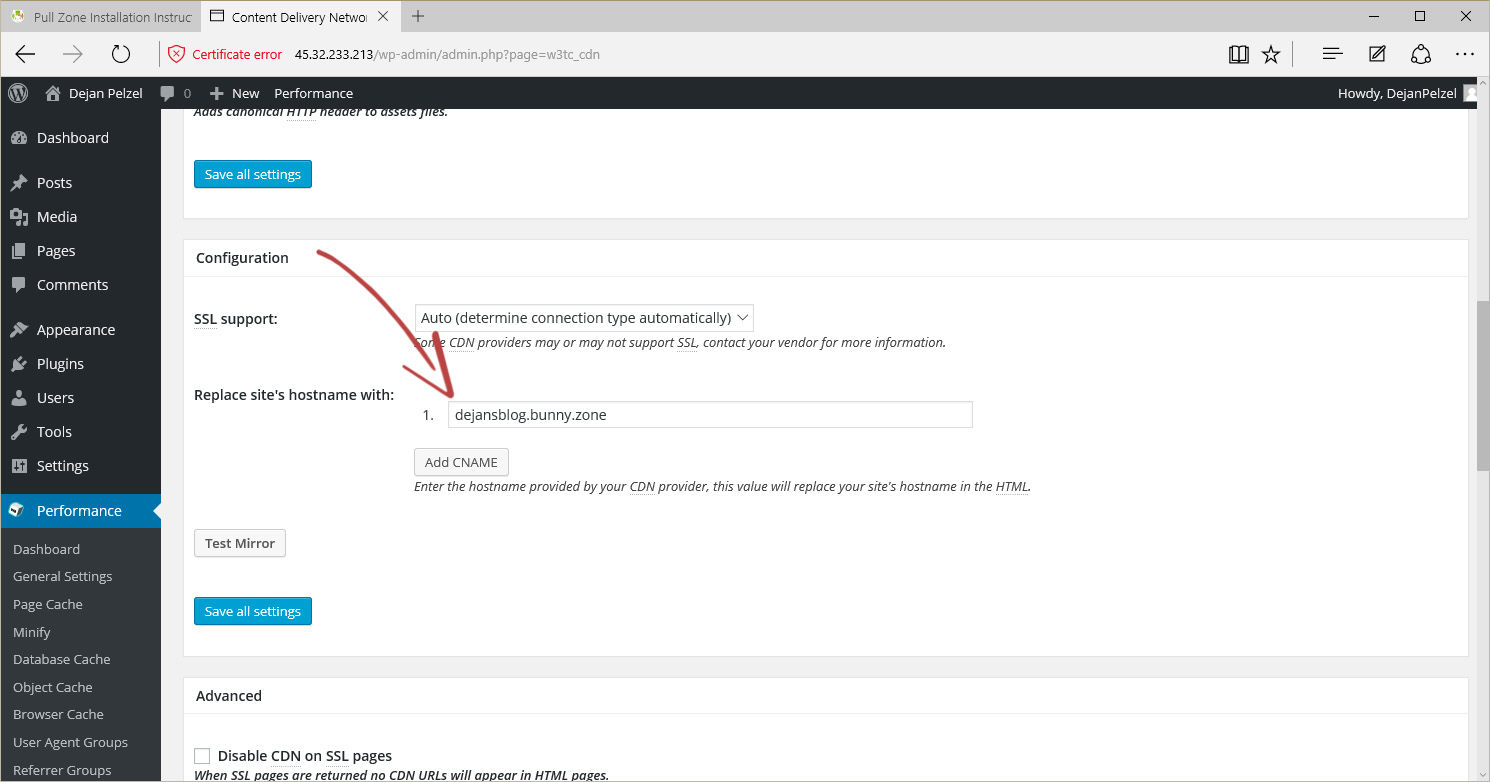
Step 4: Configure W3 Total Cache to use BunnyCDN
Finally, open the W3 Total Cache CDN configuration by going to Performance->CDN in the menu on the left. Scroll down to the configuration section and enter the hostname you have created in step 1 into the "Replace site's hostname with" field like shown on the screenshot. Click on Save all settings and you're done. Your Wordpress site is now using BunnyCDN and should load much faster for users around the world.
You're done!
Your Wordpress site is now supercharged and configured with BunnyCDN.
Alert: For Control Panel Help & Tutorials, click here: Panel Tutorials


