

Create New Web Application
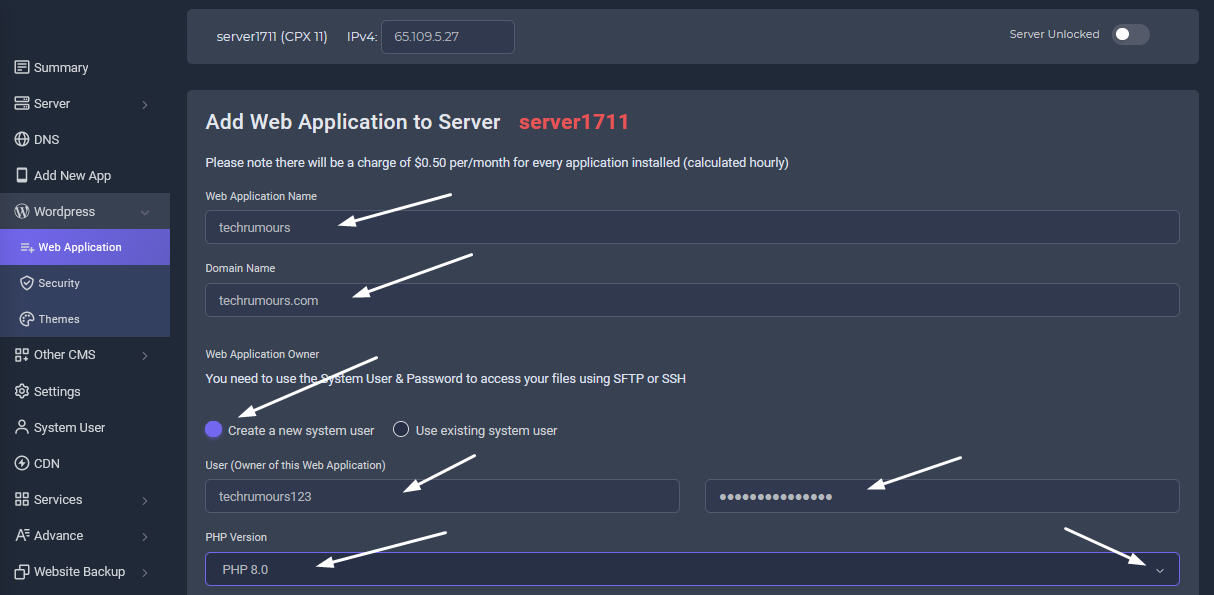
Click the Add New App tab. Then select 1-click Wordpress. Please note there will be a charge of $0.50 per/month for every application installed.
Install a new Wordpress application
An app is a web application, such as WordPress, you can install WordPress with one click when you create an app.
- Then in the Add Web Application form, give your app a name and enter your site's domain if you have one.
- Then select the system user you want to run this app.
- Select the PHP version (recommended 8.0 or 8.1)
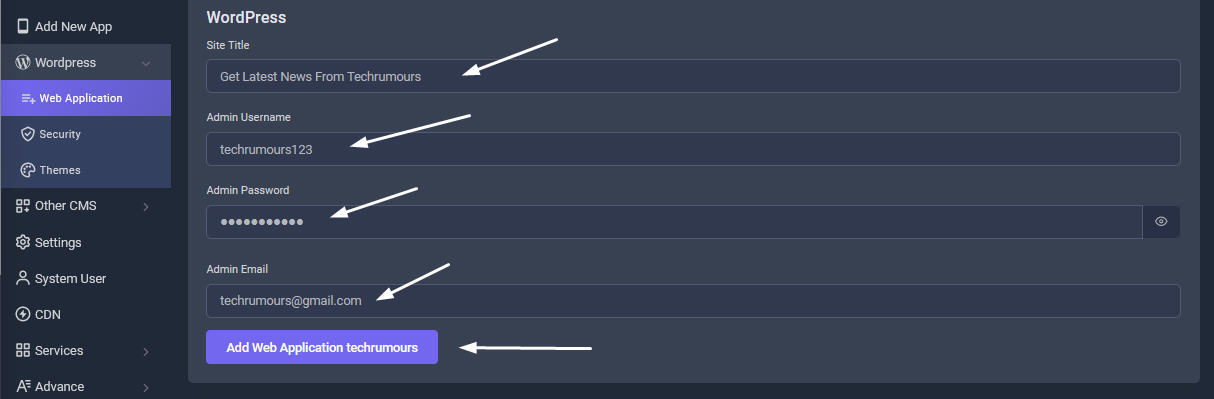
Add Wordpress Details
Continue to fill in the Wordpress details field information.
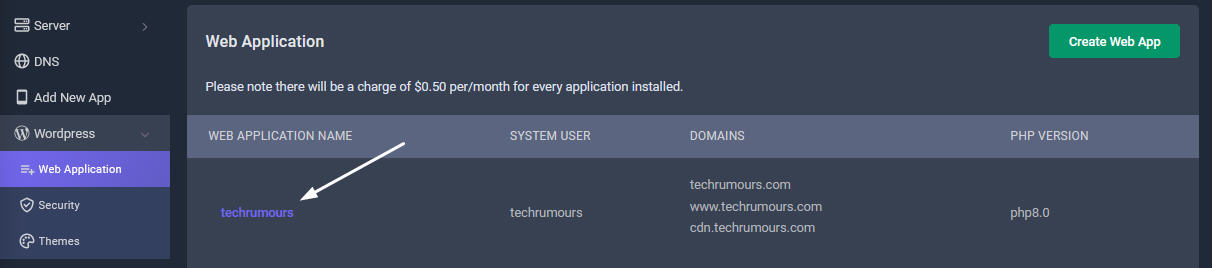
Wordpress App Created
Click the newly created Application name and you will be shown the app's details page with many tab functions for you to set.
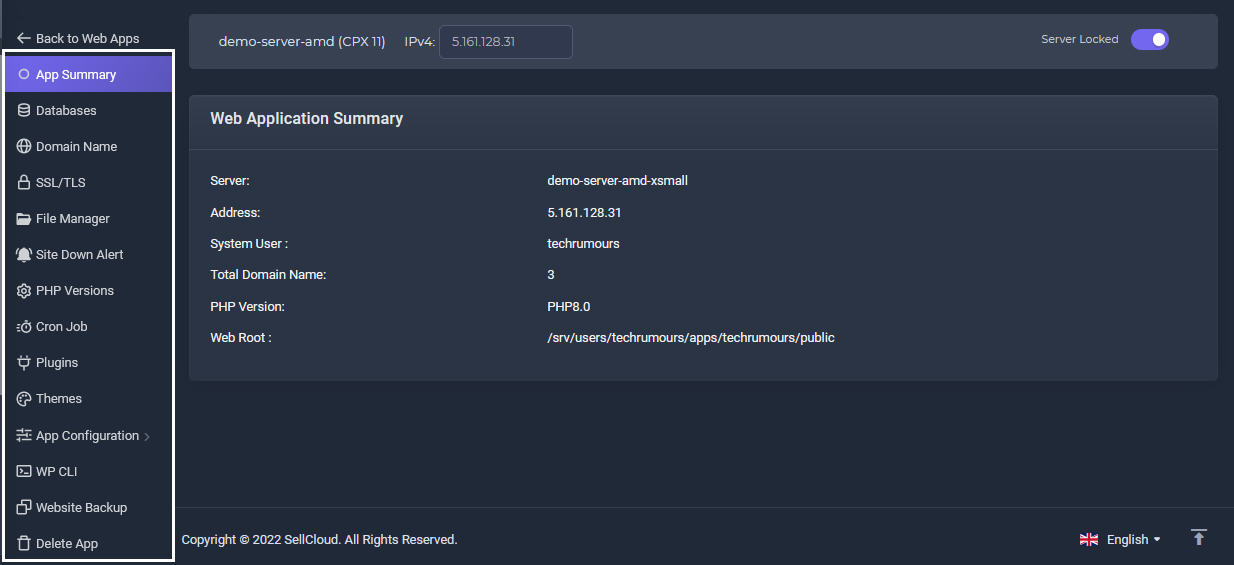
App's Settings
In this App's inner page, you will see all the app's setting for you to view and edit each tab. Click to go to App's settings Tutorials

Deploy SSL On Your Site
Having an SSL certificate on your site is one of the best ways to build trust with your visitors, especially if your site is an ecommerce store. SSL creates a private, encrypted connection from your server to your visitors' browsers and allows personal information to be relayed without eavesdropping, tampering, or forgery.
SellCloud offers two ways to deploy SSL on your site: by using a free AutoSSL certificates issued by certificate authority, Let's Encrypt (CA) or by deploying a custom certificate you bought from a certificate authority (CA).
It will automatically resolve your domain to the free AutoSSL and if your domain's A records is only pointing to your current DNS and Nameservers also pointing correctly to your current Domain registrar, AutoSSL will show as available for you to activate. Once you have deployed SSL, you can then enable redirection to HTTPS.
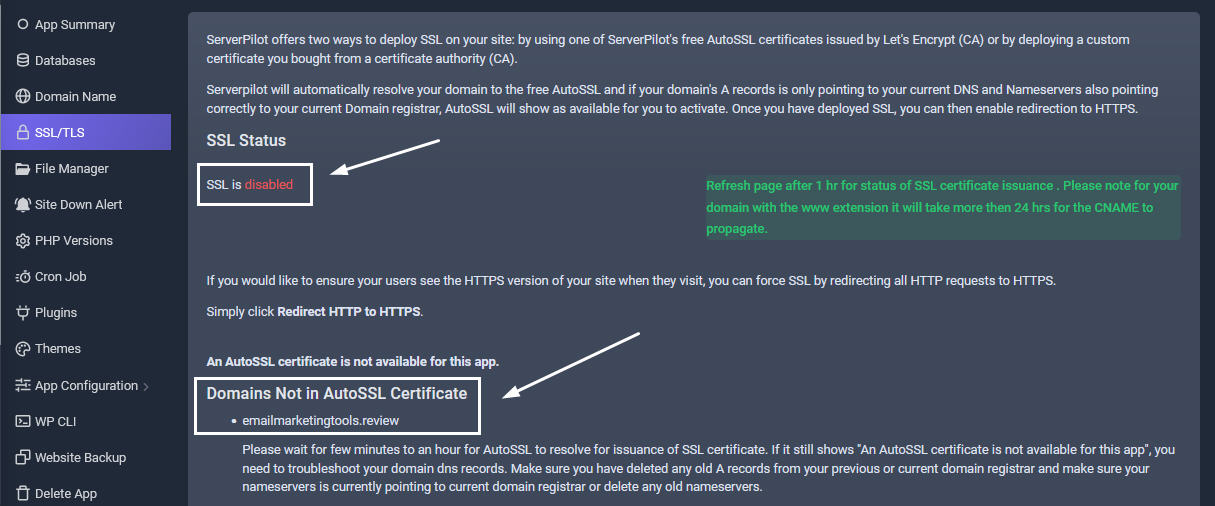
Waiting For SSL To Resolve
For Let's Encrypt certificates the issuance is generally between 30 minutes and 1 hour. If it still shows "An AutoSSL certificate is not available for this app", you need to troubleshoot your domain dns records. Make sure you have added an "A" record in the DNS tab in your control panel and also deleted any old A records from your previous or current domain registrar and also make sure your nameservers is currently pointing to current domain registrar or delete any old nameservers.
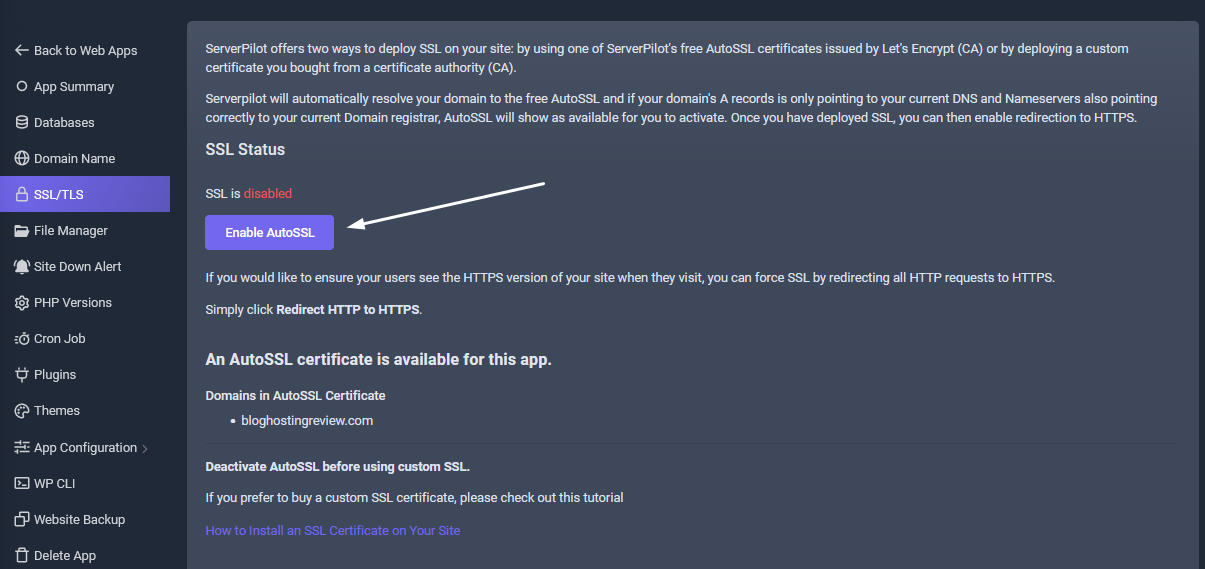
Enable SSL
Once you've added your app's domains, you'll have an AutoSSL option available in your app's SSL tab. After few minutes to an hour, If DNS resolves well, you will notice Enable AutoSSLbutton. Then Click Enable AutoSSL, and SellCloud will enable SSL for your app using an AutoSSL certificate. This certificate will be automatically renewed everytime before it expires.
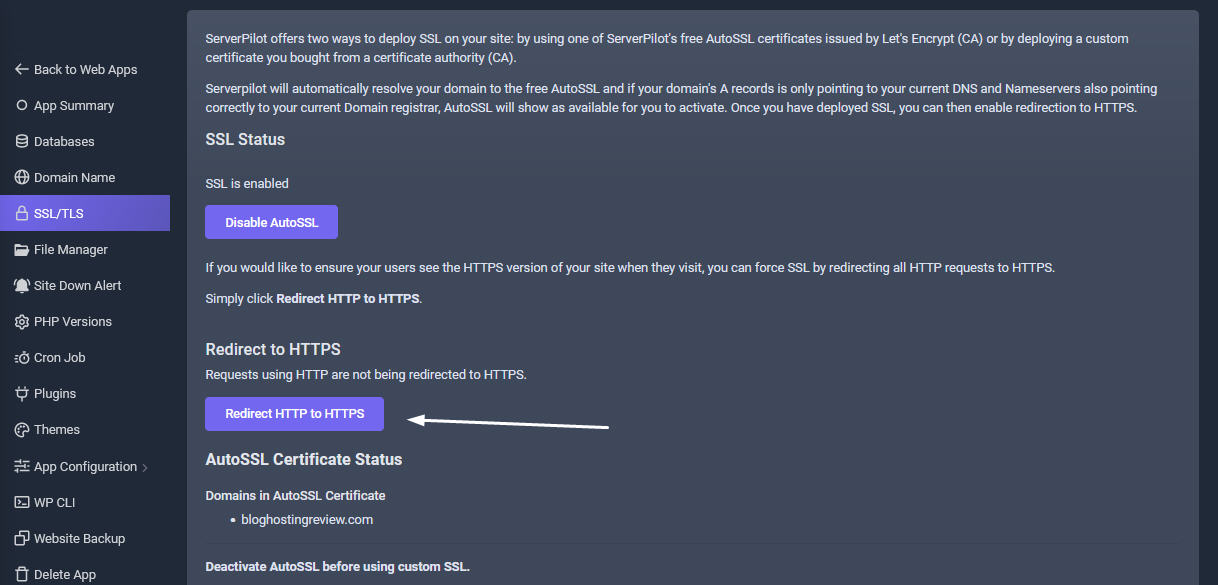
Redirect HTTP to HTTPS
If you would like to ensure your users see the HTTPS version of your site when they visit, you can force SSL by redirecting all HTTP requests to HTTPS. Simply click Redirect HTTP to HTTPS.
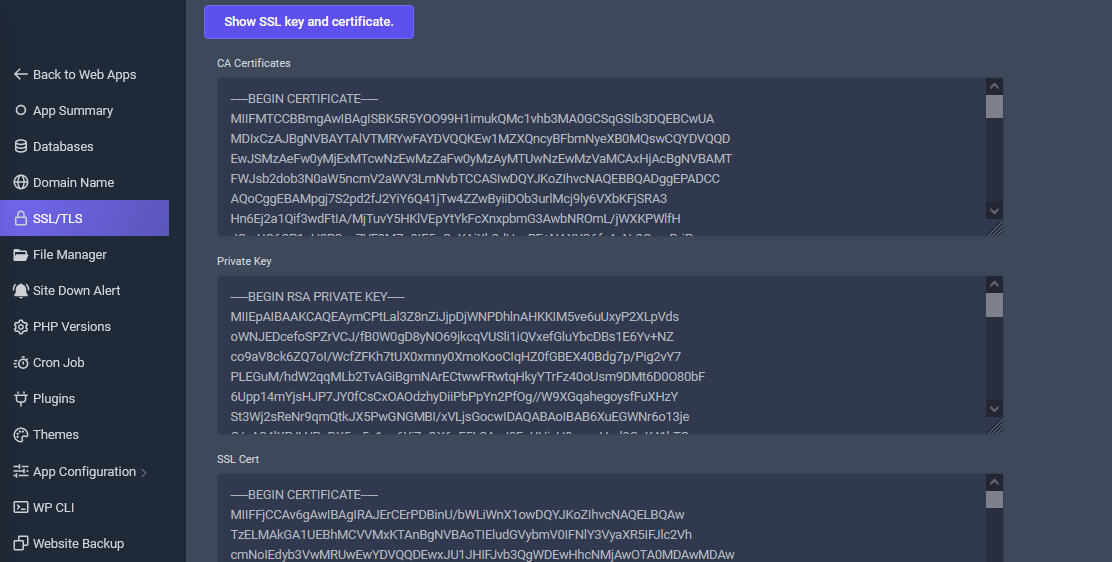
Show SSL Certificate.
You can view and copy your issued SSL certificates at any time here.
That's It!
Now, you'll be able to log in to your brand new, blazingly fast WordPress Dashboard (https://example.com/wp-login.php) when you visit your domain after you configure DNS to point to your server if you had done the earlier above mentioned DNS setup.
Your WordPress files will be stored on your server in your app's public folder (also known as the web root directory) at apps/APPNAME/public. You can access the files by using our easy File Manager within the Filemanager tab or you can install Filezilla or Cyberduck FTP client program on your PC.
We will keep your server's system packages updated with security updates. We also configured a firewall on your server so you don't have to worry about that.