Step 1. Install WP Rocket cache plugin
If you have purchased our Woodmart Premium theme, WP Rocket caching plugin works best with Woodmart in speeding up your website pages. It is a must have plugin for Woodmart theme. Strongly recommended by Sellcloud!
Cache plugins are vital for any WordPress website since they reduce the server response time and make your pages load almost instantly. We usually recommend to use WP Rocket as the most advanced and easy-to-use plugin for cache and performance optimization. Besides caching, it also optimizes all CSS and JS resources and provides a simple way to activate CDN globally. It is a paid plugin so if you can't afford it you can try its free alternatives like Autoptimize, W3 Total Cache, or WP Super Cache.
By default, SellCloud has installed WP Fastest Cache plugin on your Wordpress website, so you can keep using it or disable it completely if you prefer installing your own. In this article, we describe WP Rocket options but you can apply the same set for other plugins as well.
Note: WP Rocket is a paid only premium plugin that cost $49 per year subscription based. You need to renew it yearly if you want to get updates and support from Wp Rocket. If you bought it, you can continue reading the setup process below.
After plugin activation, you need to go through its settings and configure them to your needs. We will list important options which need to be enabled with our theme:
- WP Rocket -> Settings -> File optimization. Enable CSS minify and combine options. Note that they work with all the CSS files loaded on your website, and not with our theme only. That is why you can enable our theme CSS minify as well. Usually, we don't use "Optimize CSS delivery" and "Remove unused CSS". They will increase your Google Page Speed score but they may badly impact on website loading appearance adding some jump and "flashes of unstyled content".

- WP Rocket -> Settings -> File optimization. Enable JS minify, combine and Load JS files deferred options there.
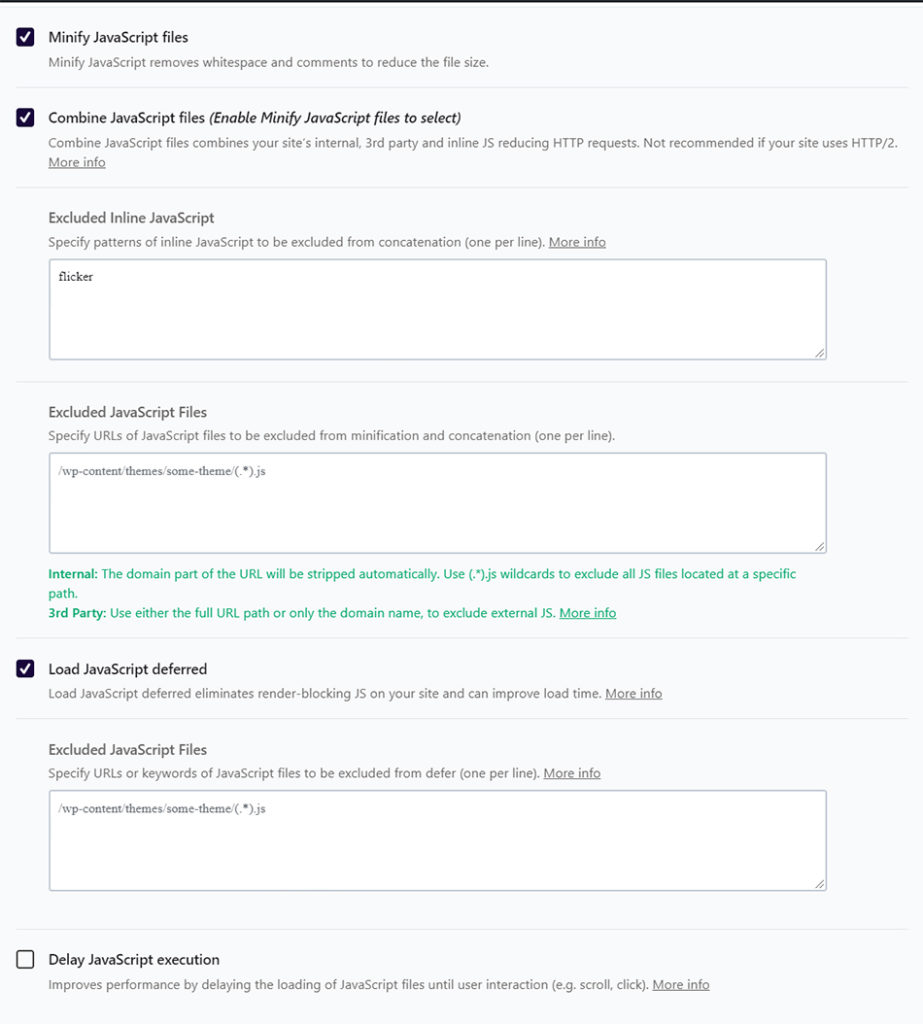
- Delay JS execution is a good option but also may impact your UX before the user starts moving his mouse to initiate all scripts. We enabled this option for our test case and added the following list of JS files to the exception list to make sure that these parts start working right after page loading

jquery.min
helpers.min.js
clickOnScrollButton
searchFullScreen
menuOffsets
menuDropdowns
cartWidget
mobileNavigation
loginSidebar
menuSetUp
cart-fragments
slick
productImages
cookie.min
owl.carousel
owlCarousel
imagesLoaded
- WP Rocket -> Settings -> Cache -> Separate cache files for mobile devices. Recommended. Activate this option if you use our Mobile DOM optimization option in Theme Settings -> Performance or create a separate page for mobile devices using an appropriate option for particular pages.
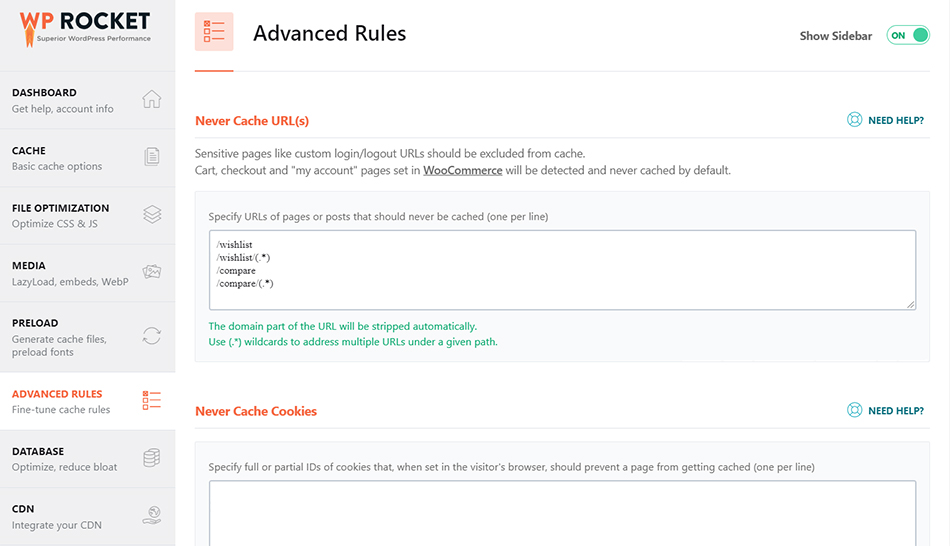
- WP Rocket -> Settings -> Advanced Rules -> Never cache URLs. Add there your wishlist and compare pages since they shouldn't be cached. Note that default WooCommerce pages like My account, Cart and Checkout are excluded from the cache by default
 />
/>
That is our demo website configuration. All other options can be activated on your desire. You can play with different combinations to get the best result.
Step 2. Setup CDN
Content Delivery Network (CDN) is a geographically distributed network of web servers that can store your static resources (images, CSS, JS, fonts etc.) and deliver to your visitors around the world faster than from your own server. This technology can increase your website loading in case when you have visits from a lot of different locations. It may reduce the loading time for static resources and also reduce your server load.
If you are going to set up a CDN service on your website, use our BunnyCdn intergration from your Sellcloud panel. You can add your website and intergrate with BunnyCDN by following this SellCloud BunnyCDN Tutorial
When the CDN zone is deployed you need to copy its "Zone URL" as shown on the screenshot.

- Go to WP Rocket Settings -> CDN (or use its alternative) and enable the CDN option. Also, insert your Zone URL into the appropriate field as per screenshot.

- Save and clear the cache.
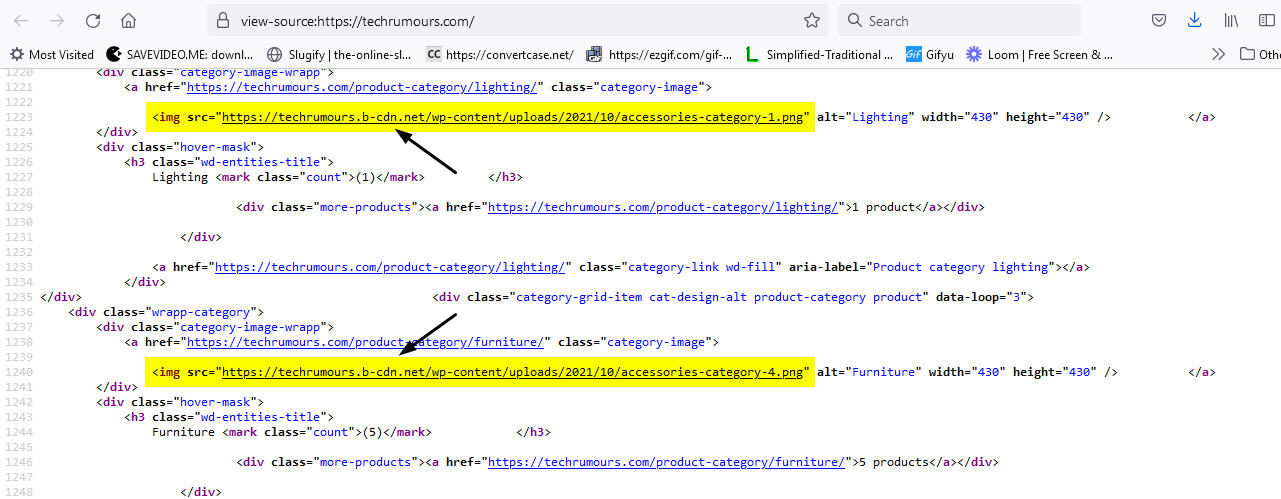
- Verify if the CDN is activated in the source code of your website. Example of working CDN on the screenshot.